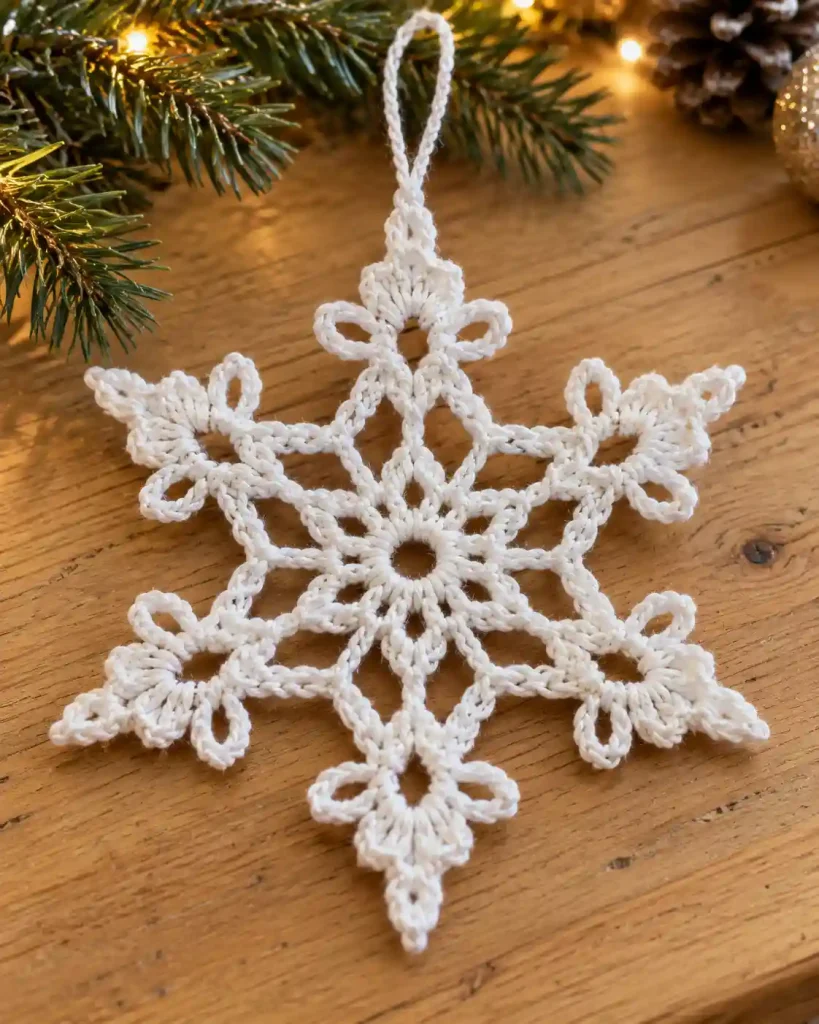
This Crochet Snowflake Ornament Pattern creates a delicate six-point snowflake that works beautifully as a Christmas tree ornament, gift topper, or winter decoration. The design is crocheted from the center outward in three joined rounds, using chain spaces and simple stitch combinations to build the six symmetrical arms. You’ll also learn how to add a hanging loop and block the finished snowflake so its points stay crisp and evenly spaced.
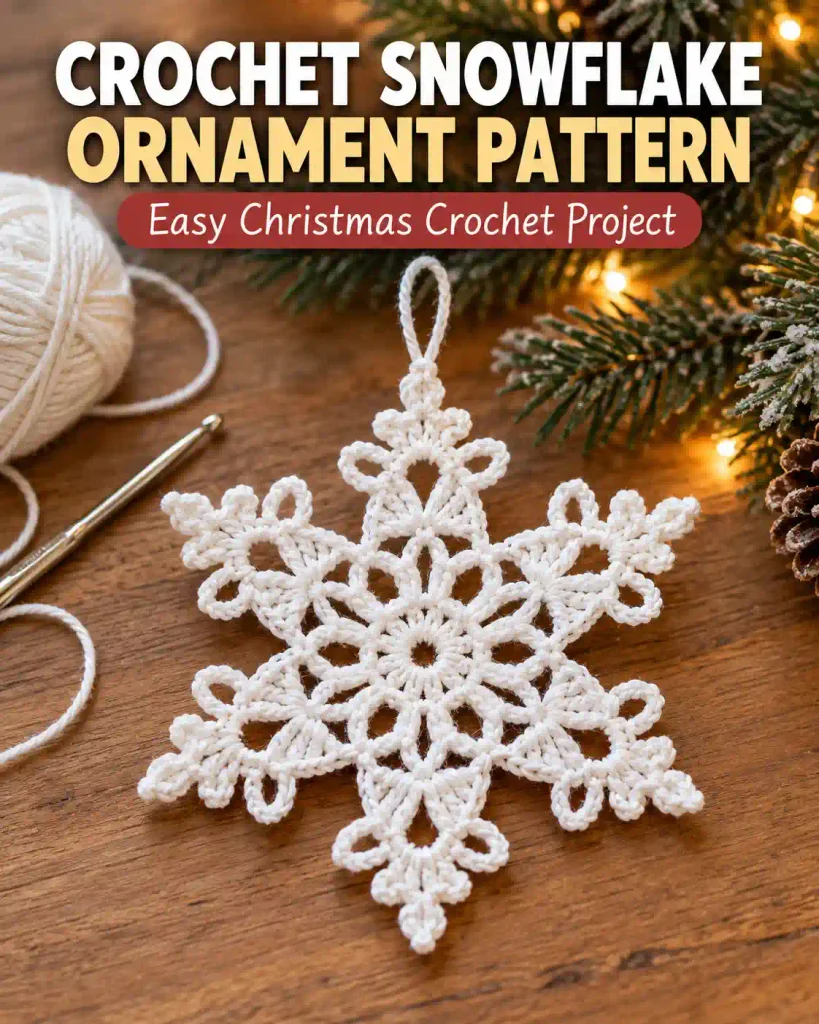
Crochet Snowflake Ornament Pattern at a Glance
This Crochet Snowflake Ornament Pattern is suitable for an adventurous beginner who is comfortable with a magic ring, chains, single crochet, double crochet, slip stitches, and working into chain spaces.
The snowflake is made as one flat piece. Round 1 establishes six sections around the center, Round 2 creates six larger chain spaces, and Round 3 transforms those spaces into six decorative pointed arms.
Using DK cotton yarn and a 3 mm hook, the blocked ornament should measure approximately 4–4.5 inches / 10–11.5 cm across from point to point.
Allow approximately 25–40 minutes for crocheting, plus additional drying time if you wet block the ornament.
Gauge is not critical because this is a decorative piece. Consistent tension is more important for keeping all six sections balanced.
The dimensions, yarn quantity, and making time given here are approximate, untested estimates.
Crochet Snowflake Ornament Pattern: Materials and Yarn Quantities
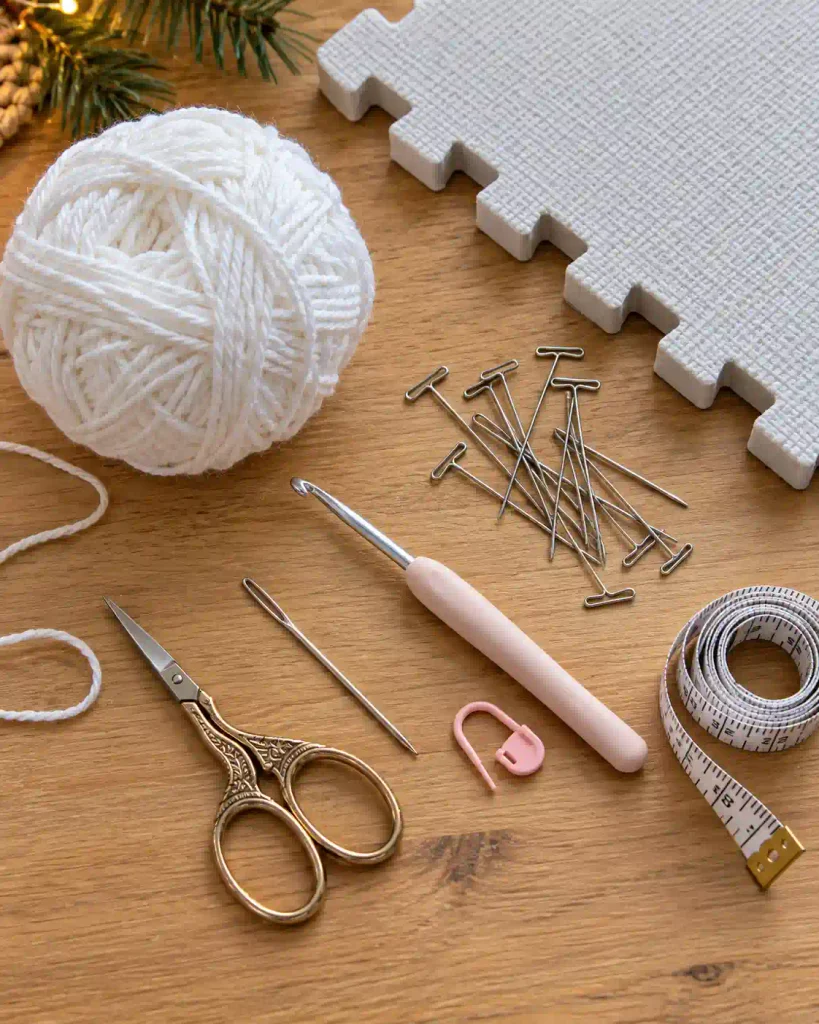
For this Crochet Snowflake Ornament Pattern, a smooth cotton yarn is a practical choice because it provides clear stitch definition and responds well to blocking.
You will need:
- DK weight cotton yarn (Category 3) in white: approximately 12–18 yd / 11–16.5 m, about 5–8 g
- 3 mm crochet hook
- Yarn needle
- Scissors
- Stitch marker if desired
- Rust-resistant pins for blocking
- Blocking mat or another suitable pinning surface
- Measuring tape
The yarn quantity is an approximate estimate rather than a tested amount.
Mercerized cotton can give the ornament a crisp appearance and subtle sheen. Regular cotton works well too. A cotton blend may also be suitable if it can be blocked according to its care instructions.
You can substitute another yarn weight, but the snowflake’s finished dimensions will change. Finer yarn and a smaller hook create a more delicate ornament, while thicker yarn produces a larger snowflake.
Always choose a hook that creates defined stitches without making the fabric unnecessarily stiff.
Crochet Snowflake Ornament Pattern: Abbreviations and Special Stitches
This Crochet Snowflake Ornament Pattern uses US crochet terminology.
- ch – chain
- ch-sp – chain space
- st(s) – stitch(es)
- sl st – slip stitch
- sc – single crochet
- dc – double crochet
- MR – magic ring
- R – round
- [ ] – repeat the instructions inside the brackets
The Craft Yarn Council provides a useful Crochet Abbreviations Master List if you need a reference for standard US crochet terms. Craft Yarn Council
A ch-3 picot in this pattern is made by chaining 3, then slip stitching into the first chain of those three chains.
Beginning chains used to position the hook do not count as separate pattern stitches unless stated.
Crochet Snowflake Ornament Pattern Gauge, Size and Notes
Gauge is not critical for this Crochet Snowflake Ornament Pattern because the project does not need to fit a person or another object.
With DK cotton yarn and a 3 mm hook, expect the blocked snowflake to measure approximately 4–4.5 inches / 10–11.5 cm from point to point. This is an untested estimate.
Instead of making a gauge swatch, check the snowflake after Round 2. It should lie reasonably flat and contain six clearly defined ch-5 spaces.
The entire snowflake is worked in joined rounds without turning.
Always join rounds with a slip stitch where instructed. Count the six repeated sections rather than relying only on individual stitch counts.
If your snowflake is considerably larger than expected, a smaller hook may help. If the fabric feels excessively tight and the chain spaces cannot open during blocking, use a slightly larger hook or relax your tension.
Crochet Snowflake Ornament Pattern: Method Overview
The Crochet Snowflake Ornament Pattern is constructed entirely from the center outward, so there are no separate snowflake arms to sew together.
Begin with a magic ring. The first round creates six double crochet groups separated by chain spaces. These six equal sections establish the symmetry required for the rest of the ornament.
Round 2 expands each section into a larger ch-5 space. At this stage, the project looks more like a small open crochet wheel than a finished snowflake.
Round 3 creates the recognizable snowflake shape. Each ch-5 space receives one complete arm consisting of side stitches, chain loops, and a central pointed picot.
After completing all six arms, the snowflake is fastened off and the ends are woven securely into the back.
A separate chain loop is then attached to one point for hanging. Finally, careful blocking opens the lace and makes the six points look balanced.
How to Crochet the Snowflake Center
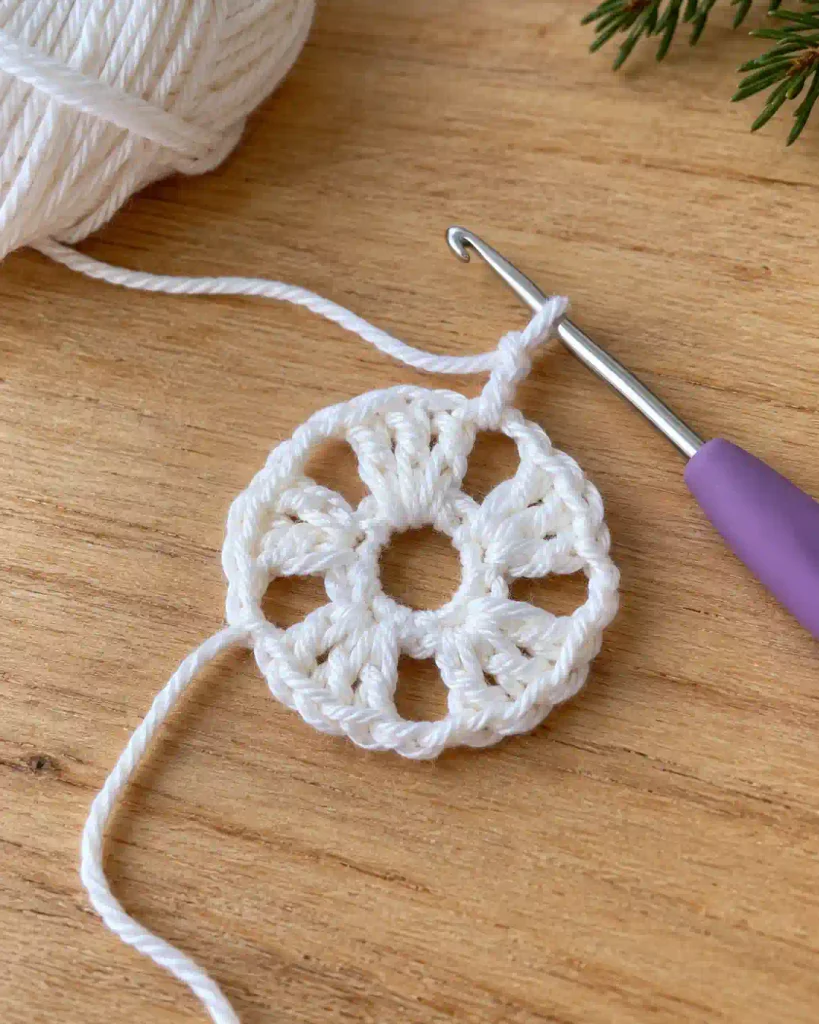
Round 1: Create the Six Center Sections
Start the Crochet Snowflake Ornament Pattern with white DK cotton yarn and a 3 mm hook.
Make a magic ring.
R1: Ch 3. This beginning ch 3 counts as the first dc.
Work 1 dc into the ring, ch 2.
Then repeat:
[2 dc into the ring, ch 2] 5 times.
Join with a sl st to the top of the beginning ch 3.
You should now have:
- 12 dc total
- 6 groups of 2 dc
- 6 ch-2 spaces
Pull the magic ring firmly closed.
The six ch-2 spaces are particularly important because each one becomes a separate snowflake section in the following rounds.
Before continuing, count all six spaces. If you have only five or accidentally created seven, correct Round 1 now. A missing or extra section cannot produce a symmetrical six-point snowflake later.
The center may look slightly compact at this stage. That is normal. The larger chain spaces added in Round 2 will open the design considerably.
How to Build the Six Snowflake Sections
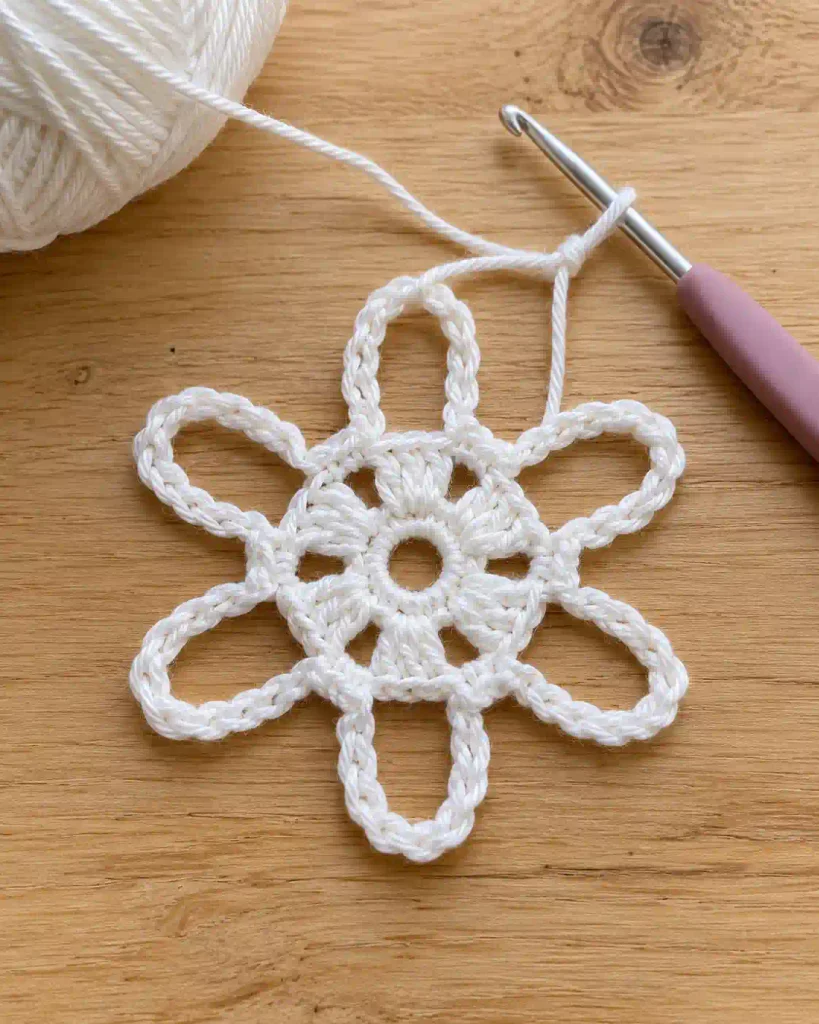
Round 2: Create the Open Chain Spaces
Round 2 expands the center of the Crochet Snowflake Ornament Pattern and prepares six equal spaces for the decorative arms.
Sl st into the first ch-2 space.
R2: Ch 1, sc in the same ch-2 space, ch 5, sc in the next ch-2 space.
Continue around with:
[Ch 5, sc in the next ch-2 space] 5 times.
After the final sc, you should have:
- 6 sc
- 6 ch-5 spaces
Join with a sl st to the first sc.
Do not add extra chains after the final repeat.
Spread the piece gently with your fingers. The six ch-5 spaces should be similar in size and distributed evenly around the center.
If one space looks considerably smaller, check that you worked five chains rather than four.
At this stage, the piece should remain relatively flat. A little movement or curling is not a problem because the final snowflake will be blocked.
Do not tighten the ch-5 spaces excessively. Round 3 places several stitches into each space, so the chains need enough flexibility to accommodate the complete arm.
Count the six spaces one final time before continuing.
How to Crochet the Six Snowflake Points
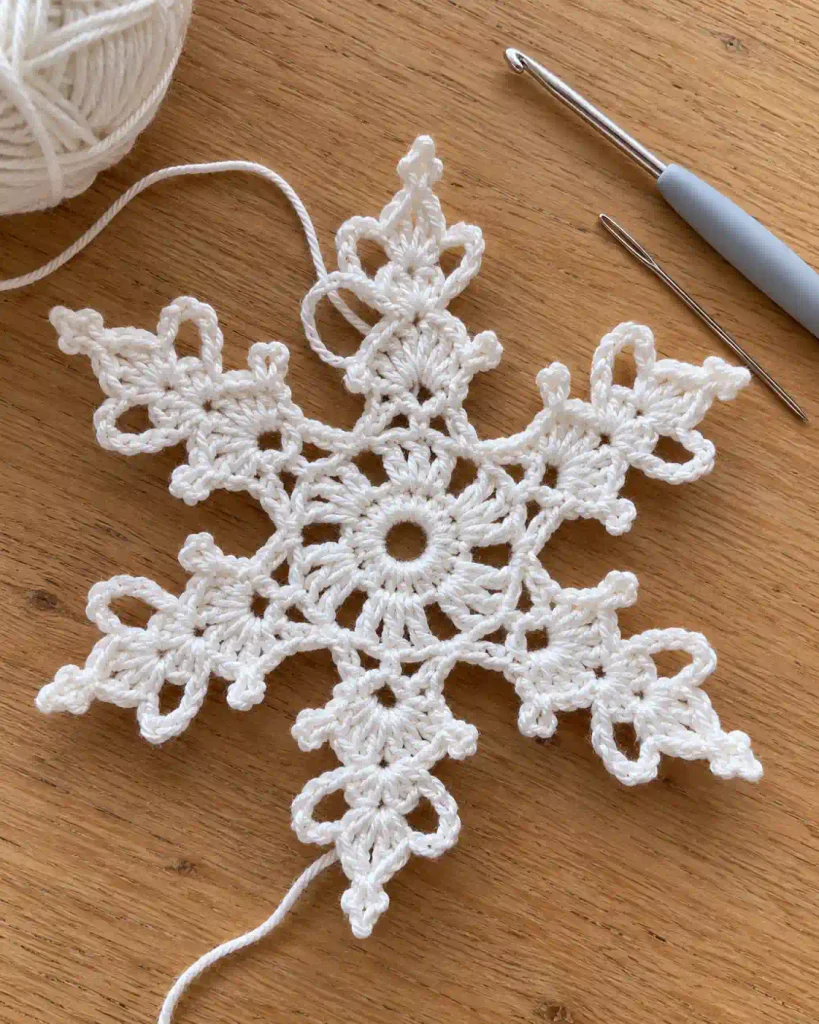
Round 3: Form Each Decorative Arm
The final round gives the Crochet Snowflake Ornament Pattern its six pointed arms.
Sl st into the first ch-5 space.
In that space, work:
sc, ch 3, sc, ch 5, sl st into the first ch of the ch-5 to form a picot, sc, ch 3, sc.
One complete arm is now formed.
Move directly to the next ch-5 space and repeat the same sequence:
[sc, ch 3, sc, ch 5, sl st into the first ch of the ch-5, sc, ch 3, sc]
Repeat in each of the remaining ch-5 spaces.
When finished, you should have six matching snowflake arms, with one pointed ch-5 picot centered on each arm and smaller ch-3 loops on either side.
Join with a sl st to the first sc of Round 3.
Fasten off, leaving approximately 6 inches / 15 cm for weaving in.
Before blocking, gently spread all six arms with your fingers. Check that every arm contains the same sequence. If one point is missing a chain loop or picot, correcting it now is easier than after the ornament has been blocked.
Crochet Snowflake Ornament Pattern: Assembly
The Crochet Snowflake Ornament Pattern is made in one piece, so there are no separate arms or motifs to assemble.
The only additional component is the hanging loop.
Attach white yarn with a sl st to the tip of one of the six central picots.
Ch 20.
Without twisting the chain, sl st back into the same snowflake point to create a loop.
Fasten off and leave a short tail for weaving in.
A 20-chain loop should provide a practical hanging length for a small tree ornament, although the exact length will vary with your tension. Add or remove chains if you prefer a longer or shorter loop.
Thread each remaining yarn tail through a yarn needle. Weave the ends through several nearby stitches on the back of the ornament, changing direction once to help secure them.
Avoid pulling the tails tightly enough to distort the center or any of the six arms.
The snowflake is now structurally complete and ready for blocking.
Crochet Snowflake Ornament Pattern: Finishing and Care
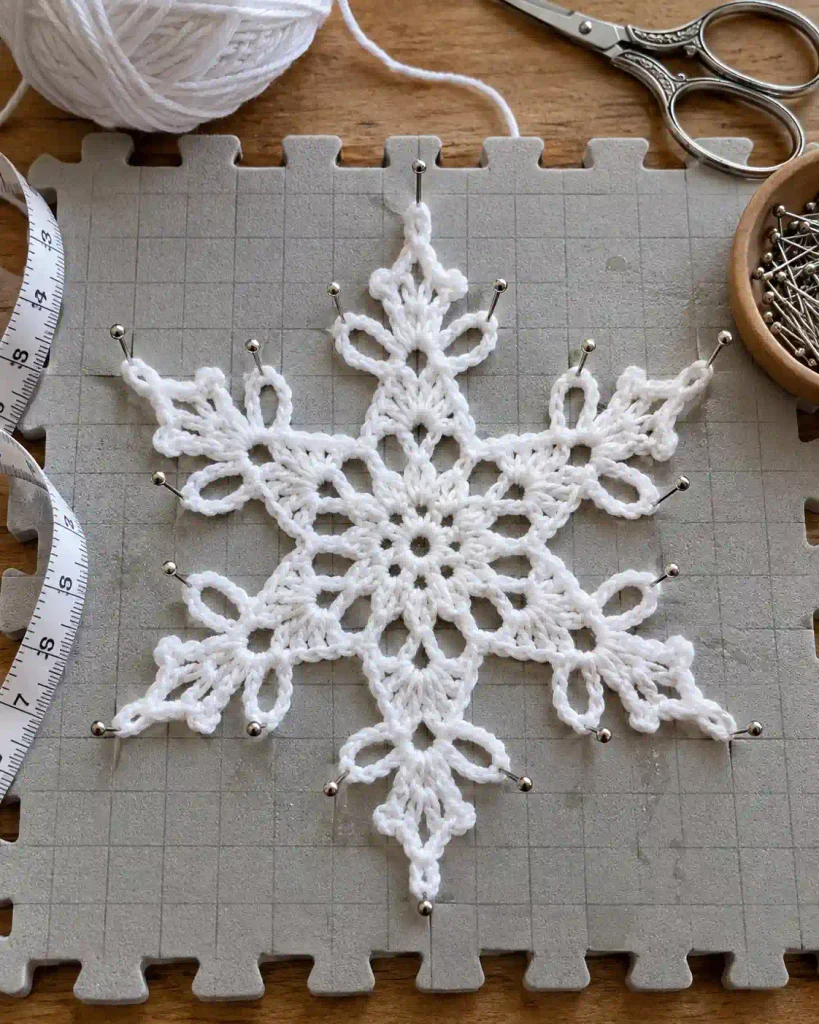
Blocking makes a noticeable difference to this Crochet Snowflake Ornament Pattern because it opens the chain spaces and defines the six points.
If the yarn label permits wet blocking, dampen the snowflake and gently remove excess water without twisting it. Place it flat on a blocking mat.
Pin the center first if necessary, then arrange the six main points at equal distances. Pin the smaller side loops so the design remains symmetrical. Use rust-resistant pins.
Allow the snowflake to dry completely before removing the pins.
Blocking methods should always be appropriate for the yarn fiber you selected. Do not assume cotton, acrylic, wool, and blended yarns respond to heat, steam, or water in the same way.
After drying, inspect the center, six arms, hanging loop, and woven ends. Re-secure any loose tail before using or storing the ornament.
FAQs and Troubleshooting for Crochet Snowflake Ornament Pattern
1. Why does my snowflake have five or seven points instead of six?
The problem usually begins in Round 1 or Round 2. The Crochet Snowflake Ornament Pattern requires exactly six ch-2 spaces after Round 1 and six ch-5 spaces after Round 2. Each Round 2 space receives one arm in Round 3. Count the spaces before starting the final round rather than trying to compensate later.
2. Why does my crochet snowflake curl instead of lying flat?
Some curling before blocking is normal. However, severe cupping can indicate tight chains or uneven tension. Check that every Round 2 chain space contains exactly five chains. After completing the ornament, blocking should help open the lace and establish the final shape.
3. Can I use acrylic instead of cotton yarn?
Yes, but the finished result may behave differently. Cotton generally provides crisp stitch definition and can be convenient for a flat ornament. Acrylic can produce a softer snowflake and may require a fiber-appropriate blocking method. Always check the yarn manufacturer’s care instructions before using water, steam, or heat.
4. How can I make the snowflake ornament smaller or larger?
The simplest method is changing the yarn and hook together rather than altering the six-section construction. Finer yarn with an appropriately smaller hook creates a smaller ornament. Thicker yarn with a suitable larger hook creates a larger snowflake. Keep all six repeats unchanged so the design remains symmetrical.
5. How should I store and clean crochet snowflake ornaments?
Follow the care instructions for your chosen yarn. If cleaning is necessary, avoid assuming the ornament is machine washable. After cleaning, reshape and block it again if appropriate. For seasonal storage, make sure the snowflake is completely dry and store it flat or loosely layered so the six points are not folded or crushed.
Final Thoughts
The Crochet Snowflake Ornament Pattern uses only three main rounds, but the six-section construction creates an attractive winter decoration with a defined center, open lace, and pointed arms. Accurate repeats and careful blocking are more important than exact gauge, making this a manageable project for crocheters learning decorative motifs. Once you have finished your snowflake, try the Medium Crochet Pumpkin Pattern for another seasonal decoration, or explore the Easy Crochet Granny Square Pattern to practice another center-out construction method.