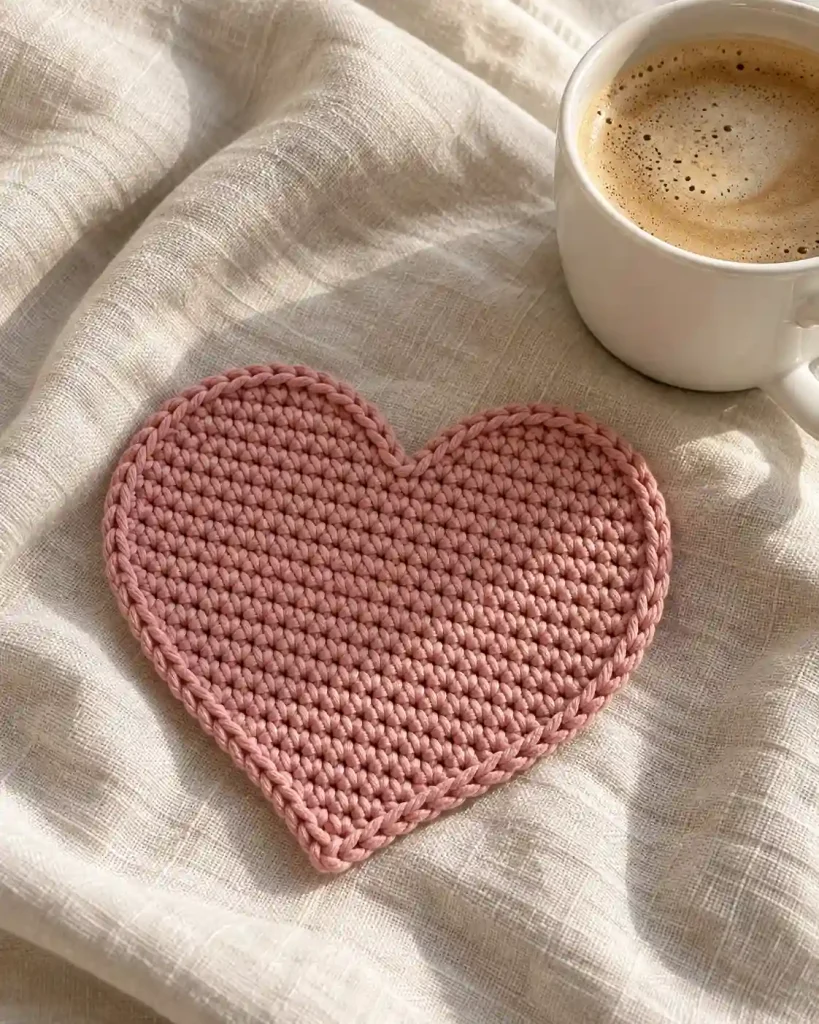
This Crochet Heart Coaster Pattern is a lovely way to make something practical with a handmade touch. Featuring a pointed base, softly rounded upper curves, and a neat crocheted border, this heart-shaped coaster is ideal for coffee tables, thoughtful gifts, or Valentine’s Day decorations. The pattern uses simple stitches and straightforward shaping. In this tutorial, you’ll learn how to build the heart from the bottom up, shape its two lobes, and finish the edges neatly.
Crochet Heart Coaster Pattern at a Glance
This Crochet Heart Coaster Pattern creates a flat, heart-shaped coaster using basic US crochet stitches.
Unlike decorative hearts made from several pieces, this design is worked as one continuous fabric. The pointed bottom is formed with gradual increases, and the two rounded upper lobes are shaped separately using decreases.
A final single crochet border helps define the heart and creates a tidy finished edge.
Pattern details:
- Skill level: Confident beginner
- Crochet terminology: US terms
- Yarn weight: DK cotton, category 3
- Hook size: 3.5 mm
- Construction: Flat rows, two separately shaped upper lobes, and an outer border
- Finished width: Approximately 4.5–5 inches / 11.5–12.5 cm
- Finished height: Approximately 4.5–5 inches / 11.5–12.5 cm
- Estimated making time: 45–75 minutes
- Gauge: Flexible, but consistent tension is helpful
- Main stitches: Chain, single crochet, and single crochet decreases
The measurements and making time are estimates for this original, untested pattern.
Crochet Heart Coaster Pattern: Materials and Yarn Quantities
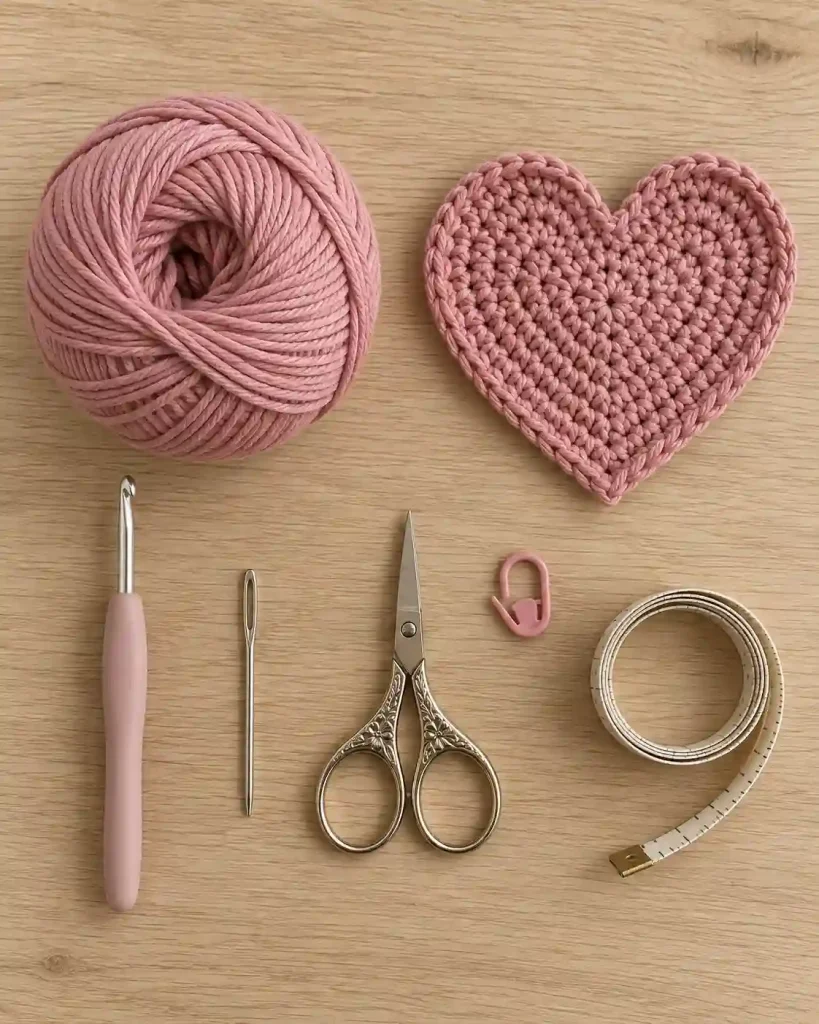
Cotton yarn is a practical choice for this Crochet Heart Coaster Pattern because it generally absorbs moisture well and produces a relatively stable fabric.
Smooth DK cotton also makes it easier to see your stitches while shaping the heart.
Materials:
- DK weight cotton yarn: Approximately 25–40 yards / 23–37 meters
- 3.5 mm crochet hook
- Yarn needle
- Small scissors
- Stitch marker or removable yarn marker
- Measuring tape
- Optional blocking mat and rust-resistant pins
The yarn quantity is an estimate and may vary with tension, yarn thickness, and border adjustments.
Choose one color for a classic heart coaster, such as dusty rose, warm red, cream, or soft pink.
For a contrasting border, reserve approximately 5–8 yards / 4.5–7.5 meters of a second color from the total estimated yarn requirement.
Mercerized cotton can give the coaster a smoother finish, while unmercerized cotton often creates a softer, more matte appearance.
Avoid very stretchy yarns if you want the heart to hold its shape.
If substituting yarn, adjust your hook size to maintain a firm but flexible fabric.
If you’re unsure which yarn thickness to choose, the Craft Yarn Council’s Standard Yarn Weight System provides a helpful reference for understanding yarn categories and choosing suitable substitutions.
Crochet Heart Coaster Pattern: Abbreviations and Special Stitches
This Crochet Heart Coaster Pattern uses US crochet terminology throughout.
Abbreviations:
- ch – chain
- sc – single crochet
- sc2tog – single crochet two stitches together
- sl st – slip stitch
- st(s) – stitch(es)
- RS – right side
- WS – wrong side
Single crochet decrease (sc2tog): Insert your hook into the next stitch and pull up a loop. Insert your hook into the following stitch and pull up another loop. Yarn over and pull through all three loops on your hook.
Turning chain: Chain 1 at the beginning of a row. This turning chain does not count as a stitch.
Stitch counts: Numbers in parentheses show the total stitches at the end of the row.
All shaping rows are turned after completion unless the instructions tell you to fasten off.
For a helpful reference to US crochet terminology, visit the Craft Yarn Council’s Crochet Abbreviations Guide. It explains common stitch abbreviations used in written crochet patterns.
Crochet Heart Coaster Pattern Gauge, Size and Notes
Gauge is not as critical for a coaster as it is for a fitted garment. However, your tension affects both the finished dimensions and how flat the heart lies.
With DK cotton and a 3.5 mm hook, the finished coaster is expected to measure approximately 4.5–5 inches / 11.5–12.5 cm across its widest point.
The height from the bottom tip to the top of either lobe should be similar.
No verified stitch-and-row gauge is available for this untested design. To check your tension, work a small single crochet swatch and measure the number of stitches and rows across 2 inches / 5 cm.
Record that measurement if you plan to make matching coasters.
The heart is worked back and forth in rows, not continuous rounds.
The first and last stitches of each row are important because they create the shaping.
Keep your turning chains loose enough to avoid pulling the sides inward.
Crochet Heart Coaster Pattern: Method Overview
The Crochet Heart Coaster Pattern begins at the pointed bottom.
You will crochet a small foundation row and gradually increase the stitch count until the fabric becomes a broad triangle.
Once the lower heart is complete, the upper edge is divided into two sections.
Each section becomes one rounded lobe.
The lobes are shaped with decreases along their outer edges, leaving a small central notch between them.
After completing both lobes, the yarn is reattached for the border.
The border is worked around the entire heart, including the pointed bottom and the curved upper edges.
Construction sequence:
- Crochet the pointed lower heart using increases.
- Shape the first upper lobe.
- Reattach yarn and shape the second upper lobe.
- Work a single crochet border around the entire piece.
- Weave in ends and gently shape the coaster.
There are no separate pieces to sew together.
This makes the project relatively quick and helps the finished coaster remain flat.
If you enjoy small crochet projects, you might also like our Mini Crochet Turtle Pattern. This cute amigurumi project is a fun way to practice shaping and create a handmade animal with a rounded shell and tiny flippers.
How to Crochet the Pointed Heart Base
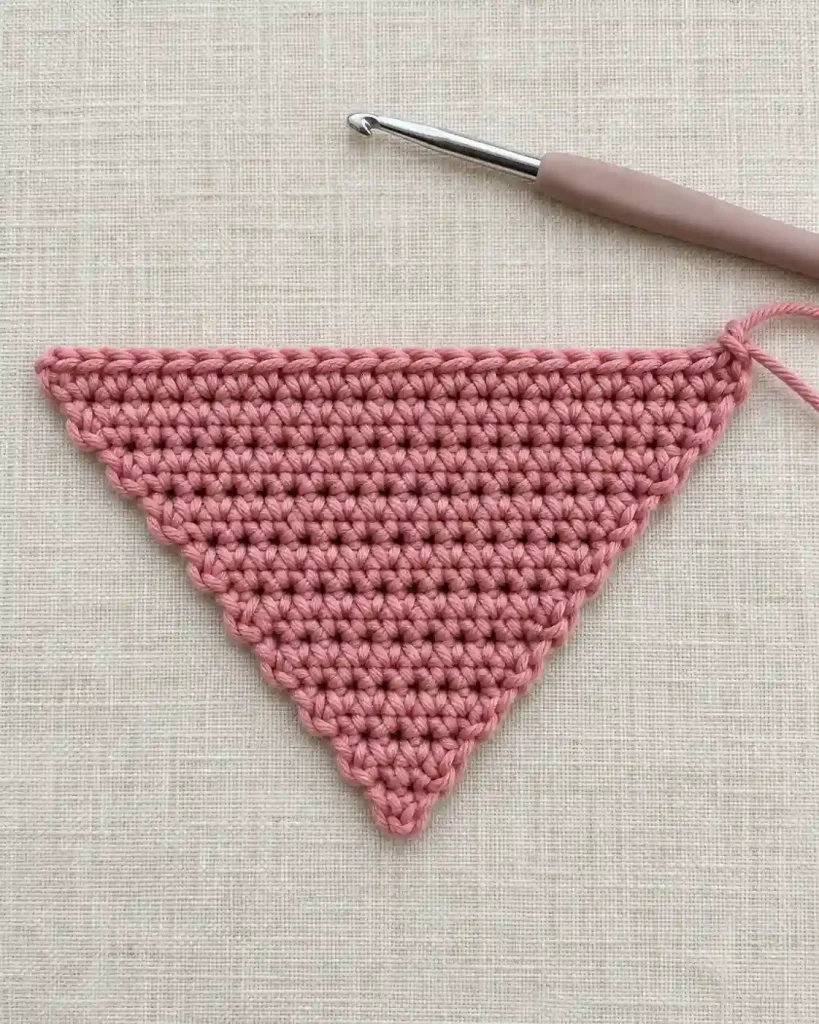
Begin your Crochet Heart Coaster Pattern with DK cotton yarn and a 3.5 mm hook.
Foundation: Ch 3.
Row 1: Sc in the second ch from the hook and in the next ch. Ch 1, turn. (2 sc)
Row 2: Work 2 sc in the first st and 2 sc in the last st. Ch 1, turn. (4 sc)
Row 3: Work 2 sc in the first st, sc in the next 2 sts, and 2 sc in the last st. Ch 1, turn. (6 sc)
Row 4: Work 2 sc in the first st, sc in the next 4 sts, and 2 sc in the last st. Ch 1, turn. (8 sc)
Row 5: Work 2 sc in the first st, sc in the next 6 sts, and 2 sc in the last st. Ch 1, turn. (10 sc)
Row 6: Work 2 sc in the first st, sc in the next 8 sts, and 2 sc in the last st. Ch 1, turn. (12 sc)
Continue the same increase pattern:
- Row 7: 14 sc
- Row 8: 16 sc
- Row 9: 18 sc
- Row 10: 20 sc
At the end of Row 10, you should have a broad triangular piece with 20 stitches along the upper edge.
Do not fasten off.
How to Shape the First Heart Lobe
The upper lobes give this Crochet Heart Coaster Pattern its recognizable heart shape.
The 20 stitches from Row 10 are divided into two groups of 10.
You will work the first lobe across the first 10 stitches, leaving the remaining 10 stitches unworked.
First lobe
Row 11: Sc in the next 10 sts. Ch 1, turn. (10 sc)
Row 12: Sc2tog, sc in the next 8 sts. Ch 1, turn. (9 sc)
Row 13: Sc in the next 7 sts, sc2tog. Ch 1, turn. (8 sc)
Row 14: Sc2tog, sc in the next 6 sts. Ch 1, turn. (7 sc)
Row 15: Sc in the next 5 sts, sc2tog. (6 sc)
Fasten off.
These alternating decreases shape the outer and inner edges of the lobe.
The first lobe should gradually narrow toward its rounded upper end.
Do not pull the final row too tightly. The border will help soften its shape.
Before continuing:
- Count the stitches in each row.
- Confirm that the first lobe begins with 10 stitches.
- Check that six stitches remain across its final row.
- Leave the unworked half of Row 10 accessible.
The second lobe is worked in the opposite direction so the heart remains symmetrical.
How to Shape the Second Heart Lobe
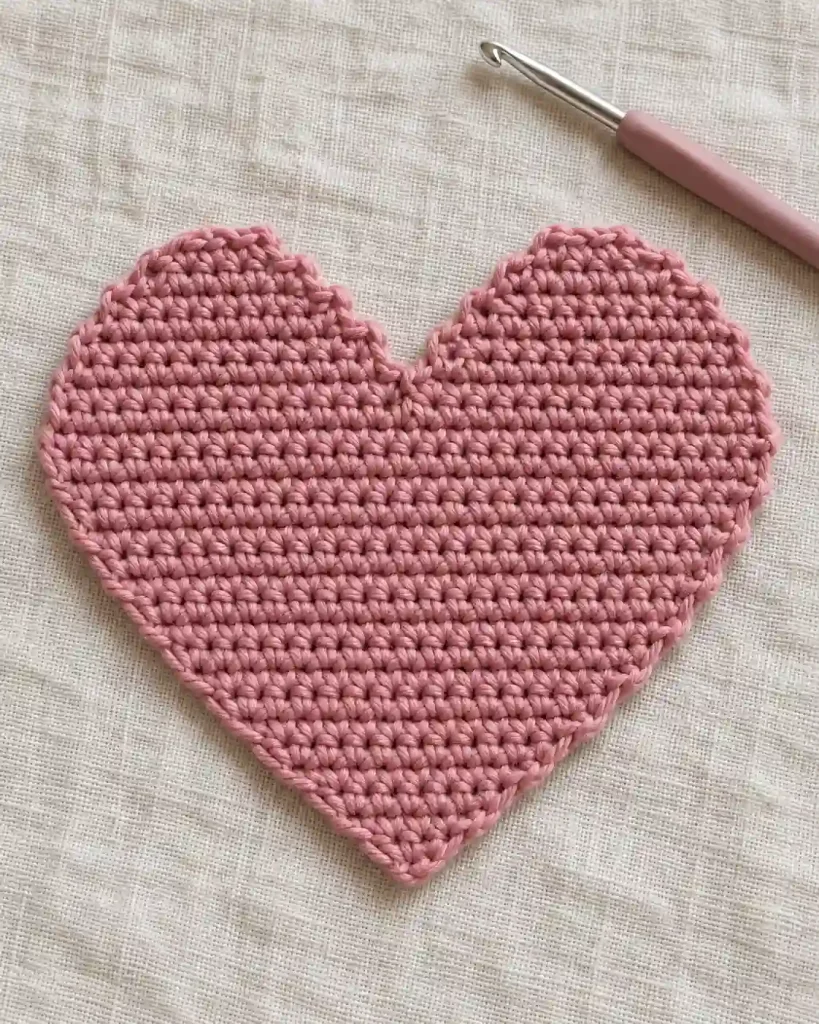
Turn the heart so the unworked 10 stitches from Row 10 are accessible.
With the right side facing you, join the yarn at the outer edge of the unworked section.
Second lobe
Row 11: Sc in each of the 10 unworked sts. Ch 1, turn. (10 sc)
Row 12: Sc in the next 8 sts, sc2tog. Ch 1, turn. (9 sc)
Row 13: Sc2tog, sc in the next 7 sts. Ch 1, turn. (8 sc)
Row 14: Sc in the next 6 sts, sc2tog. Ch 1, turn. (7 sc)
Row 15: Sc2tog, sc in the next 5 sts. (6 sc)
Fasten off.
Both lobes should now have the same number of rows and stitches.
The center notch is created by the separation between the two sections.
Lay the piece flat and compare both sides.
If one lobe appears noticeably larger, recount its stitches before adding the border.
A slightly uneven shape can often be corrected during finishing, but missing or extra stitches should be fixed now.
How to Crochet the Heart Border
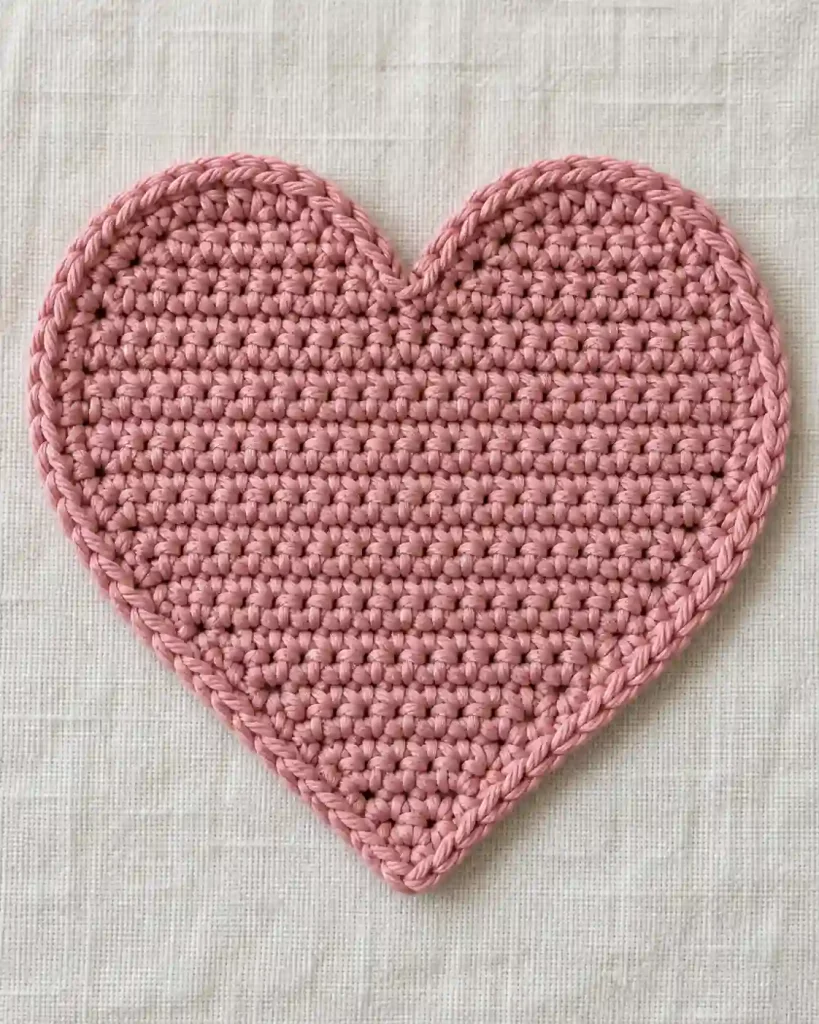
The border completes the Crochet Heart Coaster Pattern and helps define the curves.
Join your yarn at the center notch between the two lobes.
Work 1 sc into the notch.
Continue around the first lobe, placing approximately 1 sc into each exposed row-end edge.
Work 2 sc into each outer corner where the fabric changes direction sharply.
Continue down the side of the heart, placing 1 sc into each row-end edge.
At the bottom point, work 3 sc into the same corner space to maintain a defined tip.
Work up the opposite side, matching the stitch placement used on the first side.
Continue around the second lobe and return to the center notch.
Join with a sl st to the first border stitch.
Fasten off.
Because row-end edges are not individual top stitches, the exact border stitch count depends on how the hook is inserted.
The important goal is even spacing.
If the border ripples, remove a few stitches.
If it pulls the fabric inward, add stitches where needed.
Crochet Heart Coaster Pattern: Assembly
This Crochet Heart Coaster Pattern is made in one piece, so no sewing assembly is required.
Instead, the assembly stage focuses on checking the shape and ensuring the two lobes are balanced.
Place the coaster on a flat surface with the right side facing upward.
Check that the bottom point is centered beneath the notch between the upper lobes.
Gently smooth the fabric outward with your hands.
Compare the two upper curves.
They should be similar in height and width, although minor handmade differences are normal.
If the border pulls one side inward, carefully remove the affected section and work it again with more evenly spaced stitches.
If the border creates a ruffled edge, reduce the number of stitches around the curves.
Make sure the central notch is clearly visible.
The finished heart should lie reasonably flat without requiring heavy stretching.
A light blocking treatment may improve the final shape, depending on the yarn.
Crochet Heart Coaster Pattern: Finishing and Care
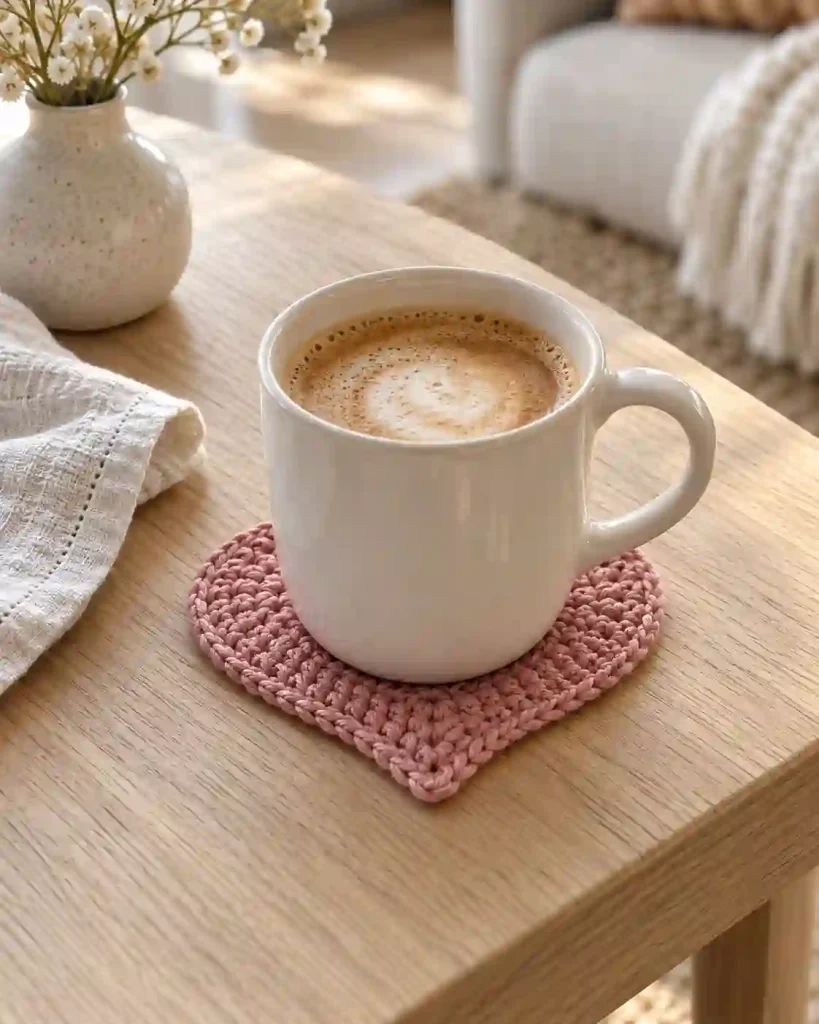
After completing the Crochet Heart Coaster Pattern, weave the yarn tails through several stitches on the wrong side.
Change direction when weaving the ends to help secure them.
Trim the excess yarn only after checking that the ends are firmly anchored.
If your yarn allows it, lightly dampen the coaster and shape it on a blocking mat.
Use rust-resistant pins to define the lower point and upper curves.
Allow the coaster to dry completely before removing the pins.
Always check the yarn label before washing or applying heat.
Cotton coasters may be suitable for gentle washing, but washing instructions vary by yarn.
Avoid high heat unless the yarn manufacturer specifically permits it.
Before using the coaster, place it on a flat table and check that it does not rock or curl excessively.
FAQs and Troubleshooting for Crochet Heart Coaster Pattern
1. Why doesn’t my heart have 20 stitches at the end of Row 10?
Each increase row adds two stitches: one at the beginning and one at the end.
If your stitch count is incorrect, check whether you missed the final stitch of a row or accidentally counted the turning chain as a stitch.
Row 10 must finish with 20 single crochet stitches before the lobes are divided.
2. Why are the two heart lobes different sizes?
The first and second lobes should each begin with 10 stitches and finish with six stitches.
Uneven tension or a missed decrease can make one lobe larger.
Count the stitches in every shaping row and compare both sides before working the border.
3. Can I use acrylic yarn instead of cotton?
You can, but cotton is generally preferable for a functional drink coaster because of its absorbency and stability.
Acrylic may be less absorbent and can be damaged by high temperatures.
For hot drinks, use a suitable heat-resistant coaster material and avoid placing very hot cookware on crocheted fabric.
4. How can I make the heart coaster larger?
Use thicker cotton yarn and a hook suited to that yarn.
This increases the overall dimensions without changing the stitch counts.
You can also add extra increase rows, but doing so requires redesigning the lobe division and shaping to preserve the heart’s proportions.
5. How do I stop the coaster from curling?
Curling often results from tight tension, uneven border spacing, or insufficient room at the corners.
Try a slightly larger hook or loosen your stitches.
If the border is too tight, remove it and add stitches where the fabric pulls inward.
Gentle blocking may also help if your yarn allows it.
Final Thoughts
This Crochet Heart Coaster Pattern combines simple crochet techniques with a charming, practical shape. The pointed base, two shaped lobes, and neat border create a handmade accessory that looks lovely on a coffee table or beside a favorite mug. Once you are comfortable with the pattern, try making matching sets in soft pink, deep red, cream, or other colors that suit your home. Heart coasters also make thoughtful small gifts for Valentine’s Day, birthdays, and housewarmings. Take your time with the shaping and enjoy turning a few rows of crochet into something useful and personal.
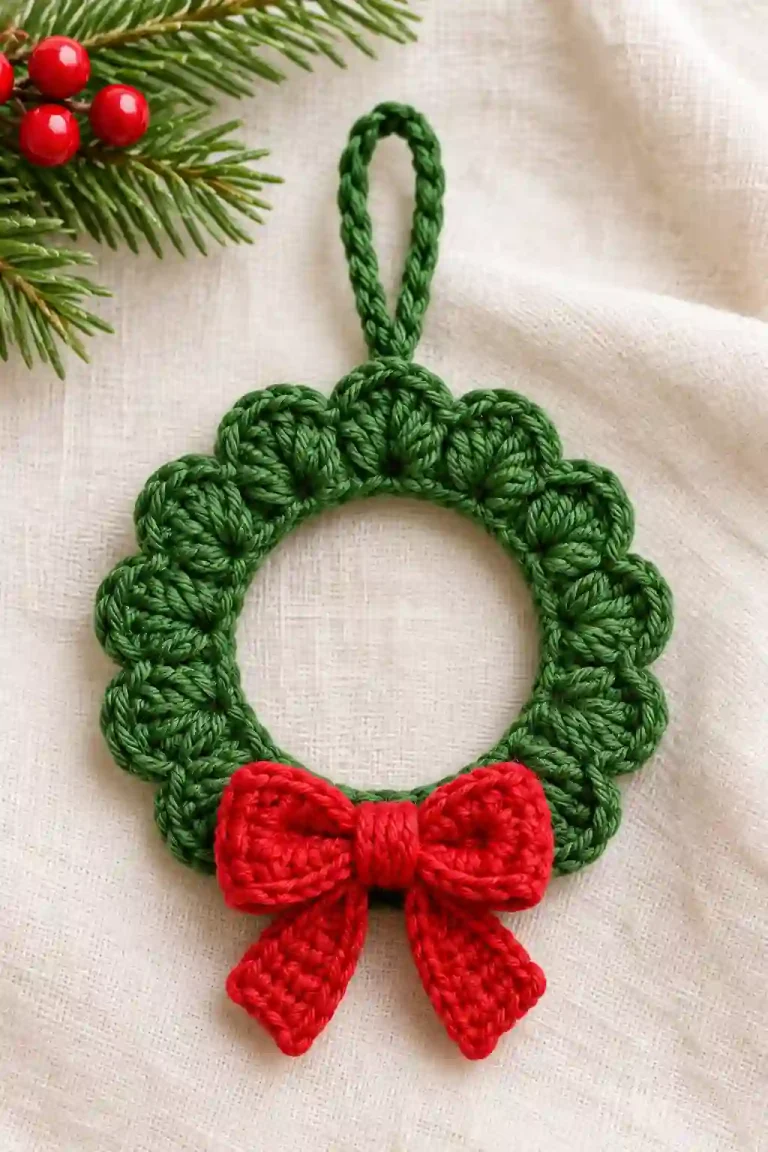
For another small decorative crochet project, explore our Crochet Mini Christmas Wreath Ornament Pattern. It’s a festive handmade decoration featuring a green wreath, red bow, and hanging loop.