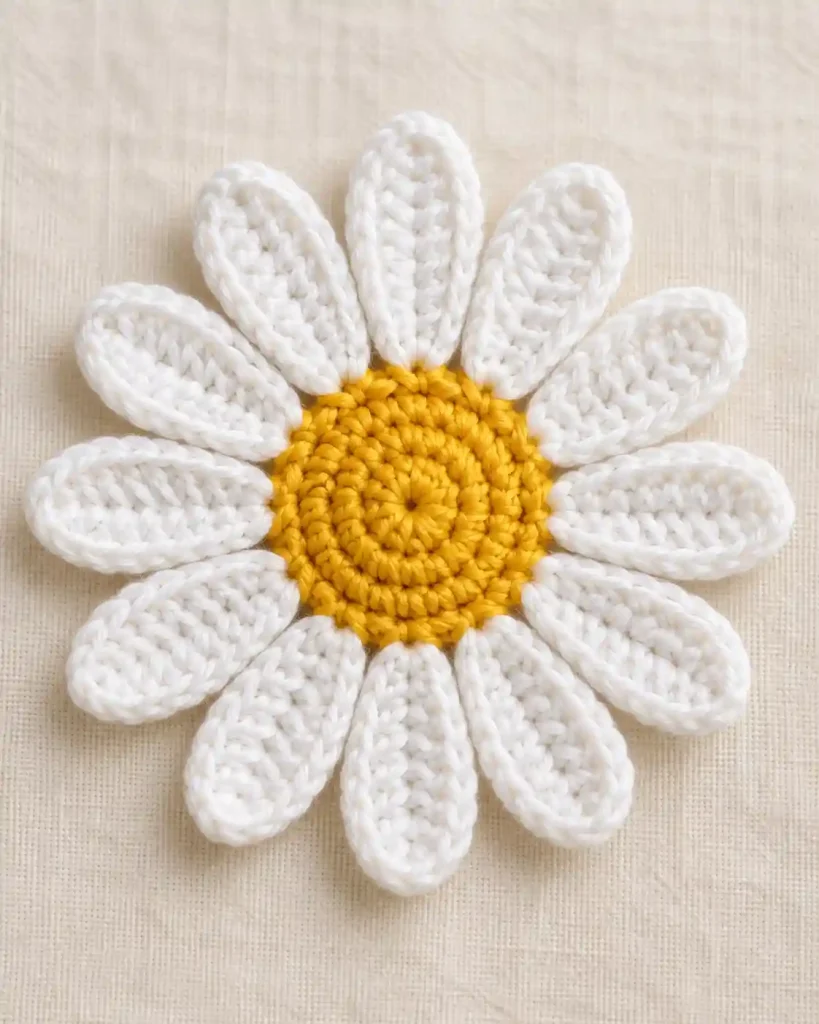
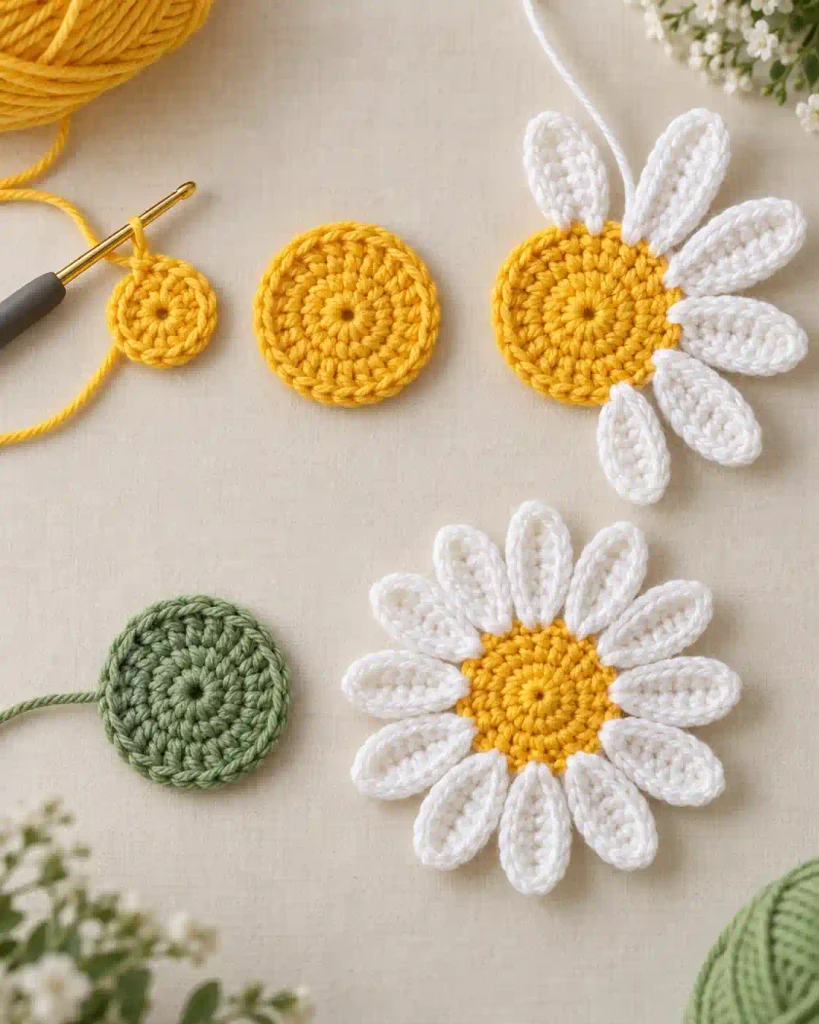
Crochet Daisy Flower Pattern is a cheerful flower project that uses a compact yellow center and a ring of long white petals to create the familiar shape of a daisy. This pattern is worked mainly in joined rounds, so there are only a few pieces to manage and very little assembly at the end. You will begin by crocheting the circular center, then work twelve individual petals directly around its edge.
An optional green backing gives the flower a tidy, finished reverse side. The project uses basic US crochet stitches along with simple increases and decreases, making it approachable for crocheters who are comfortable with a magic ring. Because the finished flower is decorative, exact gauge is not essential. The instructions include stitch counts at every important stage so you can check your work as you go.
Crochet Daisy Flower Pattern at a Glance
This Crochet Daisy Flower Pattern creates one flat, layered daisy suitable for appliqués, garlands, bag decorations, hair accessories, gift wrapping, or other craft projects.
- Skill level: Easy to intermediate
- Terminology: US crochet terms
- Yarn: DK weight cotton yarn
- Hook: 3 mm crochet hook
- Construction: Yellow center worked in joined rounds, white petals worked directly into the center edge, optional green backing worked separately
- Petal count: 12
- Finished diameter: Approximately 4–4.5 in / 10–11.5 cm
- Estimated making time: Approximately 30–45 minutes
- Gauge: Not critical for this decorative project
The finished measurements, yarn quantities, and making time given here are approximate rather than tested specifications. Your flower may be slightly larger or smaller depending on yarn choice, hook size, and personal tension.
Crochet Daisy Flower Pattern: Materials and Yarn Quantities
A smooth cotton yarn is a practical choice because it gives the center and petals clear stitch definition while helping the finished flower maintain its shape. DK weight yarn keeps the project lightweight without making the individual stitches too small.
For one flower, you will need approximately:
- White DK cotton yarn: 12–18 yd / 11–16 m, approximately 4–6 g
- Yellow DK cotton yarn: 5–8 yd / 4.5–7.5 m, approximately 2–3 g
- Green DK cotton yarn: 5–8 yd / 4.5–7.5 m, approximately 2–3 g, if making the optional backing
- 3 mm crochet hook
- Yarn needle
- Scissors
- Stitch marker, optional
These yarn amounts are approximate because tension and yarn construction affect consumption. Another fiber can be substituted if it produces the texture you want. When changing yarn weight, select a hook appropriate for that yarn and expect the finished flower dimensions to change.
Crochet Daisy Flower Pattern: Abbreviations and Special Stitches
This pattern uses standard US crochet terminology.
- ch – chain
- st(s) – stitch(es)
- sl st – slip stitch
- sc – single crochet
- hdc – half double crochet
- dc – double crochet
- tr – treble crochet
- sc2tog – single crochet two stitches together
- MR – magic ring
- [ ] – repeat the instructions inside the brackets
The beginning chain used when starting a petal does not count as a stitch.
For sc2tog, insert the hook into the next stitch and pull up a loop. Insert the hook into the following stitch and pull up another loop. Yarn over and draw through all three loops on the hook.
Crochet Daisy Flower Pattern Gauge, Size and Notes
Gauge is less critical for this Crochet Daisy Flower Pattern because the flower is decorative rather than fitted. With DK cotton yarn and a 3 mm hook, expect a finished flower approximately 4–4.5 in / 10–11.5 cm across, measured from one petal tip to the opposite petal tip.
The yellow center should measure approximately 1.5–1.75 in / 4–4.5 cm across after the third round. These measurements are approximate and have not been presented as tested gauge specifications.
The center is worked in joined rounds. Close each round with a slip stitch before beginning the next round. Do not count the joining slip stitch as part of the stitch total.
Count the stitches at the end of every center round. Accurate center counts are especially important because the final 24 stitches provide the placement points for exactly twelve petals.
Crochet Daisy Flower Pattern: Method Overview
The Crochet Daisy Flower Pattern is constructed from the center outward. First, crochet a flat yellow circle ending with 24 stitches. This stitch count is important because each petal uses two center stitches, creating twelve evenly spaced petals. After completing the center, change to white yarn and make each petal individually. Chain outward, work back along the chain to shape the petal, and anchor it to the yellow center. Repeat this sequence around the entire center to complete the petal ring.
The optional green backing is crocheted separately as a flat circle. Once the flower is complete, sew the backing behind the yellow center without covering the white petals. This helps hide yarn ends and gives the back of the Crochet Daisy Flower Pattern a cleaner, more finished appearance.
The construction order is therefore center → petals → optional backing → assembly and finishing.
How to Crochet the Daisy Center
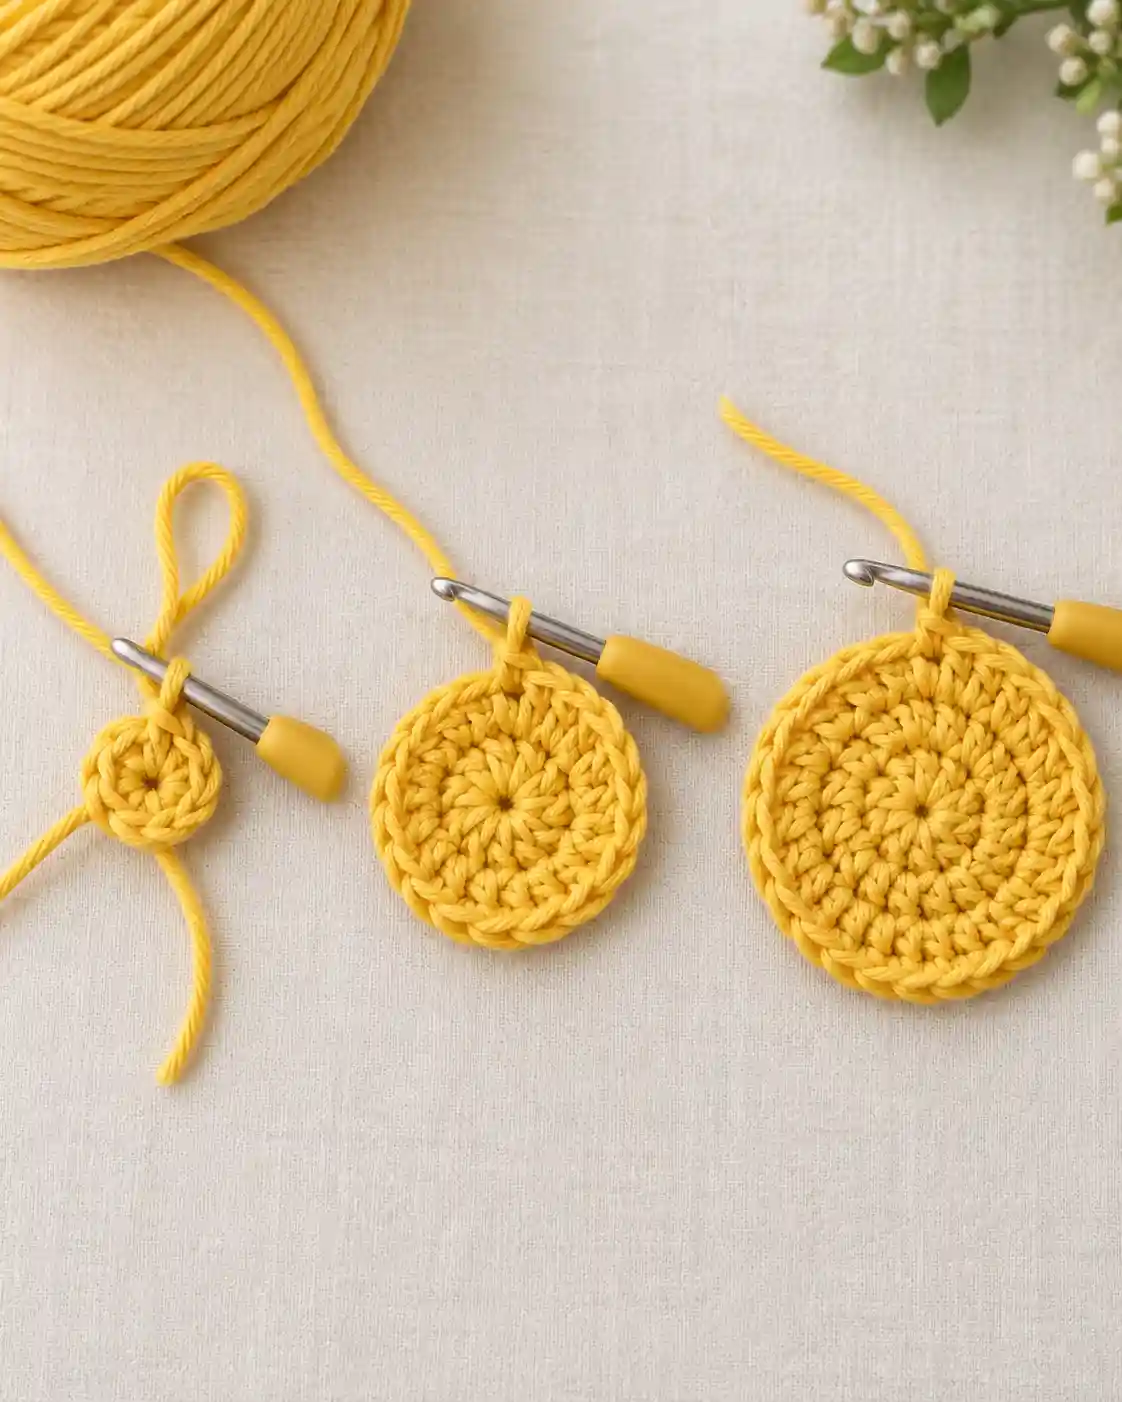
Use yellow DK yarn to make the center. Keep the circle flat as you work and check each stitch count before continuing.
Round 1: Make a MR. Work 6 sc into the ring. Pull the ring closed and join with a sl st to the first sc. (6 sts)
Round 2: Ch 1. Work 2 sc in each stitch around. Join with a sl st to the first sc. (12 sts)
Round 3: Ch 1. Repeat [1 sc in the next st, 2 sc in the next st] around. Join with a sl st to the first sc. (18 sts)
Round 4: Ch 1. Repeat [1 sc in each of the next 2 sts, 2 sc in the next st] around. Join with a sl st. (24 sts)
Do not fasten off until you have checked the shape. The center should form a flat circle without obvious cupping or ruffling.
Fasten off the yellow yarn and weave the starting tail toward the center.
How to Crochet the Daisy Petals
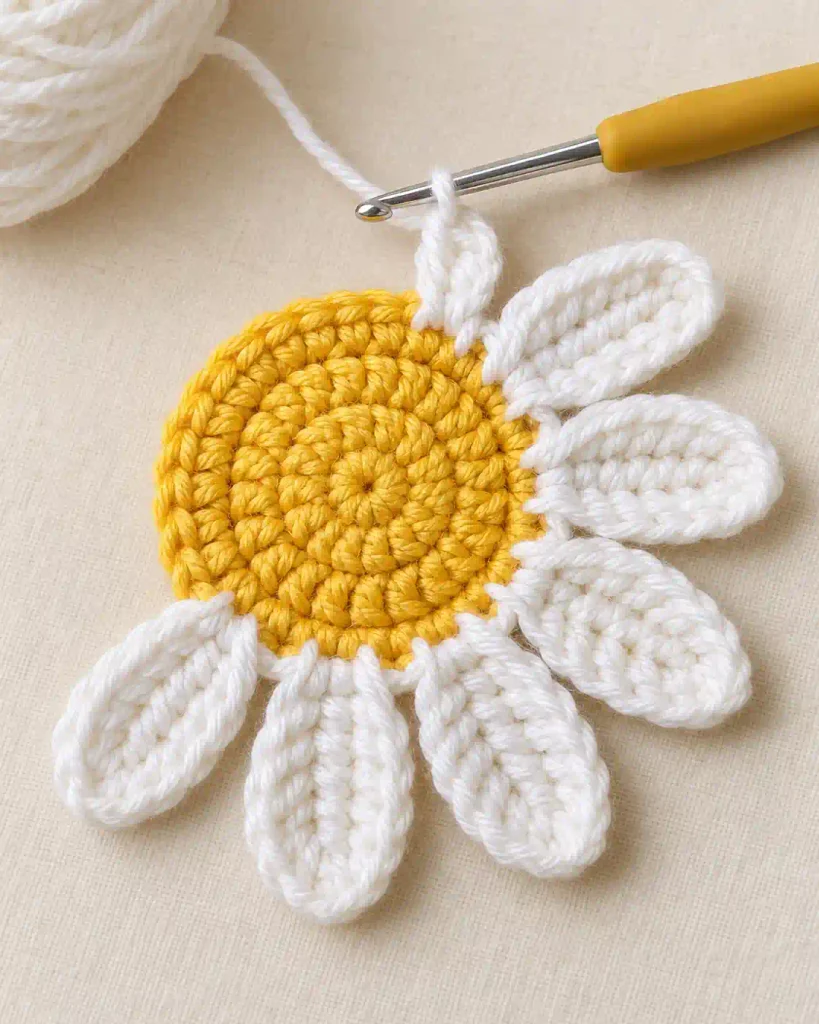
Join white yarn with a sl st in any stitch of Round 4. The twelve petals are worked one at a time and anchored across the 24 stitches of the yellow center.
Petal 1: Ch 9. Beginning in the second ch from the hook, work:
- 1 sl st in the next ch
- 1 sc in the next ch
- 1 hdc in the next ch
- 1 dc in each of the next 2 ch
- 1 hdc in the next ch
- 1 sc in the next ch
- 1 sl st in the final ch
The petal is now shaped from its pointed tip back toward the yellow center.
Sl st into the next stitch of the yellow center to anchor the petal. Sl st once more into the following center stitch to move into position for the next petal.
Petals 2–12: Repeat the same sequence: ch 9, work back along the chain using sl st, sc, hdc, dc, dc, hdc, sc, sl st, then use two center stitches to anchor and advance.
Continue until twelve petals surround the center. After the final petal, join neatly at the base of the first petal and fasten off.
How to Make the Optional Green Backing
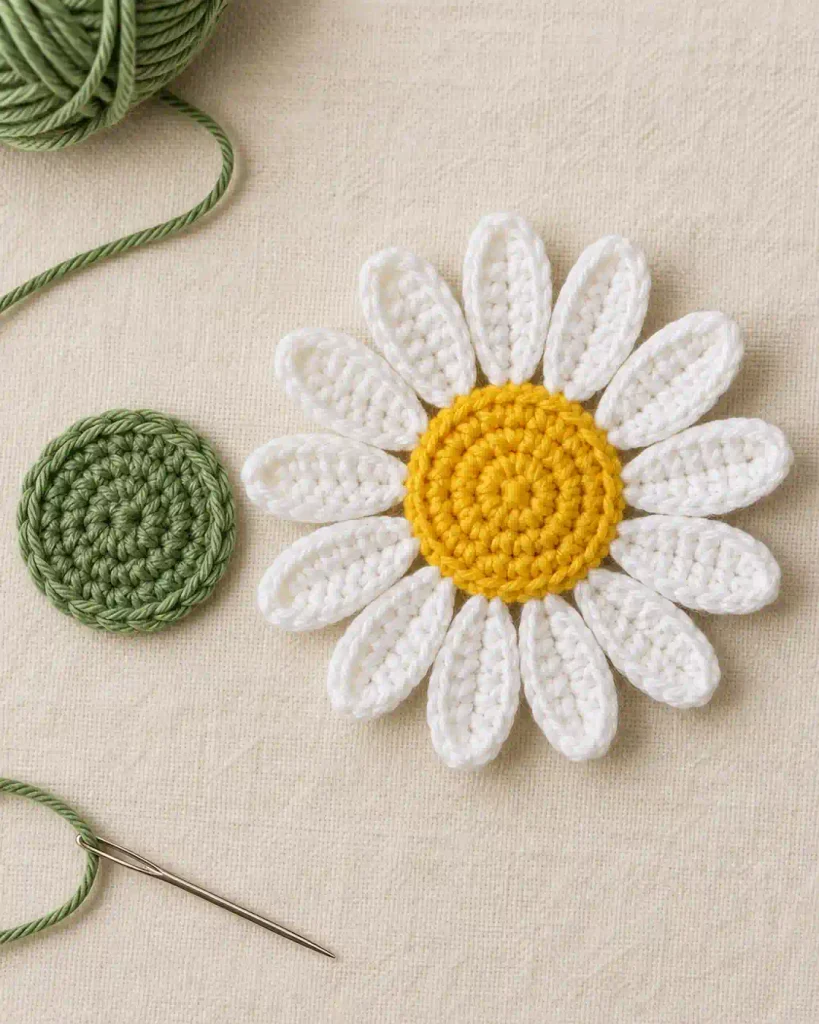
A green backing is optional. It gives the reverse side of the flower a cleaner finish.
This is especially useful when the daisy will be used as a decoration rather than sewn flat as an appliqué.
With green DK yarn:
Round 1: Make a MR. Work 6 sc into the ring. Pull closed and join with a sl st. (6 sts)
Round 2: Ch 1. Work 2 sc in every stitch around. Join. (12 sts)
Round 3: Ch 1. Repeat [1 sc in the next st, 2 sc in the next st] around. Join. (18 sts)
Fasten off, leaving a sewing tail approximately 10–12 in / 25–30 cm long.
The backing should be slightly smaller than the yellow flower center so it remains hidden when viewed from the front.
If it extends beyond the center, use a smaller hook or omit the final increase round rather than forcing the piece into place.
Crochet Daisy Flower Pattern: Assembly
Before attaching the backing, place the finished daisy on a flat surface. Arrange all twelve petals evenly.
Check that none of the petals are twisted and adjust the spacing if necessary.
Place the green circle against the back of the yellow center. Center it carefully so no green yarn is visible around the front edge.
Thread the long green tail onto a yarn needle. Sew around the outer edge of the backing, catching small sections of the yellow center stitches as you work. Avoid sewing through the white petals because this can pull them backward or distort their bases.
Continue around the entire backing, keeping the stitches secure without pulling tightly enough to pucker the center.
Make a small securing stitch on the reverse side, then weave the remaining tail through several nearby stitches.
If you are using the daisy as an appliqué, you can omit the green backing and leave a suitable yarn tail for attaching the flower directly to your project.
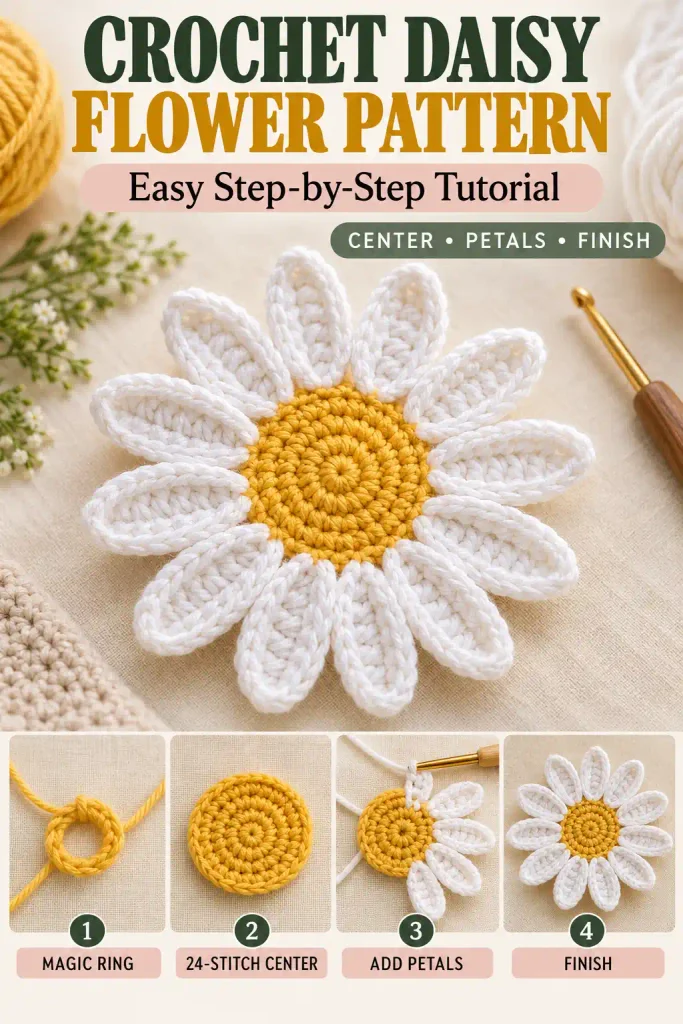
Crochet Daisy Flower Pattern: Finishing and Care
Weave in all remaining yarn ends on the back of the Crochet Daisy Flower Pattern, changing direction once or twice so the tails stay secure. Trim the yarn only after checking that the ends cannot easily pull free.
Arrange the twelve petals gently with your fingers. If necessary, lightly block the Crochet Daisy Flower Pattern to improve its shape and symmetry. Pin each petal into position without overstretching the stitches, using a blocking method suitable for your yarn fiber.
Always follow the care instructions on the yarn label. Cotton, acrylic, wool, and blended yarns may require different washing, drying, and blocking methods.
Before using the flower, check the center, petal anchors, backing seam, and woven ends. The finished Crochet Daisy Flower Pattern should lie reasonably flat with an even center and clearly separated petals.
FAQs and Troubleshooting for Crochet Daisy Flower Pattern
1. Why do I end up with fewer or more than 12 petals?
Check Round 4 of the center first. You should have exactly 24 stitches. Each petal sequence uses two center stitches: one for anchoring and one for advancing to the next starting position. Twenty-four stitches therefore provide twelve petal positions. If your count differs, correct the center before continuing.
2. Why is my daisy center cupping instead of lying flat?
Cupping can result from tight tension, an undersized hook, or missed increases. Confirm that your rounds contain 6, 12, 18, and 24 stitches. If the counts are correct but the center still cups noticeably, try a slightly larger hook or relax your tension.
3. Can I use worsted or sport weight yarn instead of DK?
Yes. The flower size will change. Sport yarn generally produces a smaller daisy, while worsted yarn creates a larger one. Choose a hook suitable for the replacement yarn rather than automatically keeping the 3 mm hook.
4. How can I make the daisy larger?
The simplest method is to use thicker yarn and a larger compatible hook. You can also lengthen each starting petal chain, but the stitch sequence must then be redesigned to distribute the extra length rather than leaving unused chains.
5. How should I wash the finished crochet daisy?
Follow the care instructions for the specific yarn you used. Do not assume every crocheted daisy can be machine washed or dried. For an attached flower, also consider the care requirements of the item it is sewn onto.
Final Thoughts
This Crochet Daisy Flower Pattern combines a simple circular center with twelve individually shaped petals. The construction is easy to follow and creates a recognizable daisy shape. The 24 center stitches provide the correct placement for the twelve petals, making it easy to achieve an even and balanced flower.
Once you understand the basic structure, you can repeat the project using different yarn colors and sizes. The optional backing gives the flower a tidy finish, or you can leave it off for a flatter appliqué. Count the center stitches carefully and arrange the petals evenly before finishing to give your Crochet Daisy Flower Pattern a neat, polished appearance.
Explore more crochet flower patterns for your next handmade project, or try this Medium Crochet Pumpkin Pattern to practice ribbed crochet, stuffing, and shaping with a seasonal project.