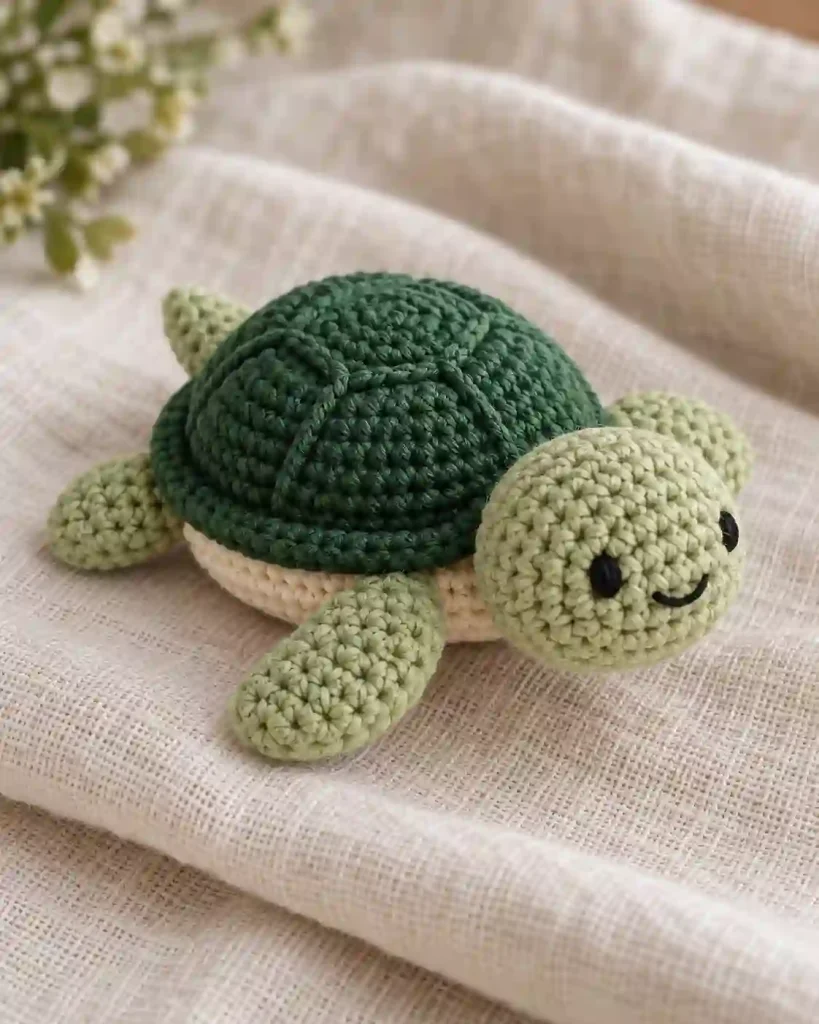
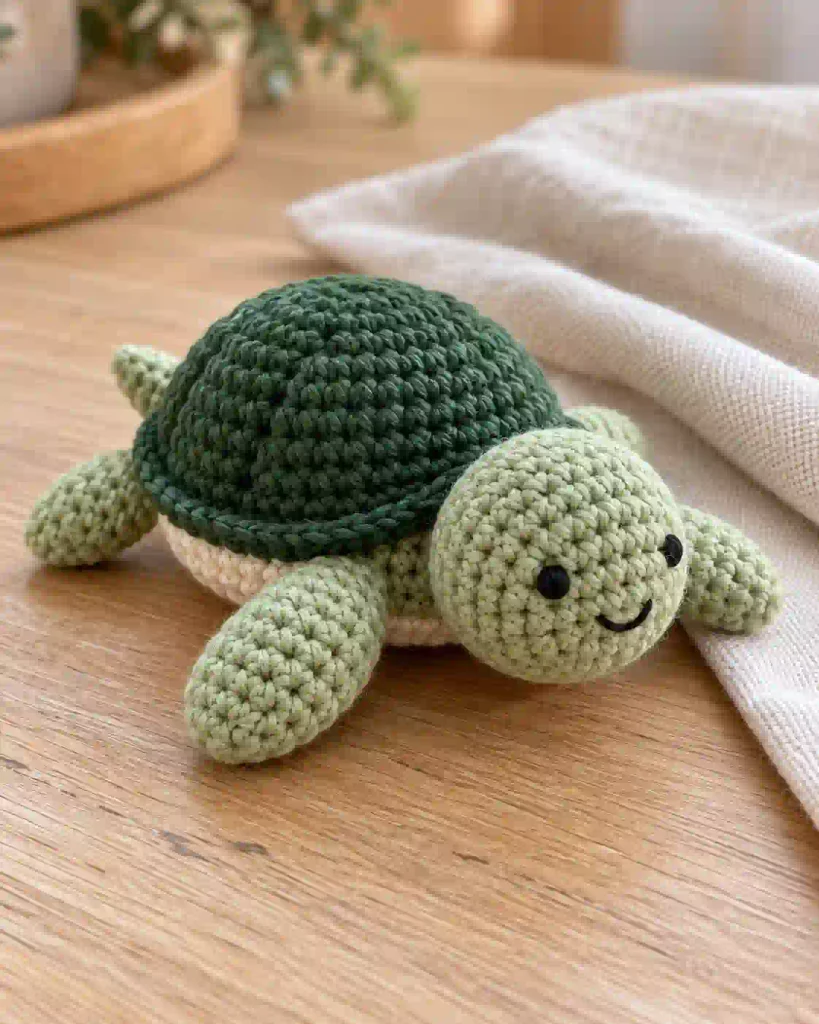
This Mini Crochet Turtle Pattern is a delightful project for anyone who enjoys making small, handmade amigurumi animals. With its rounded shell, tiny flippers, and sweet embroidered face, this little turtle makes a charming desk decoration or handmade gift. The pattern uses basic single crochet stitches, simple increases, and invisible decreases. In this tutorial, you’ll learn how to crochet the shell, shape the head and flippers, and assemble an adorable miniature turtle.
Mini Crochet Turtle Pattern at a Glance
This Mini Crochet Turtle Pattern creates a small stuffed turtle with a domed shell, a flat belly, four flippers, a rounded head, and a short tail.
The turtle is made from separate crocheted components that are sewn together. The shell and belly are joined to create a lightly stuffed body, while the head and flippers are attached around its edge.
Pattern details:
- Skill level: Confident beginner
- Crochet terminology: US terms
- Yarn weight: DK weight, category 3
- Hook size: 2.5 mm
- Construction: Continuous spiral rounds and sewn assembly
- Finished body diameter: Approximately 2.5–3 inches / 6.5–7.5 cm
- Overall length, including head: Approximately 3.5–4 inches / 9–10 cm
- Estimated making time: Approximately 2–3 hours
- Gauge: Not critical, but tight stitches are important
- Main techniques: Magic ring, single crochet, increases, decreases, and sewing
The finished size, yarn requirements, and making time are estimates. This original written pattern has not been independently tested.
The finished turtle is intended as a decorative amigurumi item rather than a toy certified for infant use.
Mini Crochet Turtle Pattern: Materials and Yarn Quantities
You only need a few supplies to make this Mini Crochet Turtle Pattern. Smooth DK yarn works well for small amigurumi because it provides clear stitch definition without creating an overly bulky result.
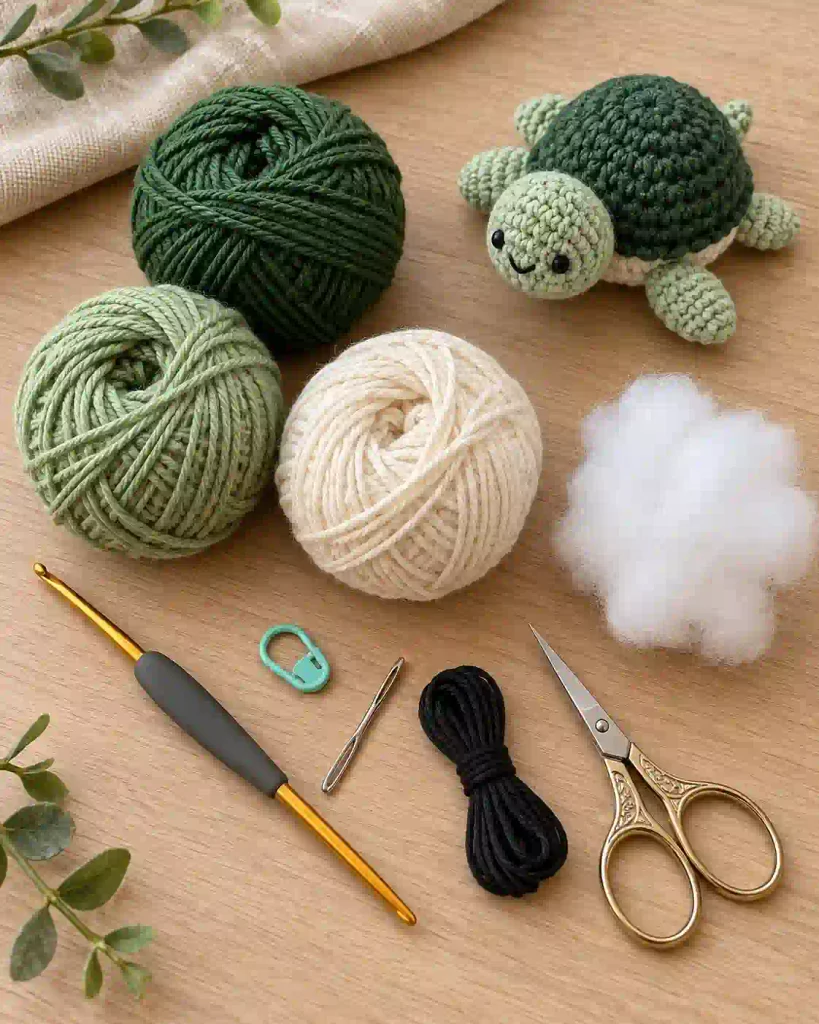
Materials:
- Dark green DK yarn: Approximately 15–22 yd / 14–20 m for the shell
- Light green DK yarn: Approximately 15–22 yd / 14–20 m for the head, flippers, and tail
- Cream or pale beige DK yarn: Approximately 8–12 yd / 7–11 m for the belly
- Black embroidery thread: A small amount for the eyes and smile
- 2.5 mm crochet hook
- Polyester fiberfill stuffing
- Yarn needle
- Small scissors
- Stitch marker
- Optional pins for positioning pieces
Yarn quantities are approximate and depend on tension, fiber content, and the amount used for sewing.
Cotton yarn can produce a firm turtle with defined stitches. Acrylic yarn is another option, although it may feel softer.
If you substitute yarn, choose a hook that creates a dense fabric with minimal gaps. Stuffing should not show through the stitches.
For a guide to yarn categories, see the Craft Yarn Council’s Standard Yarn Weight System.
Mini Crochet Turtle Pattern: Abbreviations and Special Stitches
This Mini Crochet Turtle Pattern uses standard US crochet terminology.
- MR – magic ring
- sc – single crochet
- inc – increase: work 2 sc in the same stitch
- dec – invisible decrease: work the next 2 stitches together
- sl st – slip stitch
- st(s) – stitch(es)
- BLO – back loop only
- [ ] × N – repeat the instructions inside the brackets N times
- (N) – stitch count at the end of a round
Invisible decrease: Insert the hook through the front loops of the next two stitches, yarn over, and pull through both front loops. Yarn over and pull through the remaining two loops.
All amigurumi rounds are worked in continuous spirals unless otherwise stated. Do not join rounds with slip stitches.
Use a stitch marker to identify the beginning of each round.
For additional terminology guidance, visit the Craft Yarn Council’s Crochet Abbreviations Guide.
Mini Crochet Turtle Pattern Gauge, Size and Notes
Gauge is less important for this Mini Crochet Turtle Pattern than it would be for clothing, but consistent tension helps the pieces fit together.
With DK yarn and a 2.5 mm hook, the turtle’s body should measure approximately 2.5–3 inches / 6.5–7.5 cm across.
The complete turtle, including its head, should measure approximately 3.5–4 inches / 9–10 cm long.
A useful gauge check is to crochet the first four rounds of the shell. The resulting circle should be firm, with evenly spaced stitches and no large openings.
For a more formal gauge check, measure the diameter of this 24-stitch circle rather than stretching it into a square. An exact stitch-and-row gauge is not established for this untested design.
If your stitches are loose, use a smaller hook.
The shell and belly both finish with 36 stitches around their outer edges, allowing them to be joined evenly.
All stitch counts refer to completed stitches, not the stitch marker.
Mini Crochet Turtle Pattern: Method Overview
The Mini Crochet Turtle Pattern is assembled from several small pieces.
Begin with the dark green shell. Crochet a flat circular crown, then work several rounds without increases to create the dome. A final increase round widens the lower edge.
Next, crochet the cream belly as a flat circle. Its final round contains the same number of stitches as the shell edge.
The head is made separately using light green yarn. It is lightly stuffed before the opening is closed.
Four small flippers are crocheted as flattened tubes. Two are positioned near the front of the body and two near the back.
If you enjoy making small handmade decorations, you can also try our Crochet Mini Christmas Wreath Ornament Pattern. This festive project uses basic crochet stitches to create a miniature wreath with a red bow and hanging loop.
A short triangular tail completes the turtle’s shape.
Construction order:
- Crochet the shell.
- Crochet the belly.
- Make and embroider the head.
- Crochet four flippers and the tail.
- Attach the head, flippers, and tail to the belly.
- Join the shell to the belly, adding stuffing before closing.
Keeping the parts separate until assembly makes it easier to position the turtle’s features symmetrically.
How to Crochet the Turtle Shell and Belly
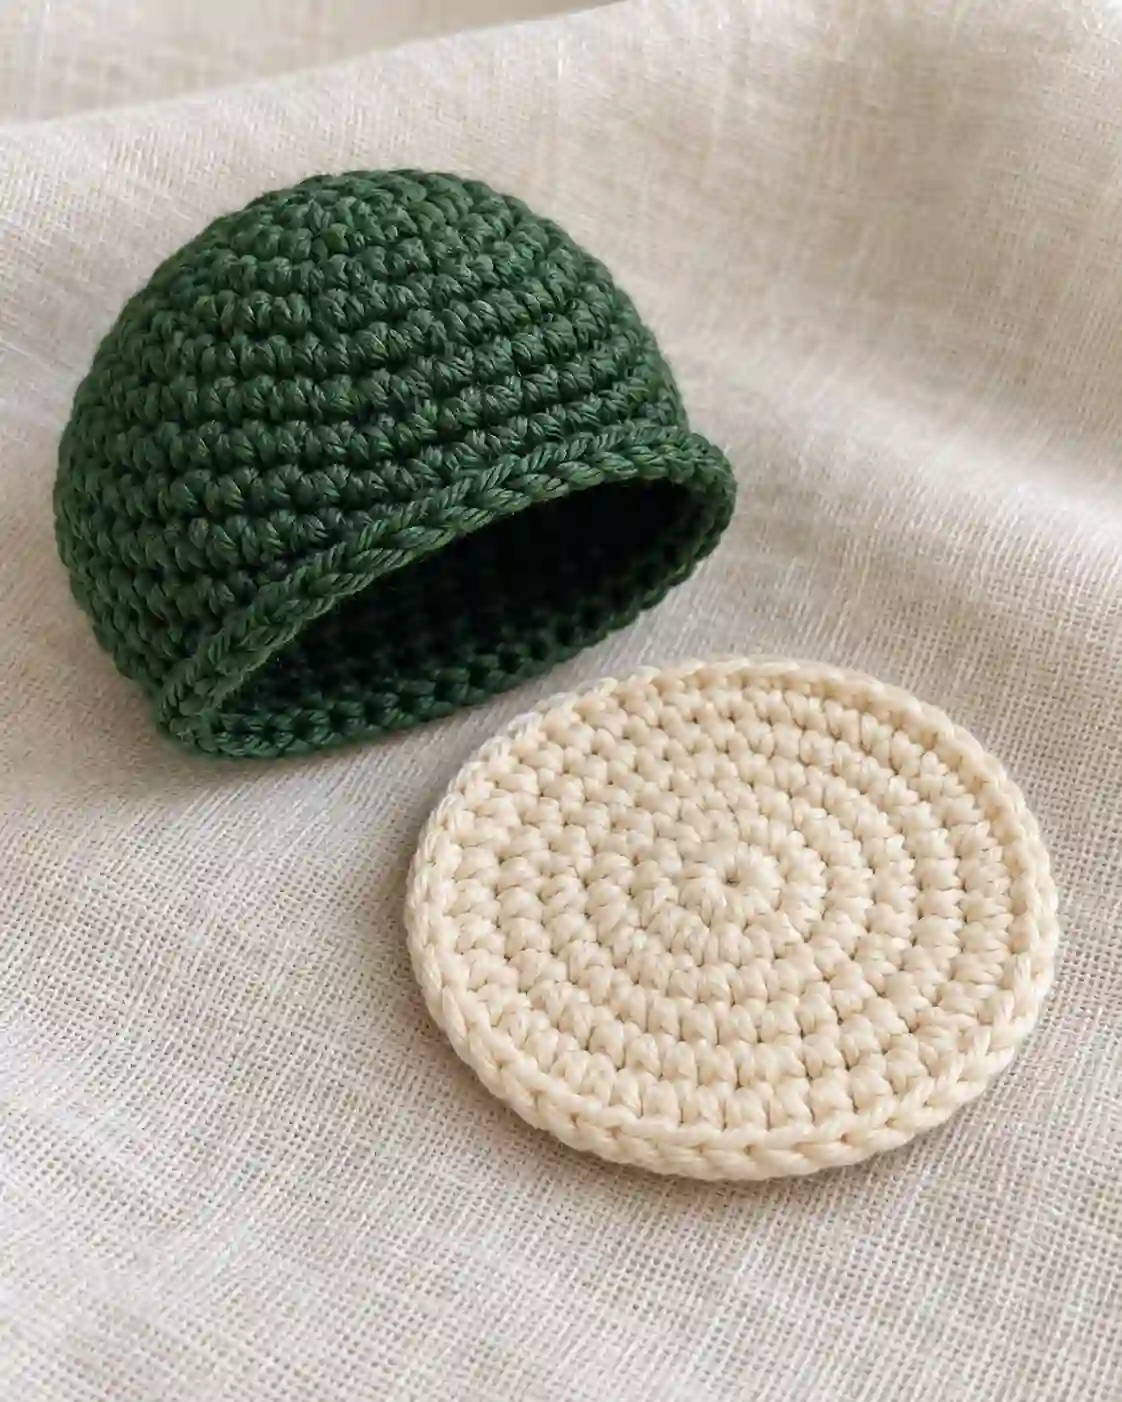
Begin the Mini Crochet Turtle Pattern with dark green DK yarn.
Turtle shell
Round 1: Work 6 sc into a MR. (6)
Round 2: Inc in each st around. (12)
Round 3: [Sc 1, inc] × 6. (18)
Round 4: [Sc 2, inc] × 6. (24)
Round 5: [Sc 3, inc] × 6. (30)
Rounds 6–8: Sc in each st around. (30)
Round 9: [Sc 4, inc] × 6. (36)
Round 10: Sc in each st around, working in BLO. (36)
Fasten off, leaving a long tail for joining.
The shell should have a rounded upper surface and a defined lower edge.
Turtle belly
Switch to cream or pale beige DK yarn.
Round 1: Work 6 sc into a MR. (6)
Round 2: Inc in each st around. (12)
Round 3: [Sc 1, inc] × 6. (18)
Round 4: [Sc 2, inc] × 6. (24)
Round 5: [Sc 3, inc] × 6. (30)
Round 6: [Sc 4, inc] × 6. (36)
Fasten off, leaving a short tail for weaving in.
The belly should form a relatively flat circle with 36 stitches around its edge.
Do not join the shell and belly yet.
How to Crochet the Turtle Head
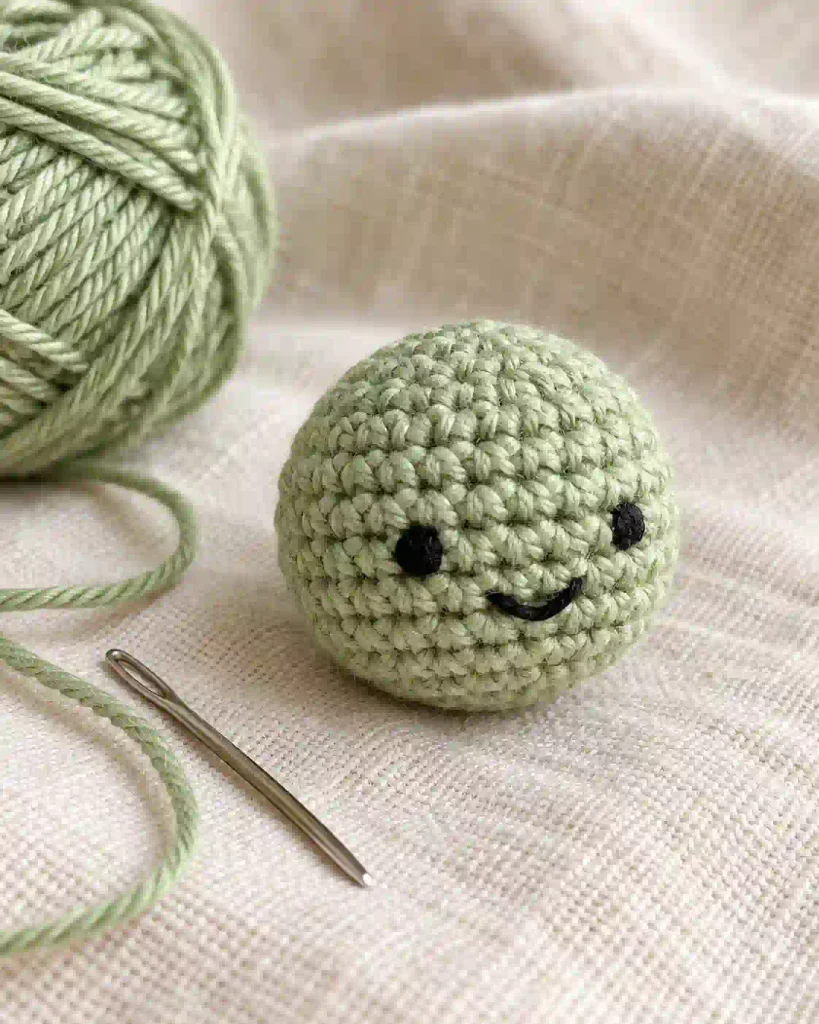
The rounded head gives this Mini Crochet Turtle Pattern its friendly appearance.
Use light green DK yarn and a 2.5 mm hook.
Round 1: Work 6 sc into a MR. (6)
Round 2: Inc in each st around. (12)
Round 3: [Sc 1, inc] × 6. (18)
Rounds 4–6: Sc in each st around. (18)
Round 7: [Sc 1, dec] × 6. (12)
Lightly stuff the head with polyester fiberfill.
Round 8: Dec around. (6)
Fasten off, leaving a long sewing tail.
Thread the tail through the front loops of the remaining six stitches and pull gently to close the opening.
Secure the yarn without flattening the head.
Embroidering the face
Choose one side of the head as the front.
Using black embroidery thread, make two small embroidered eyes between Rounds 4 and 5, approximately five stitches apart when counted across the front surface.
Use two or three small straight stitches for each eye, depending on the thickness of your thread.
Add a tiny curved smile below the eyes using a short embroidered line.
Keep the facial details small so they suit the turtle’s miniature proportions.
Avoid using plastic safety eyes if the ornament might be handled by young children.
Check that the embroidery thread is securely fastened inside the head.
How to Crochet the Four Flippers and Tail
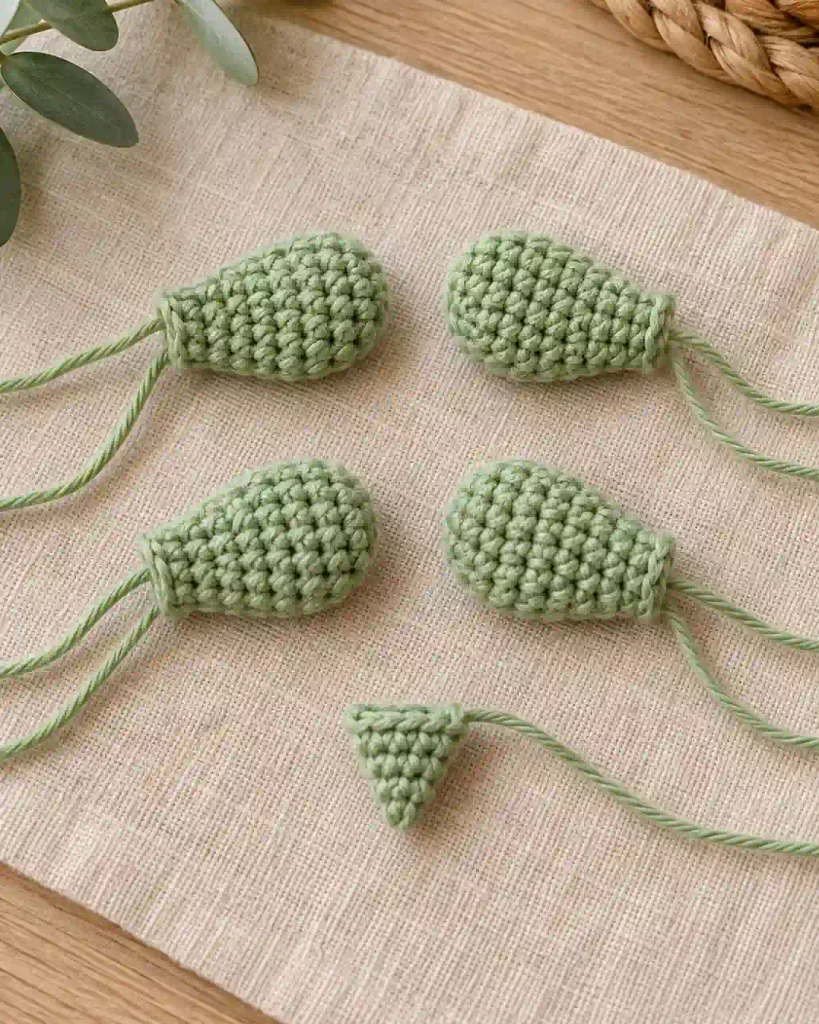
The Mini Crochet Turtle Pattern uses four matching flippers and one small tail.
Flippers — Make 4
Use light green yarn.
Round 1: Work 6 sc into a MR. (6)
Round 2: [Sc 1, inc] × 3. (9)
Round 3: Sc in each st around. (9)
Round 4: [Sc 1, dec] × 3. (6)
Do not stuff.
Flatten the opening so the three stitches on the front align with the three stitches on the back.
Work 3 sc through both layers to close the opening. (3 closing sc)
Fasten off, leaving a long sewing tail.
Repeat until you have four identical flippers.
Each flipper should be slightly wider near its rounded tip and narrower at the attachment end.
Tail — Make 1
Use light green yarn.
Round 1: Work 4 sc into a MR. (4)
Round 2: [Sc 1, inc] × 2. (6)
Round 3: Sc in each st around. (6)
Do not stuff.
Flatten the opening and work 3 sc through both layers to close it. (3 closing sc)
Fasten off, leaving a sewing tail.
The tail should form a short, slightly pointed piece.
All five pieces are now ready for assembly.
Mini Crochet Turtle Pattern: Assembly
Assembling the Mini Crochet Turtle Pattern carefully will help the finished turtle look balanced.
Place the cream belly flat with its right side facing upward.
Choose one edge as the front.
Position the head so its closed end rests against the front edge of the belly, with the embroidered face pointing outward.
Sew the head securely to the belly, attaching several stitches along its lower back.
Place two flippers near the front sides of the belly and two near the rear sides.
Arrange them symmetrically, leaving space between the front flippers and the head.
Sew each flattened flipper opening to the outer edge of the belly.
Attach the small tail at the rear center, directly opposite the head.
Now place the dark green shell over the belly, with its open side facing downward.
Align the 36 outer shell stitches with the 36 belly stitches.
Using the shell’s long yarn tail, whipstitch the two edges together, matching one shell stitch to one belly stitch.
Before closing the final opening, add a small amount of stuffing beneath the shell.
Finish sewing and secure the yarn.
Mini Crochet Turtle Pattern: Finishing and Care
After assembling your Mini Crochet Turtle Pattern, gently shape the shell with your fingers.
The shell should have a rounded dome, while the belly remains relatively flat.
If the turtle looks uneven, adjust the stuffing through the fabric with gentle pressure. Avoid overstuffing, as this can distort the shell and create gaps between stitches.
Weave all remaining yarn ends securely into the body.
Inspect the attachment points around the head, flippers, and tail.
Check that the embroidered eyes and mouth cannot be pulled loose easily.
For cleaning, follow the care instructions on the yarn label.
Some cotton and acrylic yarns tolerate gentle washing, but the correct method depends on the specific fiber and construction.
Allow the turtle to dry completely before storing it.
Keep it away from excessive moisture and prolonged direct sunlight.
FAQs and Troubleshooting for Mini Crochet Turtle Pattern
1. Why does my turtle shell have the wrong number of stitches?
The shell increases gradually from 6 stitches to 30 stitches before widening to 36 stitches in Round 9.
If your stitch count is incorrect, check each increase round carefully.
A common mistake is adding an extra increase or accidentally working into the first stitch of the next round.
Use a stitch marker and count every round before continuing.
2. Why is my crochet turtle shell too flat?
The shell needs several rounds without increases to develop its domed shape.
Make sure you completed Rounds 6–8 with 30 stitches in each round.
The final increase round widens the base, while the stuffing helps maintain the rounded shape.
Avoid pressing the shell flat during assembly.
3. Can I make this mini turtle with plush yarn?
Yes, but plush yarn will create a larger turtle and may make the stitches harder to identify.
Use a hook appropriate for the yarn and keep the same stitch counts.
Because plush yarn is thicker, the finished turtle may require more stuffing.
Consider practicing the pattern with smooth DK yarn first.
4. How can I make the crochet turtle smaller?
Use thinner yarn and a smaller hook while following the same instructions.
For example, sport-weight yarn can produce a smaller turtle than DK yarn, depending on tension.
For a larger turtle, use thicker yarn and a suitable hook.
Changing the yarn size is easier than changing the stitch counts because the shell and belly must match.
5. Is this mini crochet turtle suitable for babies?
This pattern is intended as a decorative amigurumi project and has not been tested against toy safety standards.
Small sewn components and embroidered details may become hazards if they loosen.
For an item intended for a baby or young child, use an appropriately designed and safety-tested toy pattern that meets the relevant requirements.
Final Thoughts
This Mini Crochet Turtle Pattern is a rewarding way to practice amigurumi techniques while making a small, cheerful handmade animal. The rounded shell, tiny flippers, and embroidered expression give the turtle plenty of personality without requiring complicated stitches. Once you are comfortable with the construction, experiment with different shades of green, cream, or blue to create a collection of miniature turtles. They make lovely decorative gifts and are small enough to display on a shelf or desk. Enjoy the process of shaping each component and watching your little crochet turtle come together, one stitch at a time.
For another creative crochet project, explore our Crochet Rose Coaster Pattern. It combines a practical handmade coaster with a decorative crochet flower.