Crochet Tulip Keychain Pattern projects turn small yarn leftovers into cheerful accessories for keys or bags. This guide presents an independently drafted, untested flat tulip with two pink layers, a green stem, and one leaf. For a different, stuffed construction, explore The Caffeinated Snail’s crochet tulip keychain pattern. You can also try our daisy crochet flower pattern. Below, you will learn the panels, green details, joining, and keyring attachment.
Crochet Tulip Keychain Pattern at a Glance
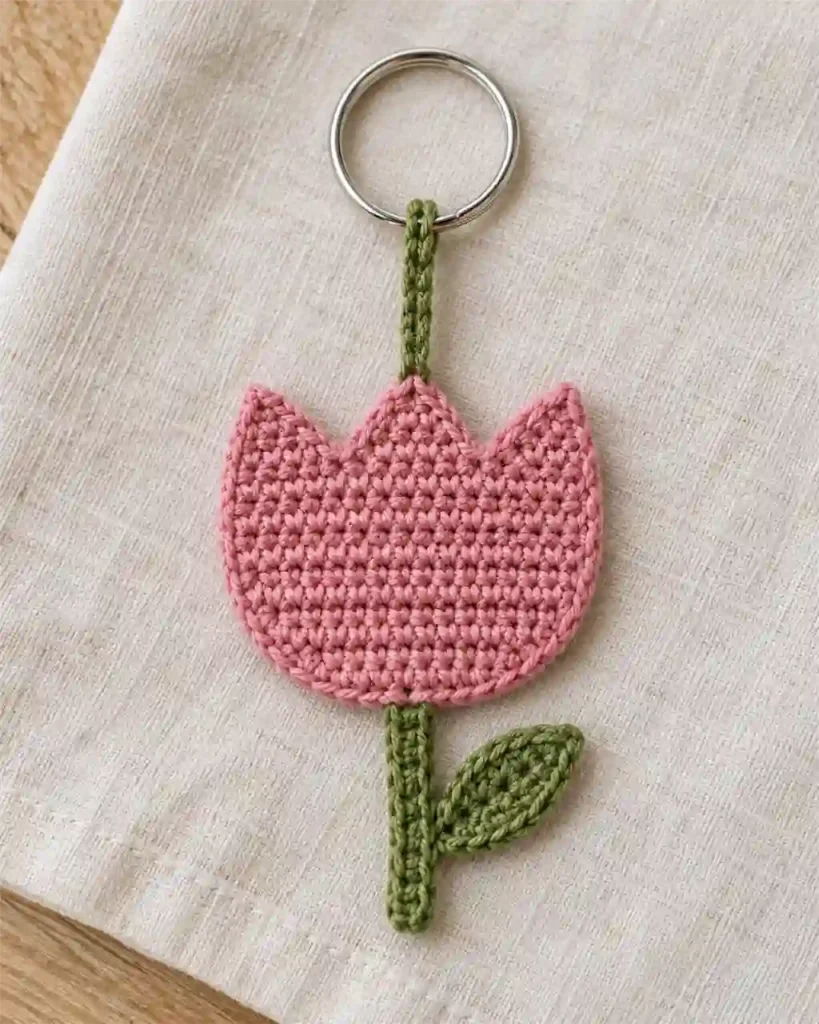
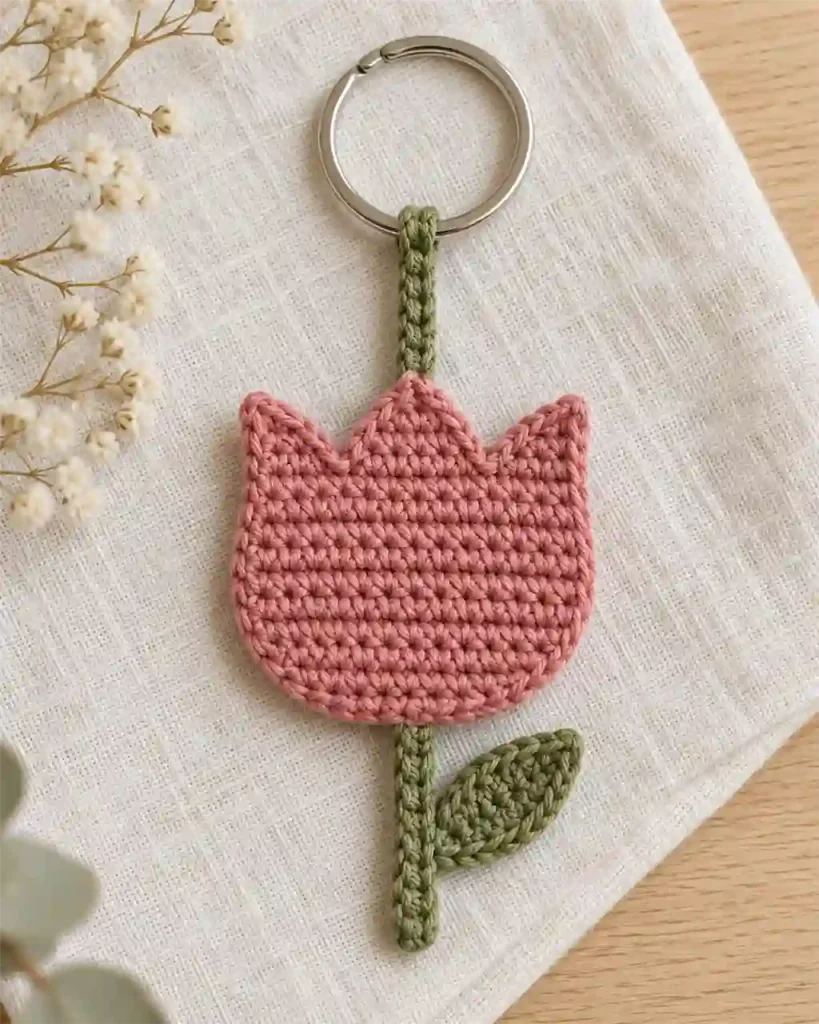
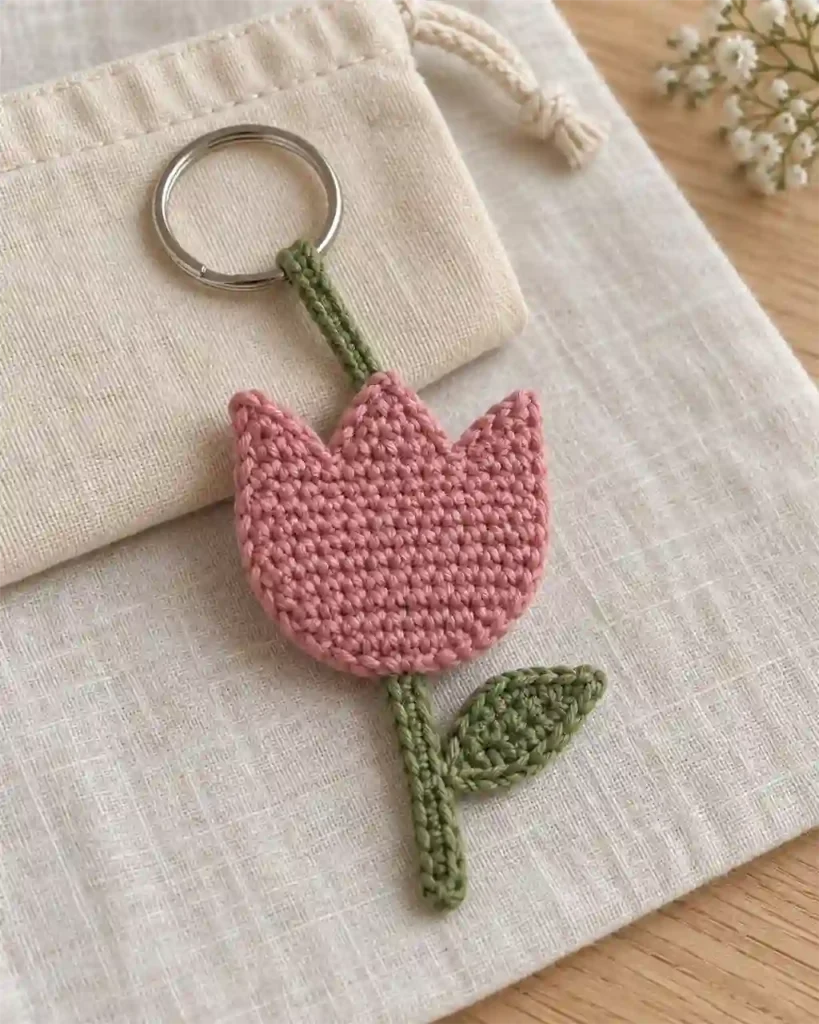
This Crochet Tulip Keychain Pattern makes a flat charm with a widening flower head and three pointed upper lobes. Two matching panels are sewn together, enclosing the top of a short green stem. A separate leaf adds a small detail at the side.
The project suits confident beginners who can increase in rows, work several stitches into one base, and sew through crochet fabric. The flower includes half double crochet, double crochet, and treble crochet along its decorative top edge.
Use category 3 yarn with a 3.5 mm hook as a starting combination. An approximate planning size is 3–4 inches tall, or 7.6–10.2 cm, excluding the hanging loop and metal ring. This has not been verified with a sample.
No tested making time is available. Make one prototype before preparing several gifts. Unlike the linked source design, this version uses flat panels and does not require stuffing.
Crochet Tulip Keychain Pattern: Materials and yarn quantities
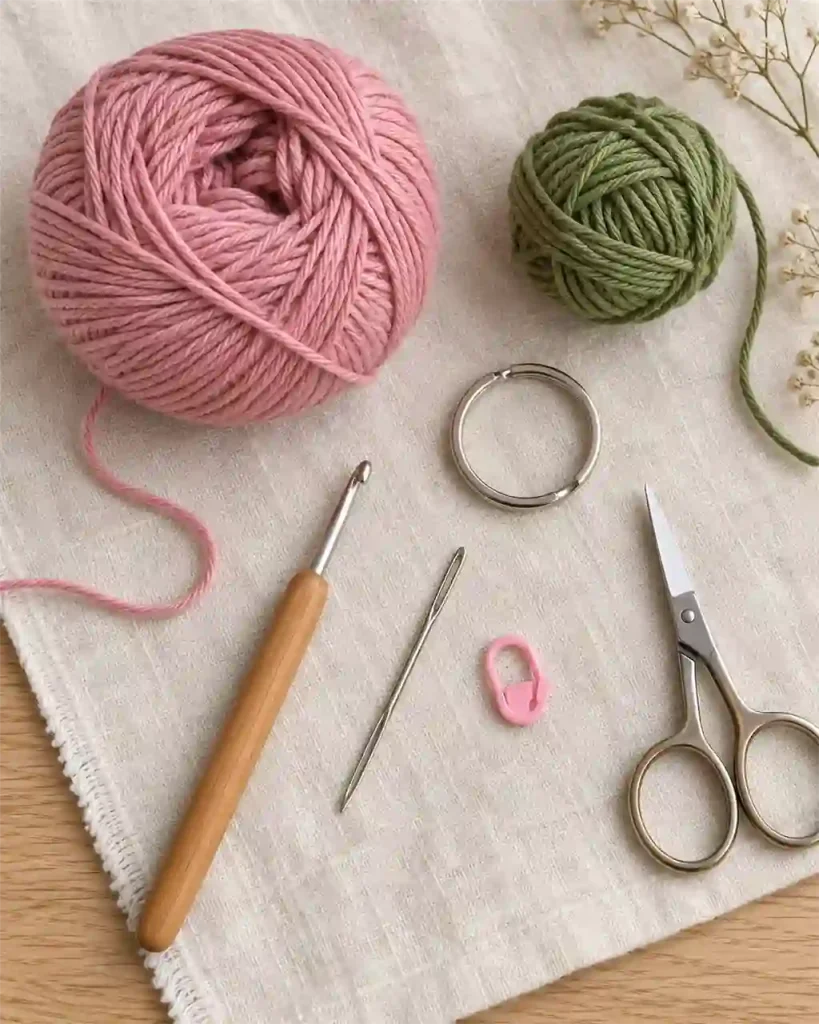
Gather these supplies for the Crochet Tulip Keychain Pattern:
- Pink yarn: Smooth category 3, light/DK yarn for two flower panels.
- Green yarn: A similar thickness for the stem, leaf, and hanger.
- Hook: 3.5 mm as a starting size.
- Split keyring: One plain metal ring suitable for the finished charm.
- Yarn needle: For joining panels and attaching the green pieces.
- Scissors.
- Removable markers: Useful for matching the panels during sewing.
As untested preparation allowances, reserve approximately 15–25 yards of pink and 8–12 yards of green. These are planning ranges, not measured requirements. Gram quantities are omitted because yarns differ in their length-to-weight ratio.
Smooth cotton is a practical starting choice when you want clearly visible stitches. Another fiber can work, but it changes the feel and potentially the dimensions. Use compatible care instructions across both colors. Choose a ring without sharp or rough edges that could abrade the yarn hanger. No wire, glue, beads, or stuffing are required for this version.
Crochet Tulip Keychain Pattern: Abbreviations and special stitches
This Crochet Tulip Keychain Pattern uses US terminology:
- ch: Chain.
- sl st: Slip stitch.
- sc: Single crochet.
- hdc: Half double crochet.
- dc: Double crochet.
- tr: Treble crochet.
- inc: Work 2 sc into the same stitch.
- st/sts: Stitch/stitches.
For tr, yarn over twice, insert the hook, draw up a loop, then yarn over and pull through two loops three times.
A top shell means work hdc, dc, tr, dc, and hdc into one base stitch. It creates one pointed lobe along the tulip’s upper edge.
Beginning ch-1 does not count as a stitch. Turn the panel after each row except the final decorative row. Numbers in square brackets give the completed stitch count.
Crochet Tulip Keychain Pattern Gauge, Size and Notes
Exact gauge is flexible for a decorative charm. Matching the two panels matters more than reaching a specific dimension: lay them together before assembly and compare their edges and upper points.
The Crochet Tulip Keychain Pattern begins with 5 sc, increases to 7, 9, and 11 sc, then holds at 11 sc for four rows. The decorative top uses those 11 base stitches to create three shells separated by slip stitches.
The approximate 3–4-inch height is an untested estimate. Measure from the top of the flower to the bottom of the stem, excluding the hanger and keyring. Record that measurement if you want a matching set.
Use both top loops unless otherwise stated. Keep turning chains outside the row count. Work the green details separately, then use their tails for sewing. The keyring hangs from a reinforced yarn loop rather than a single loose stitch.
Crochet Tulip Keychain Pattern: Method overview
Make the two pink panels first. Each begins at the narrow bottom and widens toward the top. Several straight rows create the flower body, then three shells form the recognizable tulip outline.
Next, crochet a narrow green strip for the stem and a small leaf around a foundation chain. A separate chain-and-slip-stitch cord forms the hanger.
The Crochet Tulip Keychain Pattern is assembled by placing the panels together with their preferred sides facing outward. Tuck one end of the stem between their bottom edges and secure it while joining the pink layers.
Attach the leaf near the flower base, keeping it clear of the seam. Pass the hanger through the metal ring and sew both ends to several stitches near the upper center. Finish by checking the seams and gently pulling on each attachment. The result should remain flat rather than becoming a padded bud.
Crochet Tulip Keychain Pattern: Step-by-Step Tutorial
Crochet Two Matching Pink Tulip Panels
With pink yarn, ch 6.
- Row 1: Sc in the second chain from the hook and each remaining chain. [5]
- Row 2: Ch 1, turn. Inc in the first stitch, sc in the next 3 stitches, inc in the last stitch. [7]
- Row 3: Ch 1, turn. Inc, sc in the next 5 stitches, inc. [9]
- Row 4: Ch 1, turn. Inc, sc in the next 7 stitches, inc. [11]
- Rows 5–8: Ch 1, turn, sc in all 11 stitches. [11 per row]
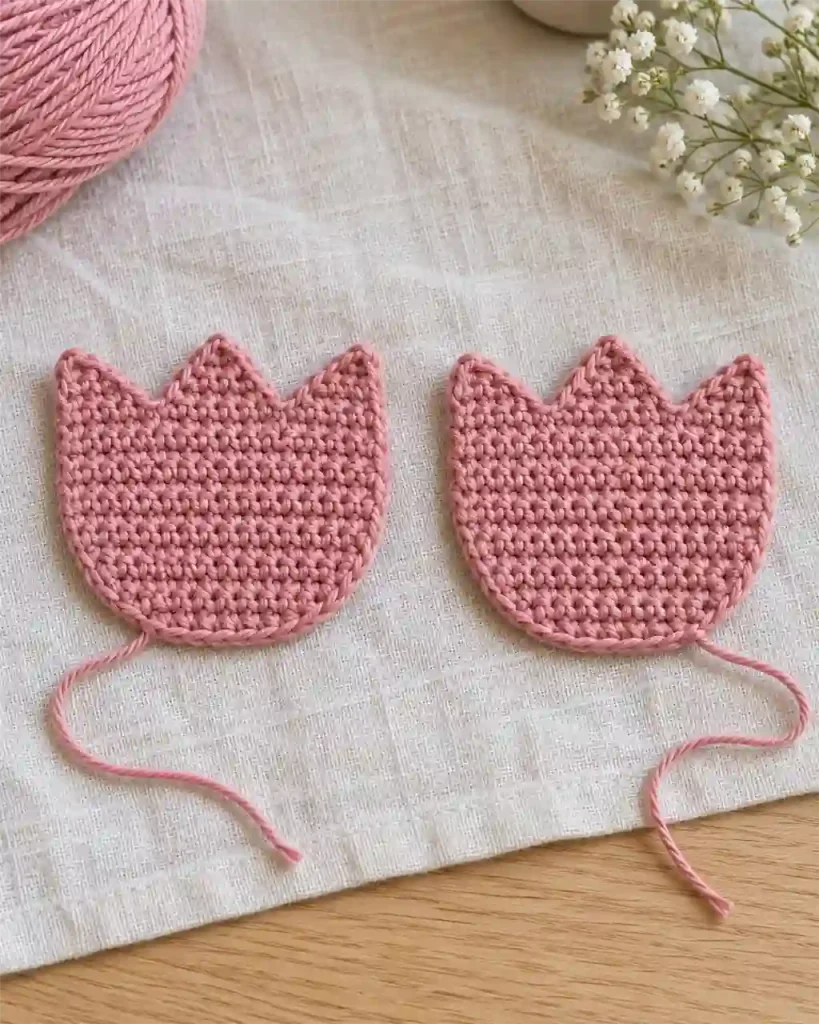
Row 9: Ch 1, turn. Sl st in stitch 1; top shell in stitch 2; sl st in stitches 3–5; top shell in stitch 6; sl st in stitches 7–9; top shell in stitch 10; sl st in stitch 11.
The top contains three shells and eight slip stitches: 23 stitches in total. Fasten off with a sewing tail. Make a second identical panel for the Crochet Tulip Keychain Pattern and compare them before joining.
Make the Green Stem and Leaf
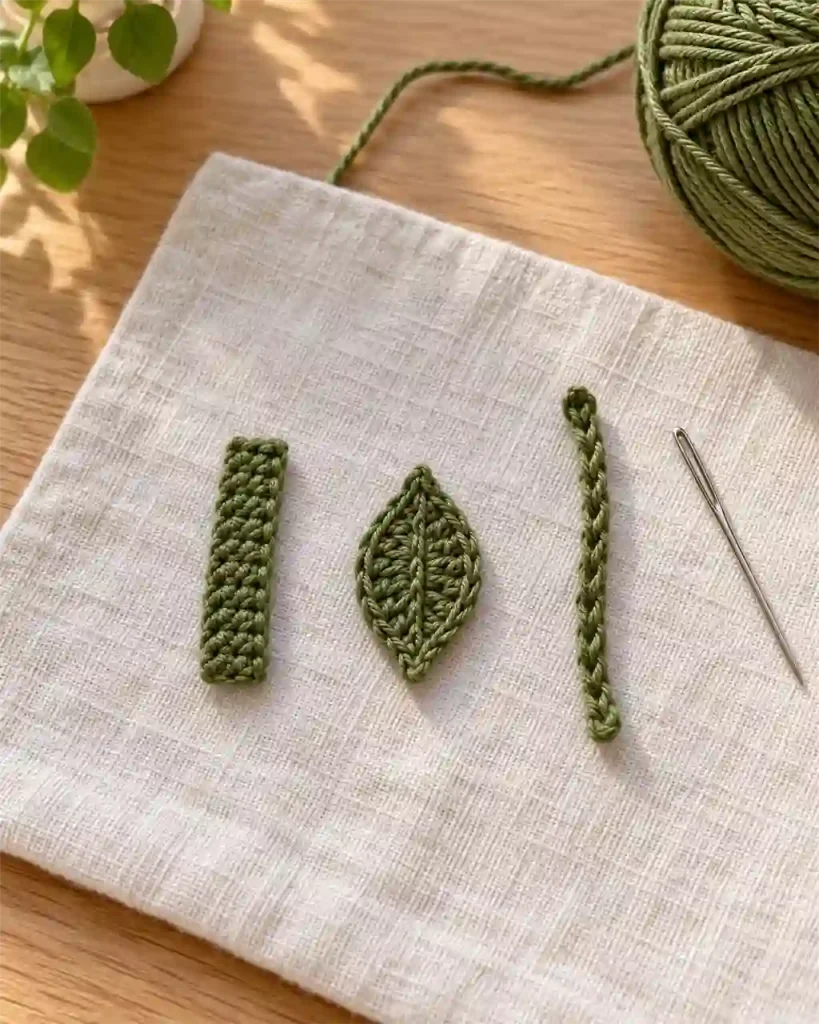
Stem: With green yarn, ch 9.
- Sc in the second chain from the hook and each remaining chain. [8]
- Ch 1, turn, sc in every stitch. [8]
- Fasten off with a long sewing tail.
The strip’s long direction becomes the stem’s length. Keep the two rows narrow rather than rolling them into a tube.
Leaf: Ch 8. Starting in the second chain from the hook, work sc, hdc, dc, dc, hdc, and sc across the next six chains. Work 3 sc into the final chain to turn around its end.
Rotate to the unused side of the foundation. Across the remaining six chain foundations, work sc, hdc, dc, dc, hdc, and sc. Join to the first sc. You have 15 stitches around the chain: six on each side and three at the turning end.
Fasten off with a sewing tail. This Crochet Tulip Keychain Pattern uses one leaf. Place its broader base beside the top of the stem and let its tip point outward. Leave both pieces separate until you have checked their proportions against the panels.
Crochet the Hanger and Prepare the Layers
With green yarn, leave a starting tail for sewing and ch 12. Sl st in the second chain from the hook and each remaining chain. You have 11 slip stitches along the cord. Fasten off with another sewing tail.
Pass one end of the cord through the split ring and bring the ends together. This creates a small hanging loop with the ring captured inside it. Check that the cord can move freely without rubbing against a sharp edge.
Place the pink panels together and align their three upper lobes. Mark the lower corners and the central top shell to help maintain the alignment.
For this Crochet Tulip Keychain Pattern, tuck approximately ½ inch of one stem end between the lower panel edges. The amount is a placement guide rather than a tested measurement. Check that enough stem remains visible and that its overlap provides room for several securing stitches. Set the hanger aside until the pink seam is complete.
Crochet Tulip Keychain Pattern: Assembly
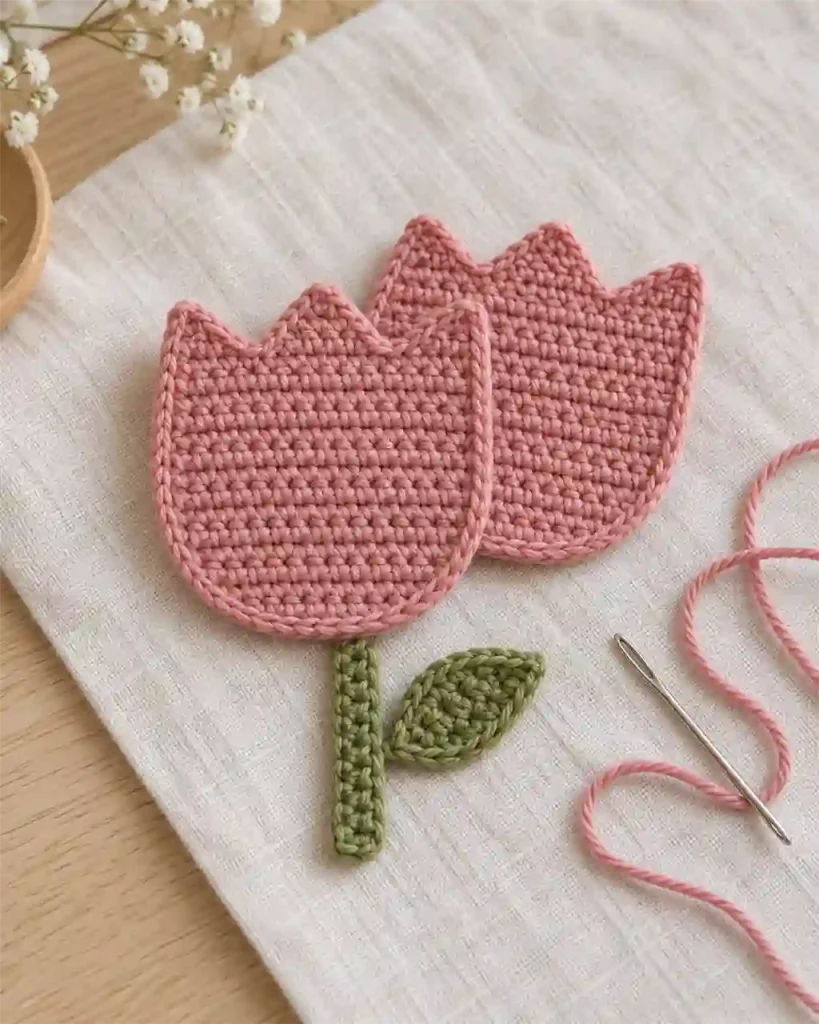
Thread the pink sewing tail onto a yarn needle. Whipstitch through corresponding panel edges, keeping the seam relaxed enough to preserve the outline. Follow each top shell carefully rather than sewing straight across the spaces between the three lobes.
At the bottom, sew through both pink layers and the tucked green stem several times. Spread these stitches across the overlap so the attachment does not rely on one strand.
Attach the leaf base to the stem near the flower, using several small green stitches. Keep its tip free if desired.
Finally, sew both hanger ends securely near the upper center, catching several stitches through both pink layers. The Crochet Tulip Keychain Pattern should hang with the flower upright and the stem pointing down. Hide the hanger tails inside the layers where practical. Gently tug the ring, stem, and leaf separately, then reinforce any point that shifts noticeably.
Crochet Tulip Keychain Pattern: Finishing and care
Hide remaining tails through several stitches, changing direction before trimming. Avoid leaving thick knots at the panel edges or exposed strands that can catch on keys.
Gently flatten the flower with your fingers. If further shaping is needed, follow the yarn label’s blocking instructions and avoid treating all fibers as heat-safe. The finished charm should stay flat without stuffing or rigid inserts.
Care for the Crochet Tulip Keychain Pattern according to the yarn and hardware. Spot cleaning is a useful first option. Remove the split ring before wet cleaning when practical, and let the charm dry completely before reattaching it.
Inspect the cord periodically for wear from the metal ring. This is a decorative accessory, not a load-bearing strap. Keep the small hardware and yarn loop away from young children and pets, and repair loose attachments before continued use.
FAQs and Troubleshooting for Crochet Tulip Keychain Pattern
1. Why do I have the wrong count after an increase row?
Each increase row adds two stitches: one extra at the first stitch and one at the last. The sequence is 5, 7, 9, and 11 sc. Count the actual stitches without including the turning chain. Missing the final stitch is a common reason one side becomes narrower than the other.
2. Why do my panels have different sizes?
Compare their row counts, hook, yarn thickness, and tension. Make both panels with the same supplies and avoid stretching one to match the other. If the difference is substantial, remake the mismatched panel. A tight sewing seam will not correct it and can distort the flower’s outline.
3. Can I use worsted yarn instead of DK?
Yes, with a suitable hook, but expect a larger charm and different yarn consumption. Make one sample before preparing several. Keep the green yarn close in thickness to the pink so the stem and hanger look proportional. The approximate dimensions supplied here do not apply reliably after changing yarn weight.
4. How can I make the keychain smaller?
Use a finer yarn and an appropriate smaller hook while keeping the stitch counts unchanged. This preserves the arrangement of the three top shells. Reducing the panel width without redesigning the final row leaves too few base stitches for the written lobe placement. Test the resulting hanger against your chosen ring.
5. What should I do if the ring attachment loosens?
Stop using the charm until the attachment is repaired. Check whether the sewing loosened or the cord itself has worn. Reinforce sound fabric with fresh yarn across several stitches; replace a damaged cord. Inspect the ring for rough edges and avoid relying on a single stitch or a loose knot.
Final Thoughts
This Crochet Tulip Keychain Pattern combines two flat pink panels with simple green details and a metal ring. Matching the panels and reinforcing the hanger are the most useful finishing steps. Since the design is independently drafted and untested, make a sample before producing a full gift set, and record the yarn and hook combination that gives you the proportions you prefer. Choose a different flower color for each recipient while keeping the construction consistent. For another small floral embellishment, explore the daisy crochet flower pattern and create a coordinating handmade accessory.