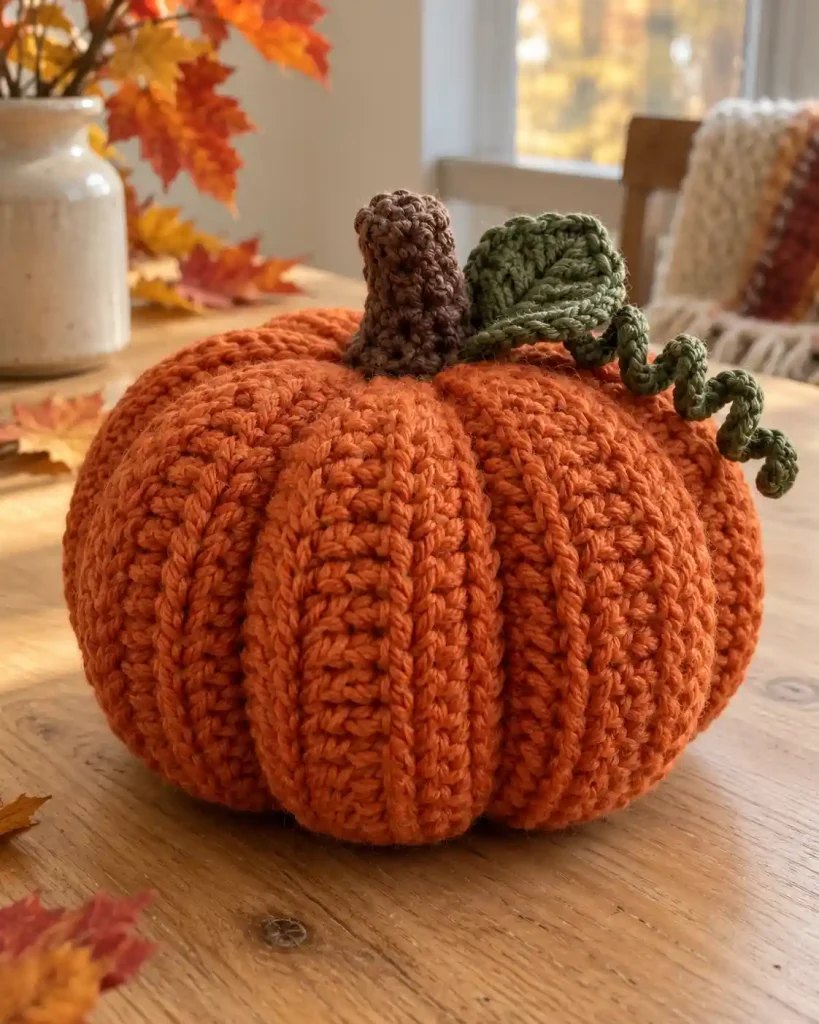
This Medium Crochet Pumpkin Pattern turns simple crochet ribbing into a soft, dimensional pumpkin for fall decorating. The body is worked flat, seamed into a tube, stuffed, and shaped into pumpkin sections before adding a separate stem, leaf, and curly tendril. You’ll learn how to keep the ribbed body even, close the openings securely, create the pumpkin shape, and assemble the decorative pieces using US crochet terms.
Medium Crochet Pumpkin Pattern at a Glance
This Medium Crochet Pumpkin Pattern is suitable for an advanced beginner who already knows basic stitches, simple seaming, and how to work into the back loop only.
The pumpkin body is made with worsted weight yarn and a 4 mm crochet hook. Instead of crocheting a complicated three-dimensional shape in rounds, you make a rectangular piece in rows of back-loop-only half double crochet. The rectangle is then joined into a tube, gathered at both ends, stuffed, and shaped.
The approximate finished pumpkin measures 7–8 inches (18–20 cm) across and 4.5–5.5 inches (11.5–14 cm) tall, excluding the stem.
Estimated making time is about 1.5–2.5 hours.
Gauge is not critical for this decorative project, although consistent tension helps produce attractive ribbing.
Measurements, yarn quantities, and making time in this pattern are approximate, untested estimates.
Medium Crochet Pumpkin Pattern: Materials and Yarn Quantities
For this Medium Crochet Pumpkin Pattern, a smooth worsted weight yarn provides enough structure for the pumpkin while keeping the fabric flexible enough for shaping.
You will need:
- Worsted weight yarn (Category 4) in orange: approximately 90–120 yd / 82–110 m, about 50–70 g
- Worsted weight yarn in brown: approximately 8–12 yd / 7–11 m, about 5–8 g
- Worsted weight yarn in green: approximately 10–15 yd / 9–14 m, about 6–10 g
- 4 mm crochet hook
- Polyester fiberfill
- Yarn needle
- Scissors
- Stitch marker
- Measuring tape
These yarn amounts are approximate rather than tested quantities. Your actual usage depends on tension, yarn construction, and how firmly the pumpkin is stuffed.
Cotton works well when you want crisp, visible ribs. Acrylic is also suitable and usually produces a softer pumpkin. You can substitute another Category 4 yarn without changing the basic instructions, but differences in thickness may affect the finished dimensions.
Medium Crochet Pumpkin Pattern: Abbreviations and Special Stitches
The Medium Crochet Pumpkin Pattern uses standard US crochet terminology.
- ch – chain
- st(s) – stitch(es)
- sl st – slip stitch
- sc – single crochet
- hdc – half double crochet
- dc – double crochet
- inc – work 2 sc in the same stitch
- BLO – back loop only
- R – round
BLO hdc: Work a half double crochet through only the back loop of the stitch instead of through both loops. This technique creates the raised ribs that give the pumpkin its texture.
For the pumpkin body, the beginning ch 1 does not count as a stitch. Each completed body row should therefore contain exactly 30 hdc.
The stem is worked in continuous rounds. Do not join at the end of each round unless specifically instructed.
If you are new to written crochet instructions, the Craft Yarn Council’s Crochet Abbreviations Master List is a useful reference for standard US crochet terms and abbreviations.
Medium Crochet Pumpkin Pattern Gauge, Size and Notes
Gauge is flexible because the Medium Crochet Pumpkin Pattern is a decorative project rather than a fitted item. As a useful reference, aim for approximately 15 hdc and 11 rows per 4 inches / 10 cm in BLO hdc.
Measure the fabric while it lies flat and relaxed without stretching the ribs.
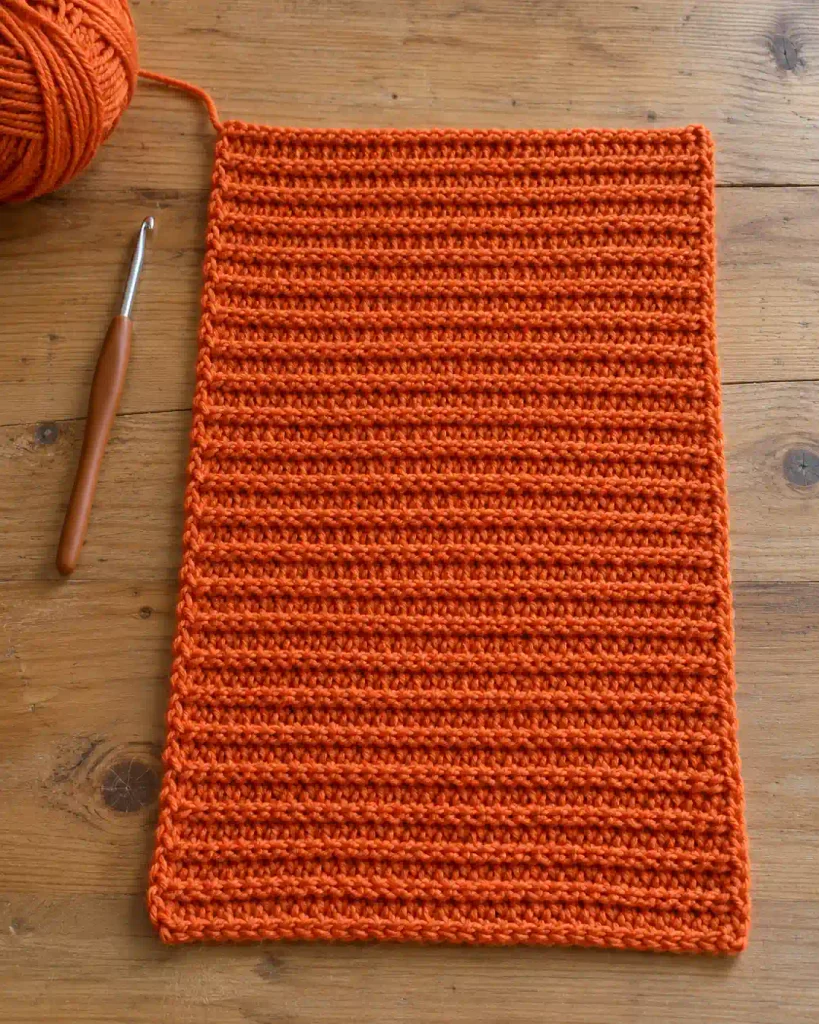
Before assembly, the body rectangle should measure approximately 8 × 13 inches / 20 × 33 cm.
The finished pumpkin is approximately:
- 7–8 in / 18–20 cm wide
- 4.5–5.5 in / 11.5–14 cm tall
- Stem: approximately 2 in / 5 cm tall
These are untested approximate dimensions.
The body is worked back and forth in rows. The stem is worked separately in continuous rounds.
Count the body stitches regularly. If your width differs considerably from the approximate measurement, adjust hook size or tension. If only the circumference needs changing, adjust the number of body rows.
Medium Crochet Pumpkin Pattern: Method Overview
The Medium Crochet Pumpkin Pattern begins with a simple ribbed rectangle. Back-loop-only half double crochet creates raised lines across the fabric. Once assembled, these lines run vertically and help give the pumpkin a realistic ridged appearance.
After completing the rectangle, bring its short row edges together and seam them to create a tube. Gather one end tightly, turn the piece right side out, add fiberfill, and gather the second opening.
The stuffed form is then shaped with long strands of orange yarn. Passing these strands through the center and around the outside creates several defined pumpkin sections.
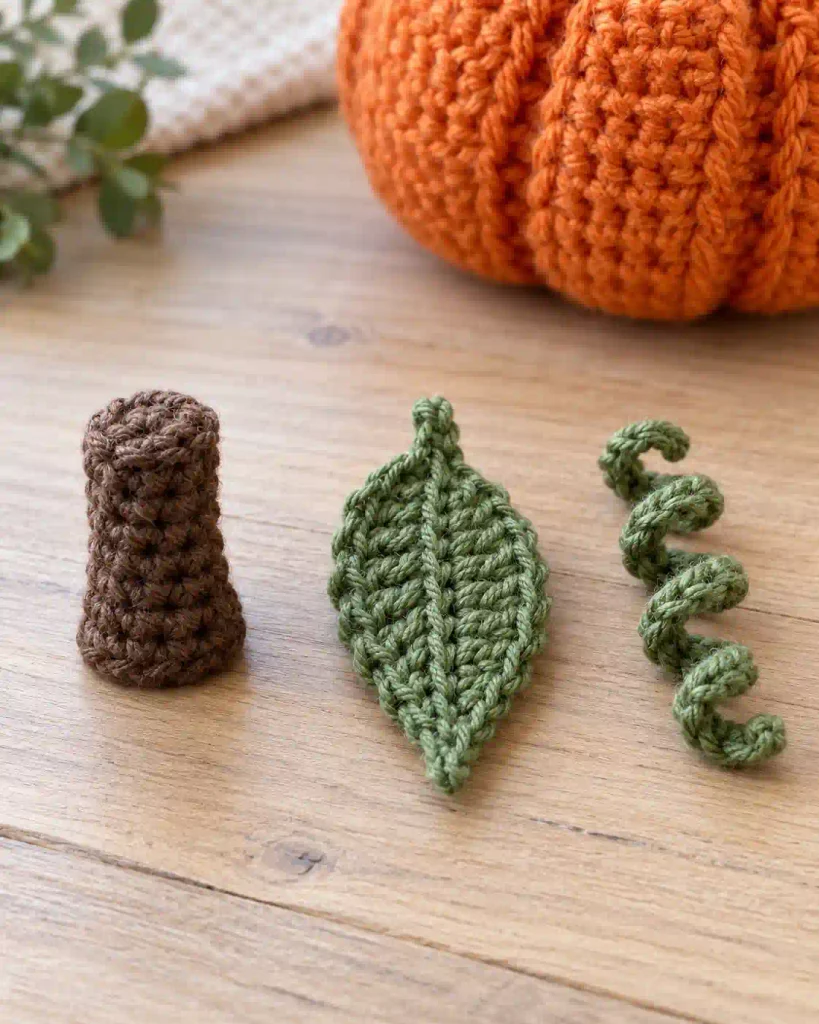
Next, crochet the brown stem in continuous rounds. The green leaf is worked around both sides of a foundation chain, while the tendril is made by placing multiple single crochets into each chain.
Finally, attach the decorative pieces securely around the top center.
Medium Crochet Pumpkin Pattern Tutorial
Crochet the Ribbed Pumpkin Body
Begin the Medium Crochet Pumpkin Pattern with orange worsted weight yarn and a 4 mm hook.
Foundation: Ch 31.
Row 1: Starting in the second ch from the hook, hdc in each ch across. Turn. (30 hdc)
Row 2: Ch 1, BLO hdc in each st across. Turn. (30 hdc)
Rows 3–36: Repeat Row 2. (30 hdc per row)
Do not count the turning ch 1 as a stitch.
When Row 36 is complete, lay the rectangle flat without stretching it. It should measure approximately 8 inches / 20 cm high and 13 inches / 33 cm wide.
Check the stitch count before assembly. Every row should have 30 hdc. Missing stitches along either edge can make the pumpkin uneven.
Bring Row 1 and Row 36 together with the right side of the ribbing facing inward. Slip stitch through corresponding stitches along both edges to form a tube.
Alternatively, fasten off with a long tail and sew the edges together using a yarn needle.
Turn the seam toward the inside.
Gather, Stuff, and Shape the Pumpkin
Cut a long length of orange yarn and thread it through a yarn needle.
Weave the needle in and out around one open edge of the tube, approximately one stitch or row-end apart. Continue around the entire opening.
Pull the yarn gradually until the opening gathers completely. Make several secure stitches across the center and knot the yarn where it will remain hidden.
Turn the pumpkin right side out.
Add fiberfill a little at a time. Fill the outer edges first, then the center. The body should feel full but remain compressible. Excessive stuffing makes the shaping grooves difficult to create.
Gather the second opening using the same method and secure it tightly.
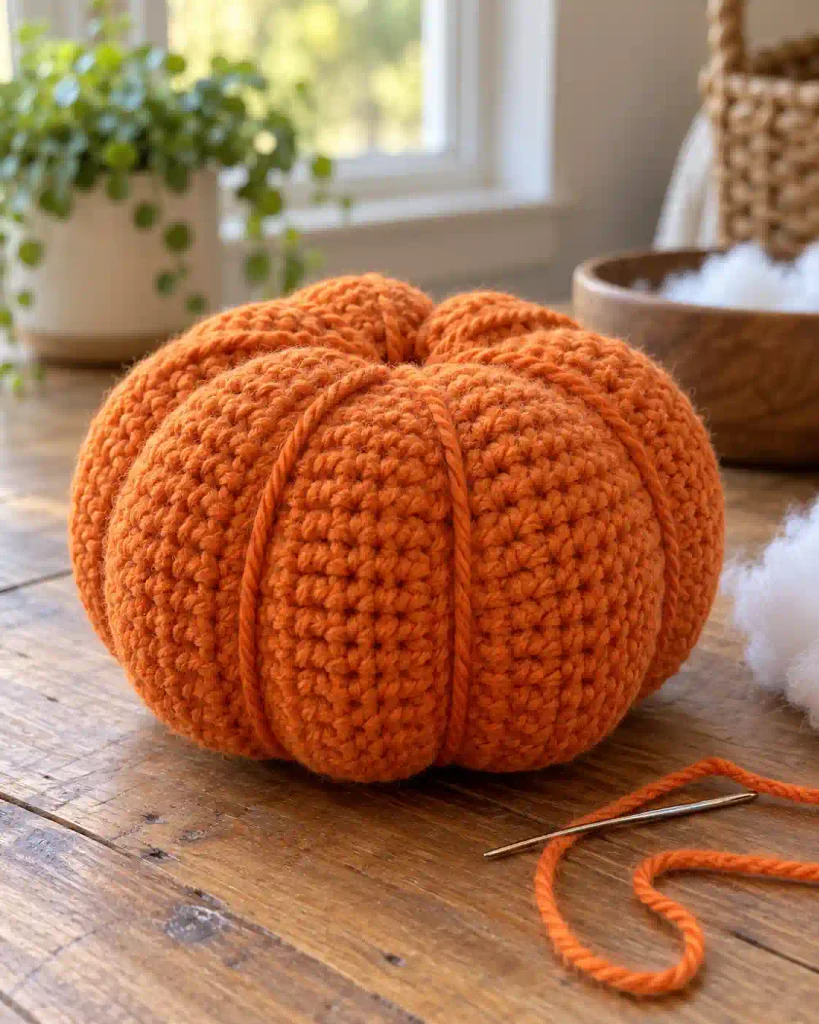
To shape the Medium Crochet Pumpkin Pattern, thread a long strand of orange yarn through the center from top to bottom. Bring the yarn around the outside of the pumpkin and pass it through the center again.
Pull gently until a groove appears.
Repeat this process at evenly spaced positions around the pumpkin to create approximately six to eight sections. Adjust the tension until the sections look balanced before securing the yarn.
Crochet the Stem, Leaf, and Tendril
For the stem, use brown worsted weight yarn.
R1: Make a magic ring and work 6 sc into the ring. (6)
R2: Inc in every st around. (12)
R3: Sc in each st around. (12)
R4: Sc in each st around. (12)
R5: Sc in each st around. (12)
R6: Sc in each st around. (12)
R7: Sc in each st around. (12)
Sl st in the next st and fasten off, leaving approximately 12 inches / 30 cm for sewing. Add a small amount of fiberfill if desired.
For the leaf, use green yarn.
Ch 12. Starting in the second ch from the hook, work:
Sl st in the first ch, sc in the next, hdc in the next, dc in each of the next 5 ch, hdc in the next, sc in the next, then 3 sc in the final ch.
Rotate the work and crochet along the unused loops on the opposite side of the foundation chain: sc in the next ch, hdc in the next, dc in each of the next 5 ch, hdc in the next, sc in the next, then sl st into the remaining end of the foundation.
Fasten off with a sewing tail.
For the tendril, ch 25. Starting in the second ch, work 3 sc in each chain across. The strip will curl naturally. Fasten off with a sewing tail.
Medium Crochet Pumpkin Pattern: Assembly
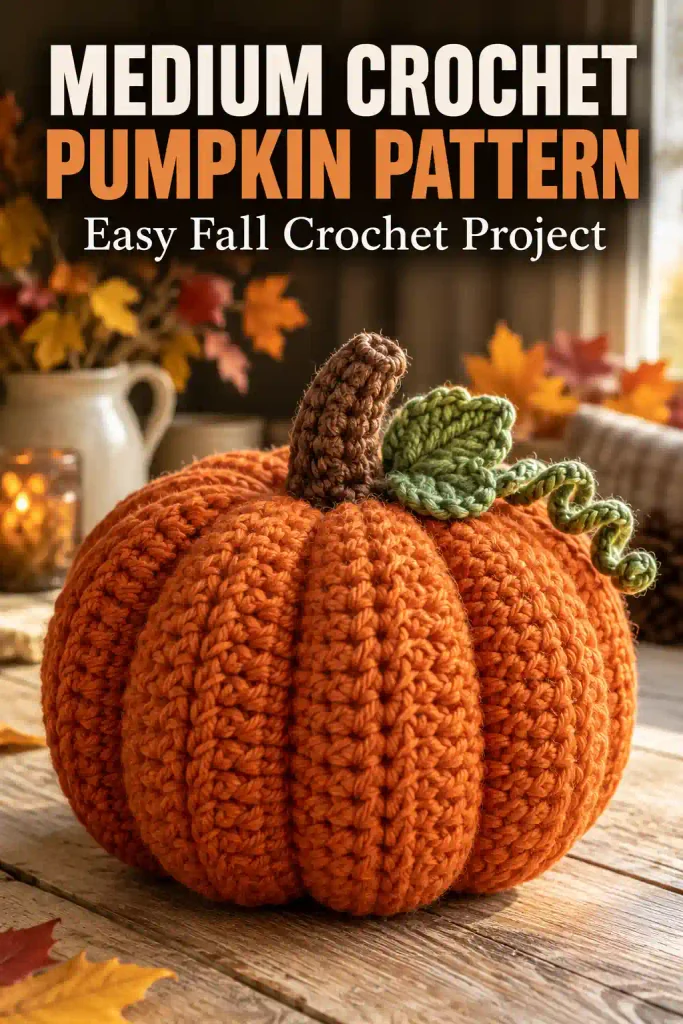
Once all the components of the Medium Crochet Pumpkin Pattern are complete, place the stem over the gathered top center. Use its long brown yarn tail to sew around the open lower edge of the stem, catching secure stitches in the pumpkin body.
Position the leaf beside the stem. Sew the base and lower portion of the leaf to the pumpkin while leaving most of the leaf free so it keeps its natural shape.
Attach the curly tendril close to the stem and leaf. Secure its starting end firmly but leave the spiral itself unattached.
Before weaving in the remaining tails, look at the pumpkin from several angles. Adjust the leaf direction and the depth of the pumpkin grooves if necessary.
The stem should sit upright or lean slightly without feeling loose. Secure all assembly stitches firmly, especially if the pumpkin will be handled rather than used only as stationary decor.
Medium Crochet Pumpkin Pattern: Finishing and Care
Finishing the Medium Crochet Pumpkin Pattern carefully helps the pumpkin hold its shape.
Weave loose yarn ends through several nearby stitches before trimming them. Whenever possible, draw shaping and assembly tails into the stuffed interior so they remain hidden.
Gently redistribute the fiberfill with your fingers if one side looks flatter than another. You can also adjust the shaping strands before securing them permanently if one pumpkin section is noticeably deeper.
The stuffed pumpkin does not normally need blocking. If desired, the leaf can be lightly blocked before attachment when the chosen fiber is suitable for blocking.
For cleaning, follow the care instructions on the labels of both your yarn and fiberfill. Do not assume every finished pumpkin is machine washable.
Finally, check the seam, gathered openings, shaping strands, stem, leaf, and tendril for secure attachment.
FAQs and Troubleshooting for Medium Crochet Pumpkin Pattern
Why does my pumpkin body lose stitches as I crochet?
Every body row in the Medium Crochet Pumpkin Pattern should contain 30 hdc. The most common mistake is skipping the first or last stitch when working BLO hdc. Remember that the beginning ch 1 does not count as a stitch. Count your stitches every few rows so you can correct an error before completing the rectangle.
Why is my finished pumpkin too tall or narrow?
First check the rectangle measurement. It should be approximately 8 × 13 inches / 20 × 33 cm before assembly. If the circumference is too small, add more BLO hdc rows while maintaining 30 stitches in every row. Also avoid overstuffing, which can make the finished pumpkin look taller and more rigid.
Can I use acrylic yarn instead of cotton?
Yes. A similar Category 4 acrylic yarn works well for this Medium Crochet Pumpkin Pattern. Acrylic generally creates a softer fabric, while cotton can produce sharper stitch definition. Because yarn thickness varies even within the same weight category, check the rectangle measurement before assembly rather than relying only on the yarn label.
How do I make the crochet pumpkin larger or smaller?
The simplest option is to change yarn weight and use a hook appropriate for that yarn. You can also modify the pattern itself. Change the starting chain to adjust the pumpkin’s height and change the number of rows to adjust its circumference. Try to preserve similar height-to-circumference proportions for a rounded shape.
How should I clean and store the finished pumpkin?
Always follow the care requirements of the specific yarn and stuffing you used. Spot cleaning may be sufficient for a decorative pumpkin. Before seasonal storage, make sure the pumpkin is completely dry. Store it somewhere clean and dry without placing heavy objects on top, as prolonged compression can distort the stuffing and shaping.
Final Thoughts
The Medium Crochet Pumpkin Pattern is a practical way to turn basic stitches into textured handmade fall decor. The ribbed rectangle keeps the crochet itself approachable, while gathering, stuffing, and shaping transform the simple fabric into a dimensional pumpkin. Once you understand the construction, changing yarn colors or adjusting the dimensions makes it easy to create a coordinated pumpkin collection. For another project that uses simple shaping techniques, try the Crochet Strawberry Pattern, or practice working in rounds with the Easy Crochet Coaster Pattern.