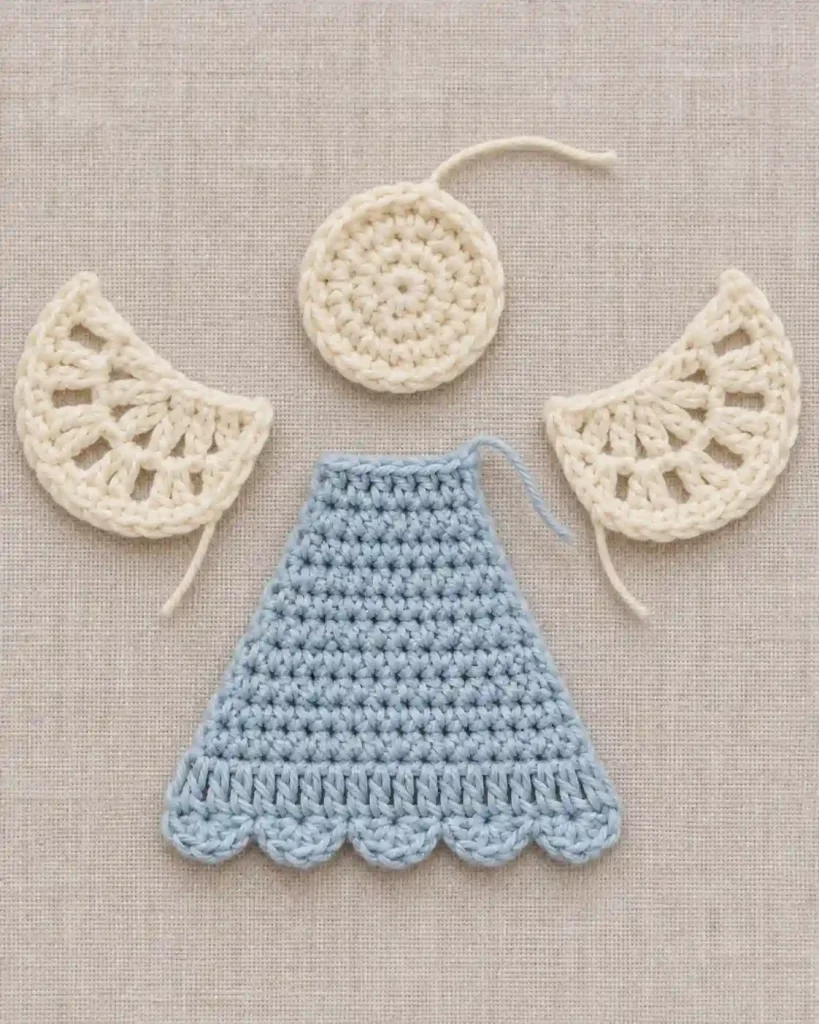
Crochet angel ornament pattern projects bring a handmade touch to Christmas decorating. This tutorial covers a flat angel with a circular head, scalloped dress, and fan-shaped wings. Pair it with a crochet snowflake ornament pattern, crochet Christmas bell pattern, or crochet Christmas star ornament. For another design, explore Yarnhild’s angel ornament tutorial. Below, you will learn the materials, stitches, assembly, and finishing steps.
Crochet Angel Ornament Pattern at a Glance
This crochet angel ornament pattern suits confident beginners who can increase, crochet in rows, and join rounds. The design uses four separate pieces: a head, a dress, and two matching wings.
| Feature | Details |
|---|---|
| Skill level | Confident beginner |
| Terminology | US crochet terms |
| Yarn | Category 3, light/DK weight |
| Hook | 3.5 mm |
| Construction | Joined rounds, turned rows, and sewn assembly |
| Estimated height | Approximately 9–11 cm, excluding the loop |
| Estimated width | Approximately 10–12 cm across the wings |
| Gauge | Flexible for this decorative project |
| Testing status | Original design; not physically tested |
The measurements are estimates rather than verified results. Your yarn, tension, and wing placement will influence the final proportions.
No measured making time is available. Plan a relaxed crafting session, plus drying time if you block the pieces.
Crochet Angel Ornament Pattern: Materials and Yarn Quantities
For this crochet angel ornament pattern, choose smooth yarn that makes individual stitches easy to identify. Cotton offers definition and structure. Alternatively, a cotton blend can produce a softer finish.
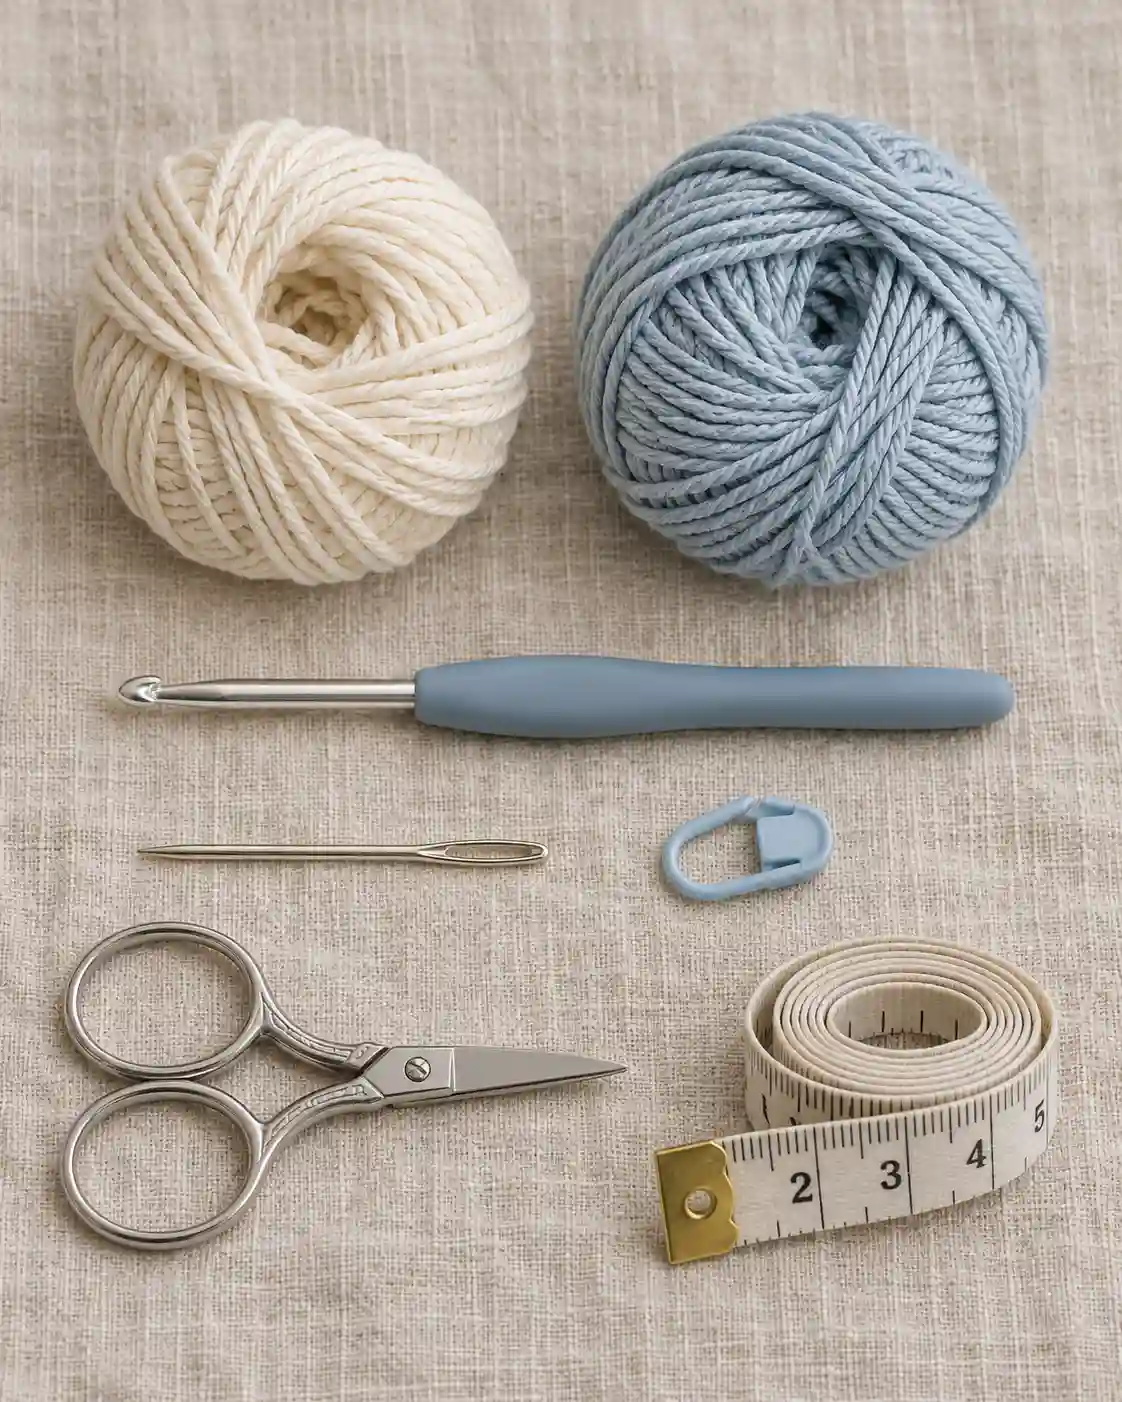
You will need:
- Cream DK yarn: Approximately 20–30 m for the head, wings, sewing, and hanging loop.
- Dress-color DK yarn: Approximately 15–25 m in white, blue, pink, or another preferred shade.
- 3.5 mm crochet hook.
- Yarn needle for assembly and weaving ends.
- Scissors.
- Removable stitch marker.
- Ruler or measuring tape.
- Blocking mat and rustproof pins, if blocking.
These quantities are untested planning allowances, including finishing tails. Grams depend on your yarn’s labeled meterage, so an exact weight would be misleading.
Keep both yarn colors similar in thickness. Otherwise, heavier wings may overpower a delicate dress.
Avoid fuzzy yarn for your first sample because it can hide increases and joining stitches. Likewise, loosely spun yarn may split during sewing.
The flat construction requires no stuffing, wire, beads, or rigid insert.
Crochet Angel Ornament Pattern: Abbreviations and Special Stitches
This crochet angel ornament pattern uses US terminology throughout.
- ch: Chain.
- sc: Single crochet.
- dc: Double crochet.
- sl st: Slip stitch.
- st / sts: Stitch / stitches.
- inc: Work 2 sc into one stitch.
- MR: Magic ring.
A shell means 5 dc worked into the same stitch.
For double crochet, yarn over and insert your hook into the indicated stitch. Pull up a loop. Yarn over and pull through two loops twice.
Parentheses identify a repeated sequence. Complete the entire sequence before repeating it.
Bracketed numbers show the completed stitch count.
Starting chains never count as stitches. Joining slip stitches also do not count. Work the first stitch into the first actual stitch of the previous round or row.
Crochet Angel Ornament Pattern Gauge, Size and Notes
Gauge is flexible for this crochet angel ornament pattern because the finished piece serves as a decoration. However, the fabric should feel stable without becoming rigid.
Expect an approximate height of 9–11 cm and width of 10–12 cm, excluding the hanging loop. These dimensions remain untested estimates.
After crocheting the head, measure across its center without stretching. A diameter around 3–4 cm provides a useful proportion check.
If your fabric feels loose, try a smaller hook. Conversely, move up slightly if the stitches feel cramped.
Work the head in joined rounds without turning. Work the dress and wings in turned rows.
Use both loops of each stitch throughout.
Count before continuing, especially after increasing rows. Keep sewing tails approximately 25 cm long. Finally, measure the completed ornament after shaping and drying.
Crochet Angel Ornament Pattern: Method Overview
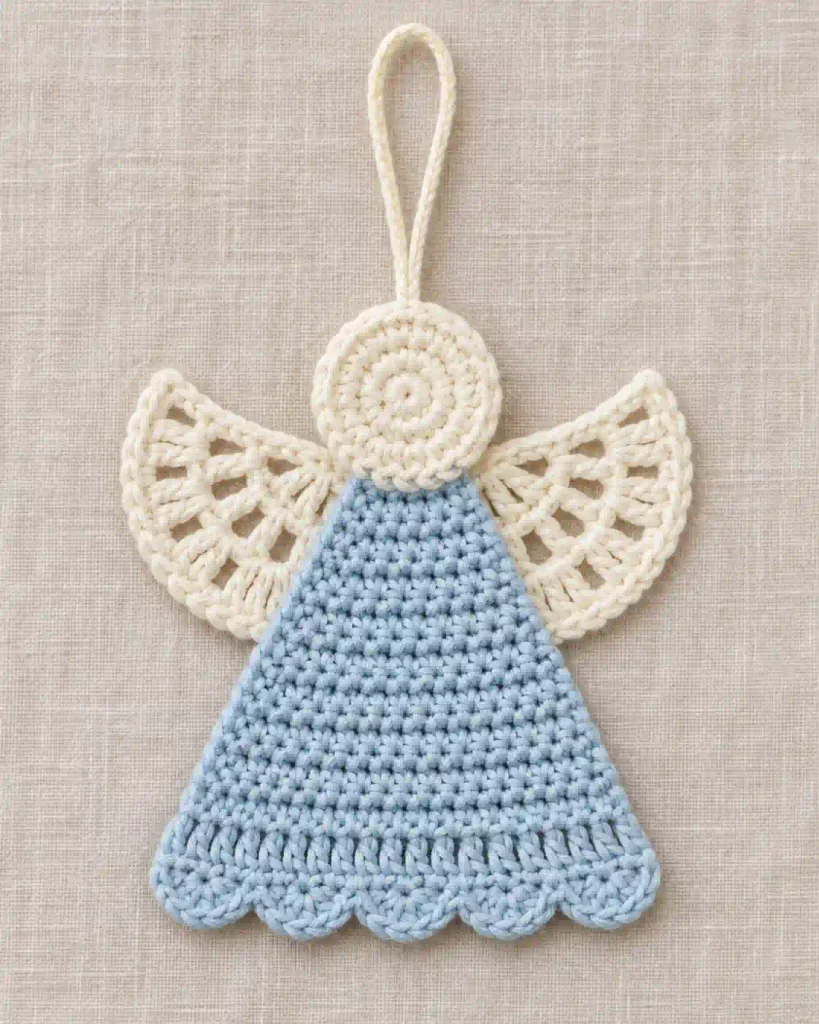
Begin this crochet angel ornament pattern with the circular head. Three single-crochet rounds create a small disc, which remains flat and unstuffed.
Next, crochet the dress from its narrow neckline downward. Increases at both ends gradually widen the fabric.
Once the dress reaches 15 stitches, add a double-crochet row. Then work five shells across the bottom to form the scalloped hem.
Afterward, make two identical wings. Each starts with double crochet in a magic ring. Turning between rows creates an open fan.
Compare the wings before sewing. Their stitch counts and overall size should match.
Attach the head behind the neckline, then position the wings behind the upper dress.
Finally, add the hanging loop through neighboring stitches near the head’s top. Check the balance before securing and hiding the remaining tails.
Step-by-Step Angel Ornament Tutorial
Part 1: Crochet the Circular Head
Start the head of your crochet angel ornament pattern with cream yarn and a 3.5 mm hook.
Round 1: Make an MR. Ch 1, then work 6 sc into the ring. Tighten the ring. Join with a sl st in the first sc. [6 sc]
Round 2: Ch 1. Work 2 sc into every stitch around. Join with a sl st in the first sc. [12 sc]
Round 3: Ch 1. Work (sc in the next stitch, inc in the next stitch) six times. Join with a sl st in the first sc. [18 sc]
Fasten off, leaving a 25 cm sewing tail.
Lay the disc flat and smooth its edge gently. Do not fold or stuff it.
Secure the magic-ring tail through the backs of several stitches. Reverse direction before trimming.
Keep the longer sewing tail available for assembly.
If you count 19 stitches, check whether you included the joining slip stitch. The completed outer round contains exactly 18 single crochets.
Part 2: Shape the Dress and Scalloped Hem
Use your chosen dress color.
Foundation: Ch 6.
Row 1: Sc in the second chain from the hook and each remaining chain. [5 sc] Ch 1, turn.
Row 2: Inc in the first stitch, sc in the next 3 stitches, inc in the last stitch. [7 sc] Ch 1, turn.
Row 3: Inc in the first stitch, sc in the next 5 stitches, inc in the last stitch. [9 sc] Ch 1, turn.
Row 4: Inc in the first stitch, sc in the next 7 stitches, inc in the last stitch. [11 sc] Ch 1, turn.
Row 5: Inc in the first stitch, sc in the next 9 stitches, inc in the last stitch. [13 sc] Ch 1, turn.
Row 6: Inc in the first stitch, sc in the next 11 stitches, inc in the last stitch. [15 sc] Ch 2, turn.
Row 7: Dc in each stitch across. [15 dc] Ch 1, turn.
Row 8: (Skip the next stitch, work 5 dc in the next stitch, sl st in the next stitch) five times. [5 shells]
Fasten off. Each shell repeat uses three base stitches, consuming all 15 stitches from Row 7.
Part 3: Make Two Fan-Shaped Wings
The wings in this crochet angel ornament pattern use matching instructions. Make two with cream yarn.
Row 1: Make an MR. Ch 2, then work 6 dc into the ring. [6 dc] Ch 2, turn.
Row 2: Work 2 dc into every stitch across. [12 dc] Ch 1, turn.
Row 3: Work (sc in the next stitch, 2 sc in the next stitch) six times. [18 sc]
Fasten off, leaving a 25 cm sewing tail.
Pull the magic ring closed, then secure its tail. Keep the two row ends separate.
These pieces form open fans because you turn between rows. Do not join them into circles.
The final single-crochet row creates each wing’s rounded outer edge. Meanwhile, the magic-ring area forms its narrow attachment point.
Place the wings beside each other and compare their proportions. If one looks larger, recount its stitches.
During assembly, rotate the matching fans so their curved edges face outward. Their narrow points will sit behind the dress.
Crochet Angel Ornament Pattern: Assembly
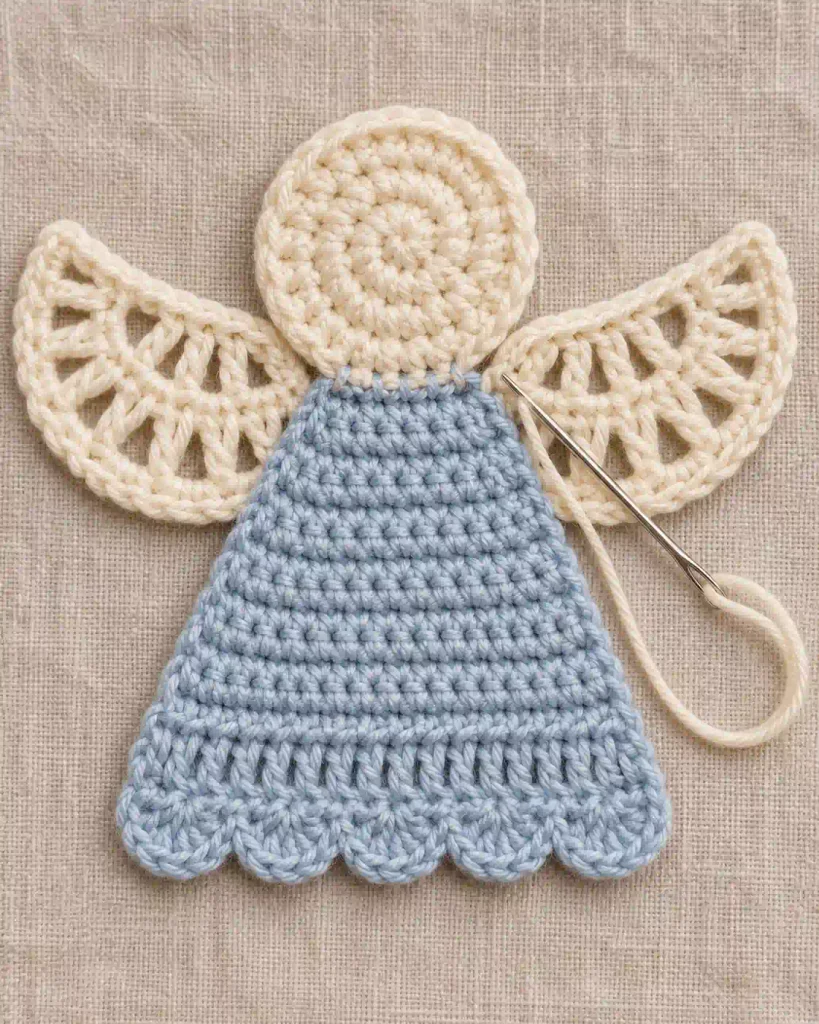
To assemble this crochet angel ornament pattern, arrange the dress with its neckline upward. Choose the surface you prefer as the front.
Place the head’s lower edge behind the neckline, overlapping by approximately 0.5 cm. Center it carefully.
Using the head’s sewing tail, stitch across several neckline and head stitches. Avoid attaching the pieces at one narrow point.
Next, position a wing behind each upper side of the dress. Face the rounded edges outward and slightly upward.
Overlap each narrow wing section with the dress by approximately 1 cm. Sew securely across that overlap, leaving the outer curves free.
For the hanging loop, cut approximately 25 cm of cream yarn. Pass it beneath two neighboring stitches near the head’s top center.
Tie the ends together, forming a loop approximately 5 cm tall. Secure the knot against the back.
Lift the angel and adjust any imbalance before hiding the sewing tails.
Crochet Angel Ornament Pattern: Finishing and Care
Weave each remaining tail through several stitches on the back. Change direction to help prevent loosening.
Keep contrasting dress yarn within the dress fabric. Otherwise, it may show through the cream pieces.
If your yarn permits wet blocking, gently dampen the ornament. Shape the head into a circle and pin both wings evenly.
Spread the hem shells without stretching them into sharp points. Allow the ornament to dry completely before removing the pins.
Follow the yarn label for cleaning and heat guidance. Different fibers require different treatment.
Avoid hanging the angel while wet because moisture and weight can stretch the loop.
Finally, inspect the head seam, both wing attachments, and hanging loop. Store the ornament flat between seasons, with nothing heavy pressing against it.
FAQs and Troubleshooting for Crochet Angel Ornament Pattern
1. Why does my scalloped hem have an extra stitch?
Row 7 must contain exactly 15 dc. Each shell repeat uses three base stitches, so five repeats fit evenly. Check whether you accidentally worked into the turning chain. If the row contains 16 stitches, undo it and correct the count before adding the shells.
2. Why will my angel not lie flat?
Check the head increases and both wing counts first. Missing increases can cause cupping, while extra stitches may create ruffles. Tight sewing can also distort flat pieces. Loosen puckered seams, then block gently if the yarn permits. Avoid stretching the fabric to conceal a counting mistake.
3. Can I use another yarn weight?
You can substitute yarn in this crochet angel ornament pattern, keeping the same weight throughout. Choose a suitable hook for stable fabric. Thicker yarn creates a larger decoration, while thinner yarn produces a smaller one. The original size and yarn estimates will no longer apply.
4. How can I make the dress longer?
After Row 7, ch 2, turn, and work another row of 15 dc without increasing. Repeat if desired. Before starting the scalloped hem, ch 1 and turn. Keeping the row at 15 stitches preserves the five-shell arrangement. Additional rows require more yarn and change the proportions.
5. How should I clean and store the ornament?
Follow the care requirements of every yarn used. If they differ, choose a method compatible with all fibers. Spot cleaning may suit small marks. After washing, reshape the angel flat and let it dry completely. Store it in a dry container without crushing the wings or scalloped hem.
Final Thoughts
This crochet angel ornament pattern combines familiar stitches with careful shaping and assembly. Check each count before continuing, especially before adding the five dress shells. Next, position the wings evenly and secure the head across the neckline. Since the design remains untested, complete one sample before preparing a matching collection. Record your yarn, hook, measurements, and adjustments for future use. Once you like the proportions, experiment with different dress colors while keeping the construction consistent. Finally, inspect the hanging loop and seams before displaying your angel. A little attention during finishing will help the ornament hang neatly throughout the season.