A Crochet Christmas Garland Pattern is a wonderful way to decorate your home with handmade holiday charm. This beginner-friendly project combines miniature Christmas trees and simple crochet stars into one festive garland. Hang it across a mantel, along a shelf, or above a doorway for a cozy seasonal touch. In this free tutorial, you’ll learn how to crochet each motif, make the connecting chain, and assemble a beautiful Christmas decoration.
Crochet Christmas Garland Pattern at a Glance
This Crochet Christmas Garland Pattern features nine individual decorations: five miniature Christmas trees and four five-pointed stars. The motifs are crocheted separately, then attached to a long foundation chain in an alternating arrangement.
The trees use simple increases to form a triangular shape, while the stars are worked in joined rounds around a central ring. Both motifs are flat, making the finished garland lightweight and easy to store.
| Pattern detail | Information |
|---|---|
| Skill level | Confident beginner |
| Yarn weight | DK (#3) |
| Crochet hook | 3.5 mm |
| Construction | Flat motifs joined to a chain |
| Motifs | 5 trees and 4 stars |
| Tree size | Approximately 3.5–4 in (9–10 cm) tall |
| Star size | Approximately 2.5–3 in (6.5–7.5 cm) across |
| Garland length | Approximately 5–6 ft (1.5–1.8 m) |
| Estimated making time | 4–6 hours |
| Gauge | Not critical |
The sizes and making time are approximate, not tested measurements. Your finished garland will depend on yarn choice, crochet tension, motif spacing, and chain length.
This project is easy to customize by adding more motifs or choosing colors that match your Christmas decorations.
Crochet Christmas Garland Pattern: Materials and Yarn Quantities
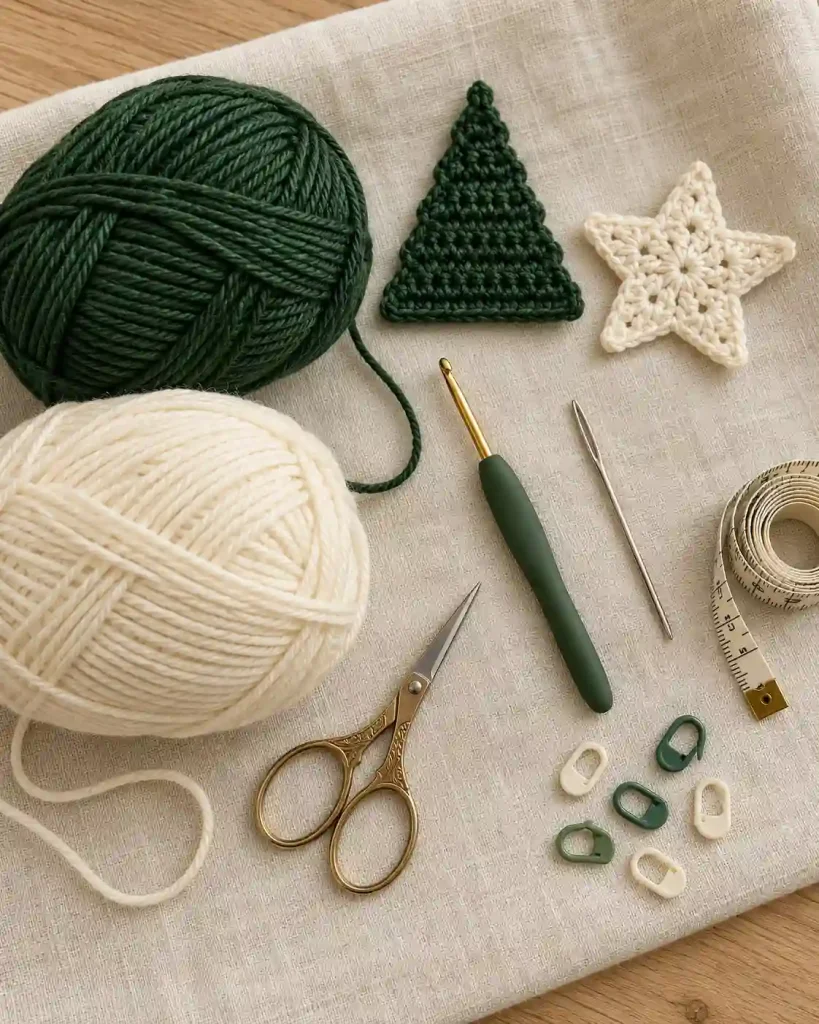
Gather your supplies before starting this Crochet Christmas Garland Pattern.
Materials
- DK-weight (#3) yarn in forest green: Approximately 35–50 yards (32–46 m) for five trees
- DK-weight (#3) yarn in cream or gold: Approximately 25–40 yards (23–37 m) for four stars
- DK-weight (#3) yarn for the connecting chain: Approximately 25–40 yards (23–37 m)
- Crochet hook: 3.5 mm
- Yarn needle: For weaving in ends and attaching motifs
- Scissors: For cutting yarn
- Measuring tape: For checking motif sizes and garland length
- Stitch markers: Optional, for marking the chain attachment points
- Rust-resistant blocking pins and a blocking mat: Optional, for shaping motifs
The yarn quantities are estimates. Allow extra yarn if you plan to add more decorations or make a longer garland.
Cotton yarn creates well-defined stitches and is useful for decorations that need to hold their shape. Acrylic is another practical option, particularly for lightweight garlands.
You can substitute worsted-weight yarn with an appropriately larger hook, but the motifs will become bigger and the garland may be heavier.
Choose smooth yarn rather than very fuzzy yarn if you want the tree edges and star points to remain clearly visible.
Crochet Christmas Garland Pattern: Abbreviations and Special Stitches
This pattern uses US crochet terminology.
| Abbreviation | Meaning |
|---|---|
| ch | Chain |
| sc | Single crochet |
| dc | Double crochet |
| sl st | Slip stitch |
| st / sts | Stitch / stitches |
| sp | Space |
| MR | Magic ring |
| inc | Increase: 2 sc in the same stitch |
| rep | Repeat |
Increase: Work two single crochet stitches into one stitch. This adds one stitch to the row.
Star point: A combination of chain stitches, double crochet, and slip stitches used to create a pointed shape.
Repeat instructions: Follow the directions between asterisks the stated number of times.
For the trees, the turning chain does not count as a stitch. For the stars, joining slip stitches do not count as stitches.
Always use the specified stitch count at the end of each row or round to check your progress.
Crochet Christmas Garland Pattern Gauge, Size and Notes
Gauge is not critical for this decorative project, but consistent tension helps all the motifs look alike.
With DK-weight yarn and a 3.5 mm hook, each tree is estimated to measure approximately 3.5–4 inches (9–10 cm) tall. Each star should measure approximately 2.5–3 inches (6.5–7.5 cm) across after shaping.
The complete garland is designed to measure approximately 5–6 feet (1.5–1.8 m), depending on how far apart you position the decorations.
The trees are worked in turned rows from the narrow tip toward the wide base. The stars are worked from the center outward in joined rounds.
There is no essential stitch-and-row gauge because the project is decorative and contains different motif shapes. Instead, measure your first completed tree and star before making the remaining pieces.
If your motifs are much larger than expected, try a smaller hook. If they are too tight or stiff, increase your hook size slightly.
Keep the same yarn and hook for matching motifs.
Crochet Christmas Garland Pattern: Method Overview
The construction of this Crochet Christmas Garland Pattern follows three main stages.
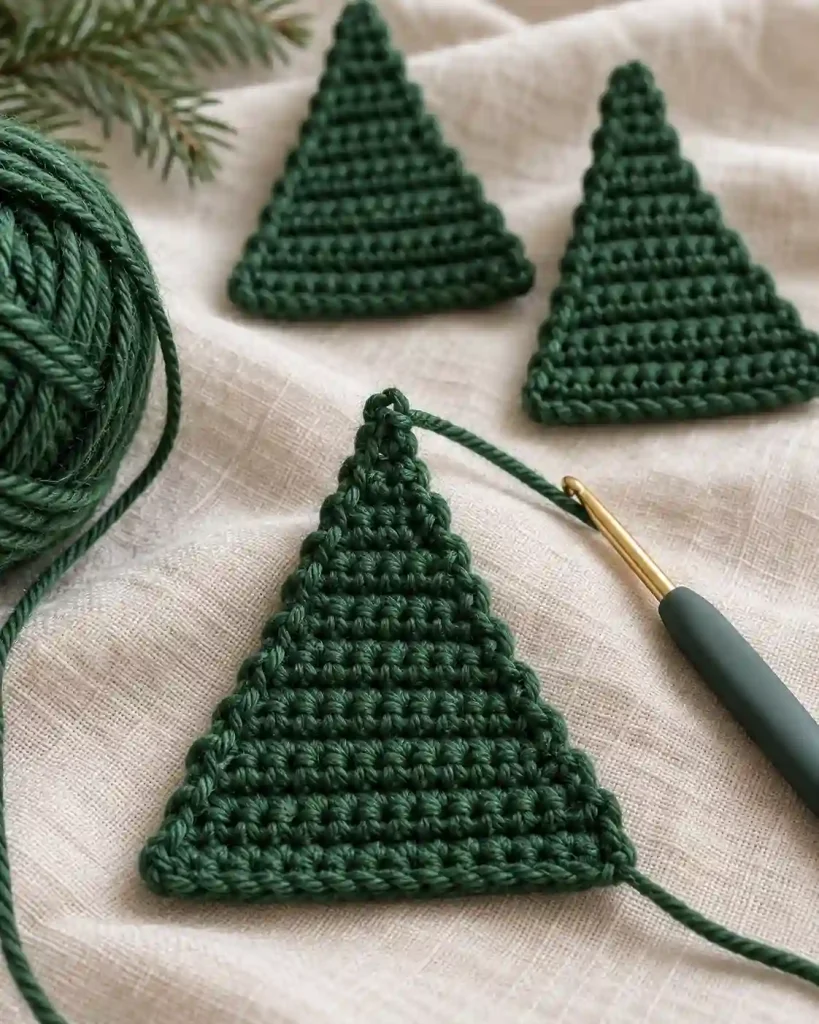
First, crochet five small Christmas trees. Each tree begins with a narrow tip and gradually increases in width to create a simple triangular silhouette.
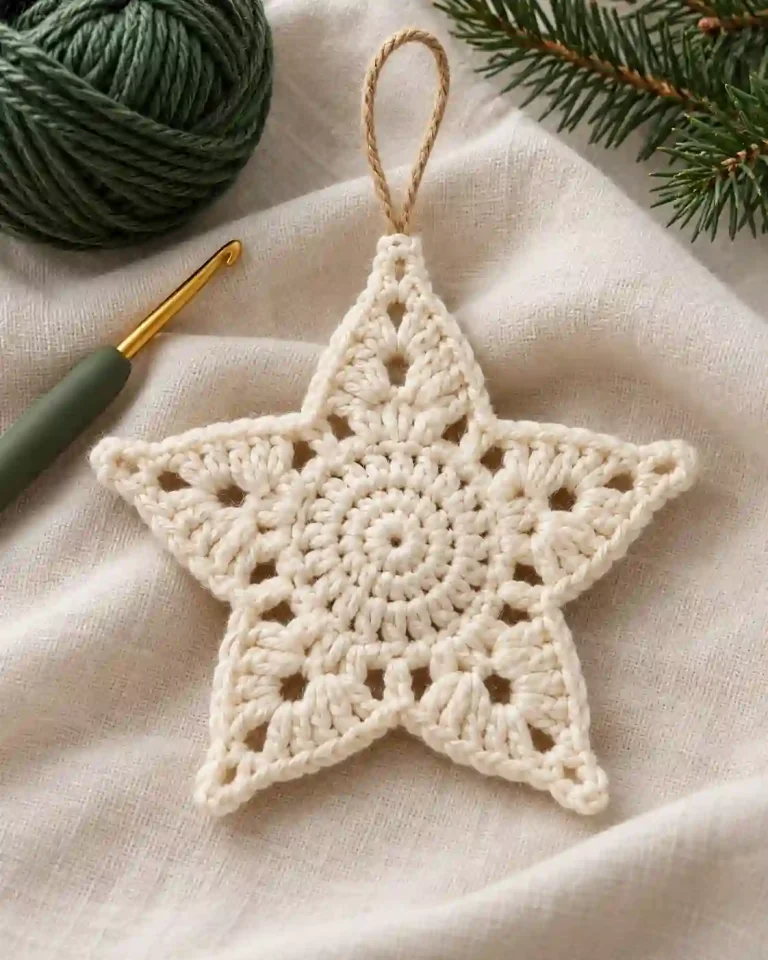
Next, make four five-pointed stars. These are crocheted around a small central ring, with the points formed in the outer round.
Finally, crochet a long chain to connect the decorations. The motifs are attached in an alternating sequence, beginning and ending with a Christmas tree.
The finished arrangement is:
Tree – Star – Tree – Star – Tree – Star – Tree – Star – Tree
This layout creates a balanced design with nine decorations.
After assembling the garland, weave in any remaining yarn ends and gently shape the motifs.
The separate-motif construction also makes it easy to replace a decoration or extend the garland later.
For more Christmas garland inspiration, explore this collection of crochet Christmas garland patterns from Desert Blossom Crafts. The pattern below is a separate design with its own instructions.
Step-by-Step Crochet Christmas Garland Tutorial
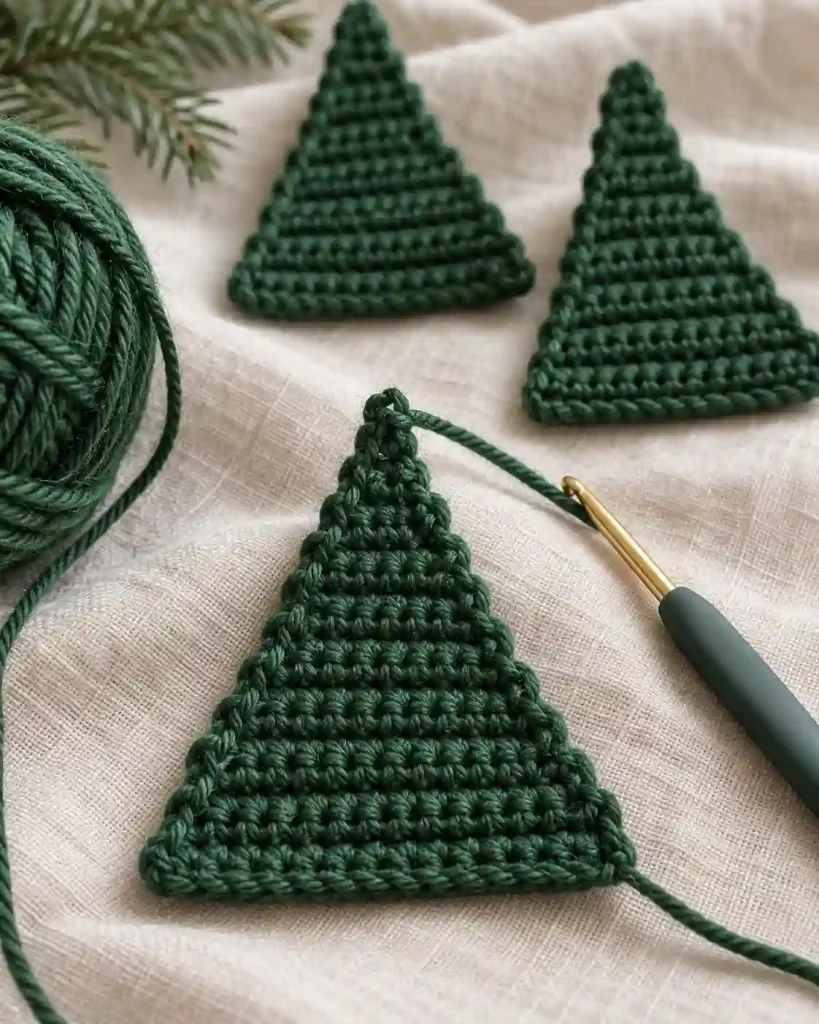
Step 1: Crochet Five Mini Christmas Trees
The trees are worked from the top downward in rows. Each row adds two stitches, creating a gradually widening triangular shape.
Using forest-green DK yarn and a 3.5 mm hook:
Row 1: Ch 2. Work 1 sc in the second ch from the hook. Ch 1, turn. (1 sc)
Row 2: Work 3 sc into the single stitch. Ch 1, turn. (3 sc)
Row 3: Inc in the first st, sc in the next st, inc in the last st. Ch 1, turn. (5 sc)
Row 4: Inc, sc in the next 3 sts, inc. Ch 1, turn. (7 sc)
Row 5: Inc, sc in the next 5 sts, inc. Ch 1, turn. (9 sc)
Row 6: Inc, sc in the next 7 sts, inc. Ch 1, turn. (11 sc)
Row 7: Inc, sc in the next 9 sts, inc. Ch 1, turn. (13 sc)
Row 8: Inc, sc in the next 11 sts, inc. Ch 1, turn. (15 sc)
Row 9: Inc, sc in the next 13 sts, inc. Ch 1, turn. (17 sc)
Row 10: Inc, sc in the next 15 sts, inc. (19 sc)
Fasten off and weave in the ends.
The completed tree should have a narrow top and a straight, 19-stitch bottom edge.
Repeat the instructions until you have five matching trees.
Keep the upper tip of each tree accessible because this is where it will attach to the garland.
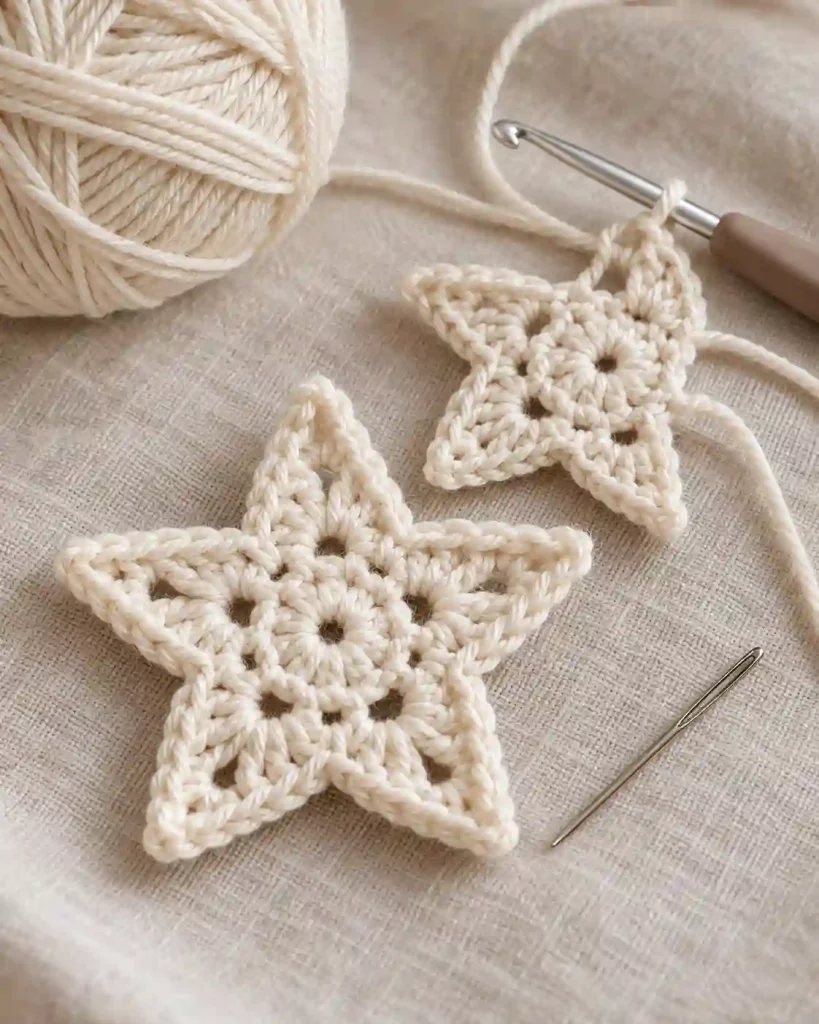
Step 2: Crochet Four Five-Pointed Stars
The stars are worked from the center outward. Each star has five identical points.
Using cream or gold DK yarn:
Round 1
- Make a magic ring.
- Work 10 sc into the ring.
- Pull the ring closed.
- Join with a sl st into the first sc.
Round 1 count: 10 sc.
Round 2
Work the following sequence five times:
- Sl st into the next sc.
- Ch 3.
- Work 1 dc into the third ch from the hook.
- Ch 2.
- Sl st into the same third ch to form the tip.
- Work 1 dc into the same chain stitch used for the first dc.
- Ch 2.
- Sl st into the next sc of Round 1.
After completing the fifth repeat, fasten off.
Round 2 result: 5 star points.
Each repeat uses two stitches from Round 1 and creates one decorative point.
The star may look slightly rounded before blocking. Gently pull the five points outward to improve their definition.
Repeat until you have four stars.
For a neat appearance, keep the same tension across all four motifs.
If one star looks larger than the others, compare your chain lengths and double crochet tension before making another.
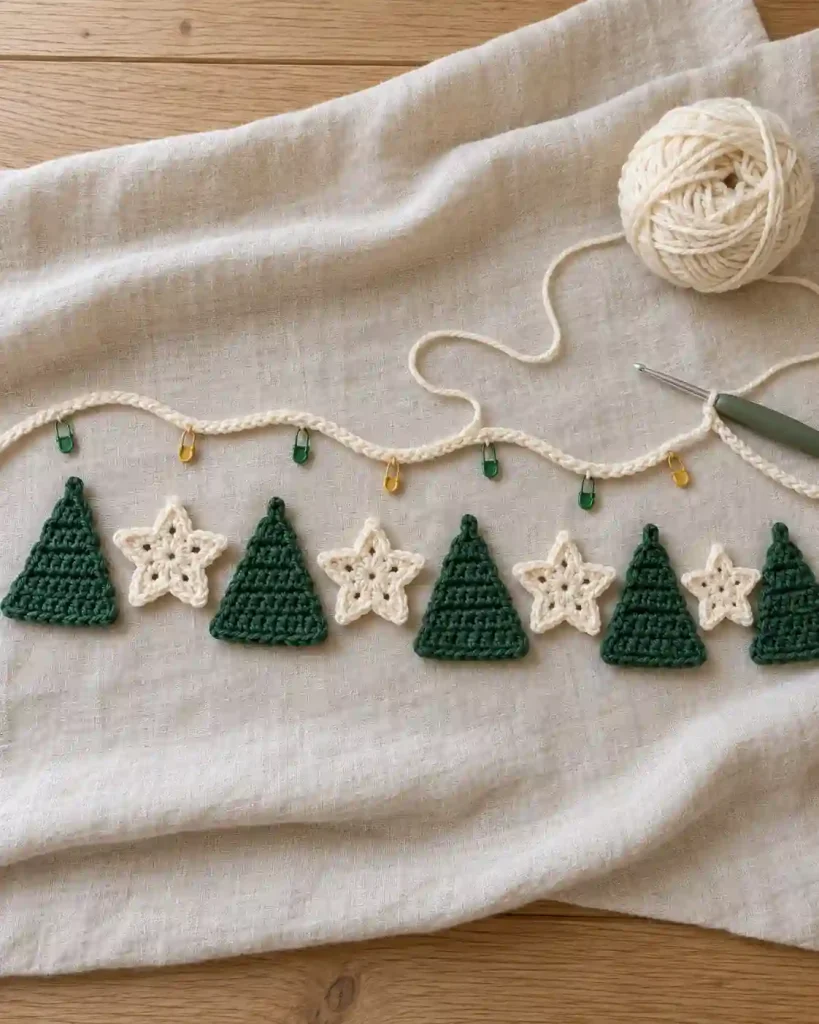
Step 3: Crochet the Connecting Garland Chain
The connecting chain provides the structure for the finished decoration.
Using your chosen garland color and a 3.5 mm hook:
- Make a slip knot.
- Ch 25 to create the first hanging end.
- Continue chaining until the main section is long enough to hold nine motifs with your preferred spacing.
- Add another 25 chains for the opposite hanging end.
- Fasten off, leaving a tail to secure the end if necessary.
For an approximately 5–6 ft garland, begin with a chain length close to your intended finished measurement and adjust after laying out the motifs.
The exact chain count will depend on your tension. Measure the relaxed chain rather than relying on a fixed number of stitches.
Lay the chain flat and place the nine decorations beneath it in the alternating tree-and-star sequence.
Leave approximately equal spacing between the motifs.
Use stitch markers to identify the attachment positions before sewing.
Avoid stretching the chain tightly while measuring. A slightly relaxed chain will drape more naturally when the garland is displayed.
Crochet Christmas Garland Pattern: Assembly
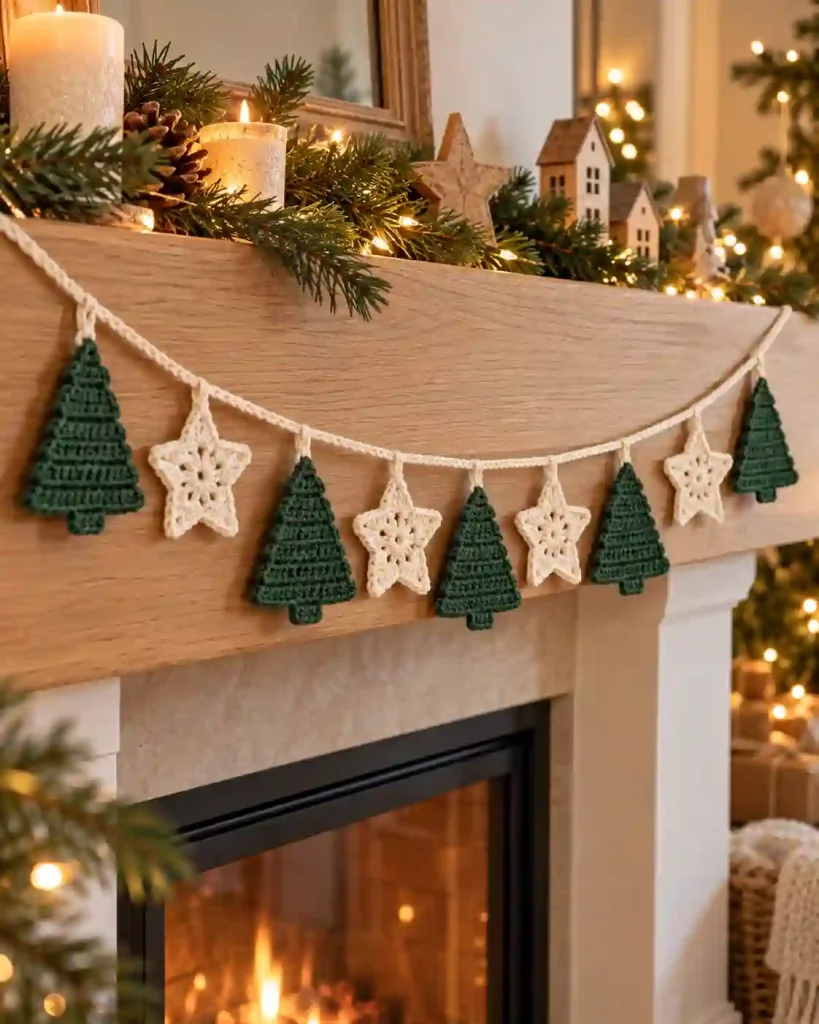
Assembling the Crochet Christmas Garland Pattern is straightforward once all nine motifs are complete.
Place the chain on a flat surface and arrange the decorations underneath it in this order:
Tree – Star – Tree – Star – Tree – Star – Tree – Star – Tree
Position the motifs at regular intervals, leaving enough room for each shape to remain visible.
Using a yarn needle and matching yarn, sew the upper tip of each tree securely around the connecting chain.
For each star, choose one point as the top and attach that point to the chain.
Pass the needle through the motif and around the chain several times. Secure the yarn on the back and weave in the tail.
Make sure the decorations hang in the same direction.
Before tightening the final attachments, lift the garland to check the spacing and overall balance.
Adjust any motif that hangs unevenly.
The first and last chain sections can be tied into small loops for hanging or left as long ends for securing around hooks.
Crochet Christmas Garland Pattern: Finishing and Care
Finishing helps your Crochet Christmas Garland Pattern look polished and ready for display.
Weave in all loose yarn ends securely, especially around the motif attachment points.
If the trees curl or the stars lose their shape, gently block them according to the yarn manufacturer’s care instructions.
For cotton motifs, light damp blocking may help flatten the fabric. Acrylic and other fibers may require different treatment, so avoid applying heat without checking the yarn label.
Allow every motif to dry completely before hanging the garland.
Inspect the chain and attachment stitches to make sure the decorations are secure.
Store the finished garland loosely folded or wrapped around a cardboard organizer to prevent tangling.
Keep it away from open flames, hot bulbs, and other heat sources.
FAQs and Troubleshooting for Crochet Christmas Garland Pattern
1. Why is my Christmas tree getting wider unevenly?
Each tree row should increase by exactly two stitches after Row 1. Work an increase at the beginning and end of every row from Row 3 onward. If one side looks uneven, count the stitches and check that you have not skipped the final stitch. Using a stitch marker at the row edges can help.
2. Why do my crochet stars look rounded instead of pointed?
The points may need shaping. Check that every star repeat includes the chain-3 section, two double crochet stitches, and the small chain-2 tip. Gently pull the points outward, then block the stars if your yarn allows it. Avoid making the slip stitches too tight.
3. Can I use worsted-weight yarn instead of DK yarn?
Yes. Worsted-weight yarn will create larger, heavier trees and stars. Choose a suitable hook and make one sample of each motif before completing the set. You may also need to increase the spacing between decorations so the finished garland does not look crowded.
4. How can I make the Christmas garland longer?
Make additional motifs and extend the connecting chain. To maintain the alternating arrangement, add pairs of one star and one tree, or adjust the sequence to suit your display. Measure the space where the garland will hang and allow extra length for draping and hanging loops.
5. Can I wash my crochet Christmas garland?
Follow the care instructions for your yarn. Some cotton and acrylic yarns can be washed gently, while other fibers require hand washing or more careful handling. If washing is permitted, protect the small motifs from snagging and reshape them while drying. Always dry the garland completely before storing it.
Final Thoughts
This Crochet Christmas Garland Pattern is a charming way to create festive decorations with simple stitches and a few colors of yarn. The combination of miniature Christmas trees and five-pointed stars gives the garland a classic holiday appearance, while the separate motifs make it easy to customize the length and arrangement. Hang your finished garland across a mantel, decorate a shelf, or use it as a handmade accent for your Christmas celebration.
For more festive crochet inspiration, try our Easy Crochet Christmas Bauble Pattern to create colorful handmade ornaments, or explore our Crochet Christmas Star Ornament Pattern for beautiful matching decorations. Combine these projects to create a coordinated collection of handmade Christmas decorations for your home.