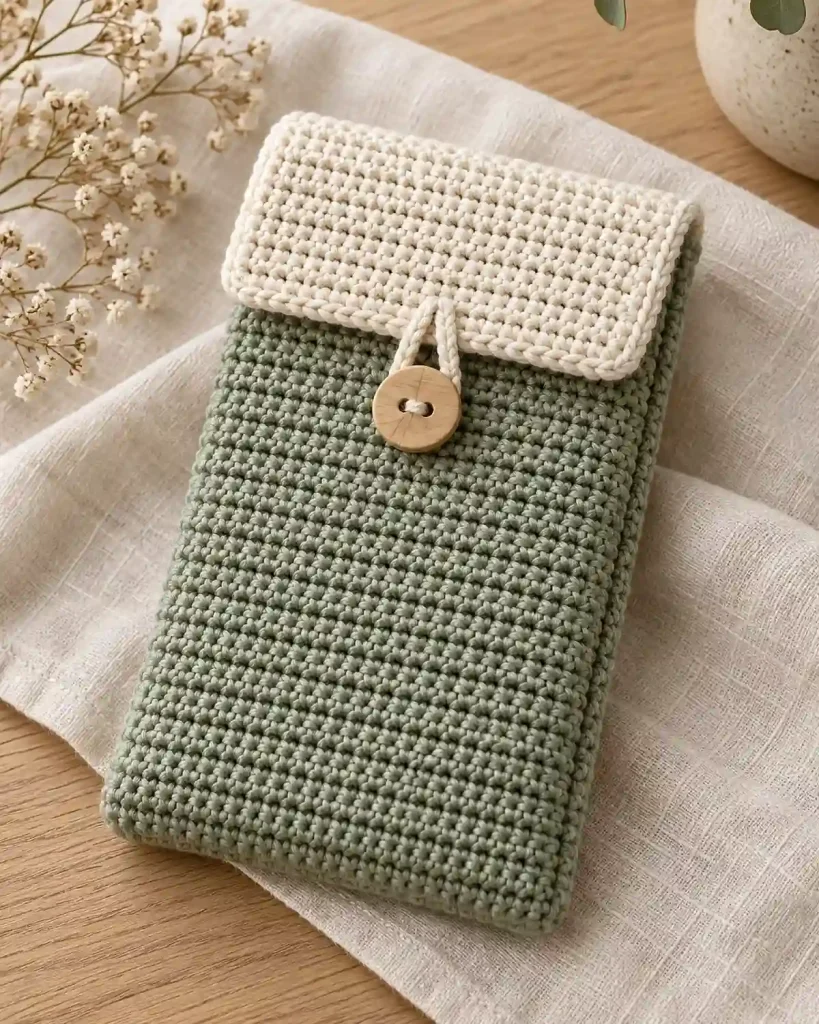
This iPhone 18 Pro Max Crochet Case Pattern is a practical project for making a soft, handmade phone sleeve with a contrasting button flap. Using DK-weight cotton yarn and simple single crochet stitches, you can create a fitted pouch for carrying your phone inside a handbag or backpack. This tutorial covers materials, gauge, panel construction, side seams, and finishing, including adjustments for a phone with a protective case.
iPhone 18 Pro Max Crochet Case Pattern at a Glance
The iPhone 18 Pro Max Crochet Case Pattern creates a removable sleeve rather than a fitted phone cover. The phone slides completely inside the pouch and must be removed for normal use, photography, and charging.
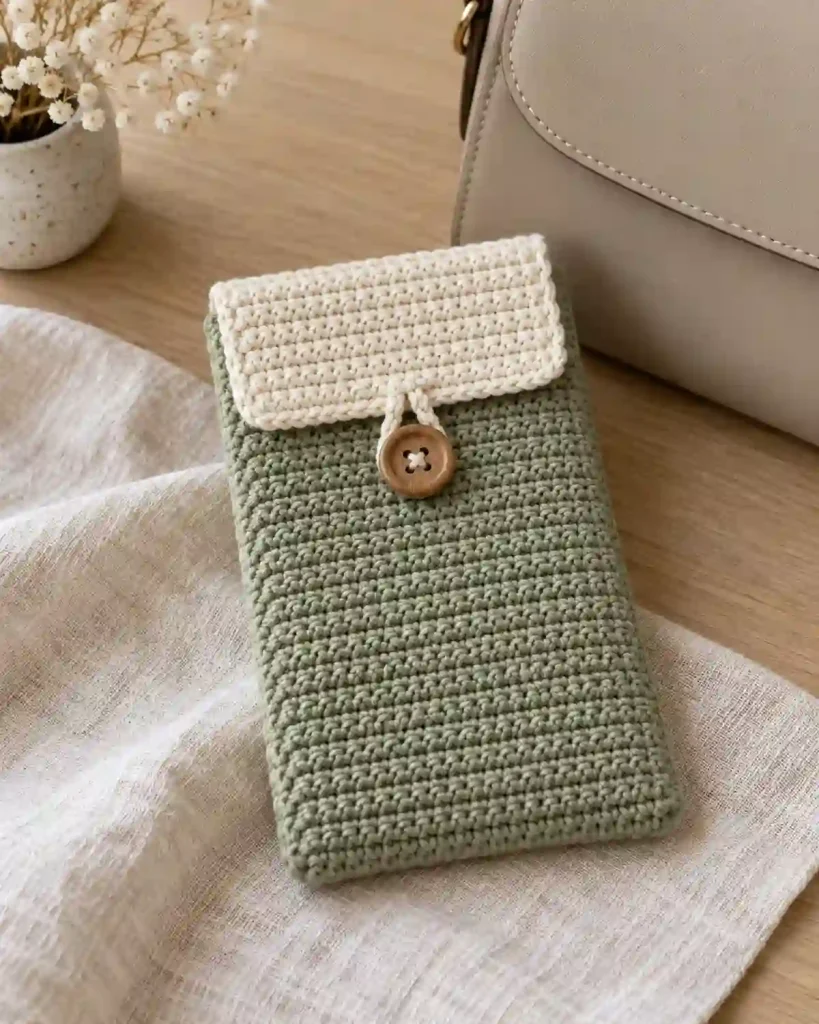
The sleeve is crocheted as one long, flat strip, folded in half to create front and back panels. A contrasting flap extends from the back and closes over a button on the front.
| Pattern detail | Information |
|---|---|
| Skill level | Confident beginner |
| Main stitch | Single crochet (US terms) |
| Yarn | DK-weight (#3) cotton |
| Crochet hook | 3.5 mm, adjusted for gauge |
| Target gauge | 22 sc × 26 rows = 10 × 10 cm |
| Flat panel width | Approximately 10 cm (3.9 in) |
| Body height | Approximately 17.3 cm (6.8 in) |
| Flap length | Approximately 4.2 cm (1.7 in), excluding loop |
| Construction | One strip, folded and side-seamed |
| Estimated time | Several crafting sessions |
Pattern status: This is an original, untested design. Measurements and yarn quantities are approximate. The pattern uses a sample gauge and should be adjusted to fit your actual phone, particularly if you use a thick protective case.
iPhone 18 Pro Max Crochet Case Pattern: Materials and Yarn Quantities
For this iPhone 18 Pro Max Crochet Case Pattern, choose a smooth cotton yarn that creates a firm, even fabric without excessive stretching.
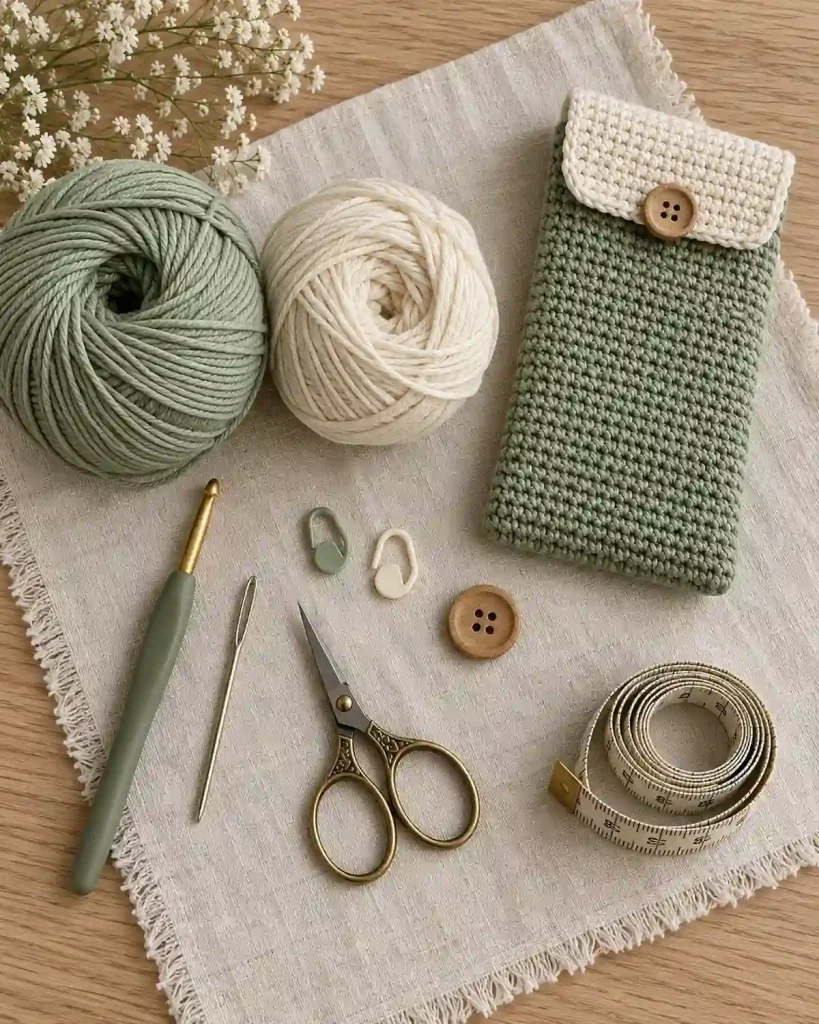
Materials
- Color A: Approximately 80–100 yards (73–91 m) of DK-weight cotton for the sleeve body and seams.
- Color B: Approximately 15–25 yards (14–23 m) of DK-weight cotton for the contrasting flap.
- Crochet hook: 3.5 mm, or the size needed to achieve gauge.
- Yarn needle: For sewing the side seams and weaving in ends.
- Scissors: For cutting yarn.
- Measuring tape or ruler: For checking the width and height.
- Two removable stitch markers: For identifying the panel boundaries.
- One smooth button: Approximately 18–20 mm in diameter.
- Your phone: Including its everyday protective case.
These yarn quantities are estimates rather than measured consumption. They also exclude yarn for a separate gauge swatch.
If your chosen yarn contains approximately 120 yards per 50 grams, the suggested quantities correspond to roughly 33–42 grams of Color A and 6–10 grams of Color B. Check your yarn label because yardage per gram varies.
A cotton blend may also work, provided it produces a stable fabric at the target gauge. Avoid very bulky, fluffy, or highly elastic yarn unless you are prepared to recalculate the pattern.
iPhone 18 Pro Max Crochet Case Pattern: Abbreviations and Special Stitches
This pattern uses US crochet terminology throughout.
| Abbreviation | Meaning |
|---|---|
| ch | Chain |
| sc | Single crochet |
| st | Stitch |
| sts | Stitches |
Single crochet (sc): Insert the hook into the indicated stitch, yarn over, pull up a loop, yarn over again, and pull through both loops on the hook.
Turning chain: At the beginning of each new row, chain 1 and turn your work. The turning chain does not count as a stitch.
Stitch counts: Numbers in parentheses indicate the total stitches completed in that row. For example, (22 sc) means the row contains 22 single crochet stitches.
Work through both top loops of each stitch unless otherwise instructed.
The pattern does not require increases, decreases, or joined rounds. All pieces are made using flat, turned rows.
iPhone 18 Pro Max Crochet Case Pattern Gauge, Size and Notes
Gauge matters for this iPhone 18 Pro Max Crochet Case Pattern because the finished sleeve needs to fit comfortably without excessive stretching.
Target gauge: 22 sc and 26 rows over 10 × 10 cm (approximately 4 × 4 inches).
Crochet a sample larger than the measurement area. Wash and dry it according to the yarn label, then measure the center without stretching.
If you have more than 22 stitches across 10 cm, try a larger hook. If you have fewer, try a smaller hook. Check row gauge as well.
At the target gauge, the 22-stitch strip measures approximately 10 cm wide. Ninety body rows measure approximately 34.6 cm long before folding.
The folded sleeve body is approximately 17.3 cm tall, with a contrasting flap extending about 4.2 cm.
These are calculated dimensions, not verified measurements of a finished sample. Seam allowance and fabric thickness reduce the usable interior space.
Measure your actual phone with its protective case before starting. Every row is worked flat, and the turning chain is excluded from stitch counts.
iPhone 18 Pro Max Crochet Case Pattern: Method Overview
The construction of this iPhone 18 Pro Max Crochet Case Pattern is straightforward and uses one continuous strip of crochet fabric.
First, crochet the front panel in Color A. This section contains 45 rows of single crochet, with 22 stitches in each row.
Continue in the same color for another 45 rows to create the back panel. The fold between Rows 45 and 46 becomes the bottom of the sleeve.
Next, switch to Color B and crochet a contrasting flap. The flap has ten ordinary single crochet rows followed by one row containing a centered button loop.
Once the strip is complete, fold the front panel against the back panel and check the fit with your phone.
After making any necessary adjustments, sew both side seams, attach the button, and weave in the yarn ends.
This construction avoids separate front and back pieces and helps keep the sleeve symmetrical.
Step-by-Step iPhone 18 Pro Max Crochet Case Tutorial
Step 1: Crochet the Front Panel
Begin the iPhone 18 Pro Max Crochet Case Pattern with the front panel.
Using Color A and your 3.5 mm crochet hook:
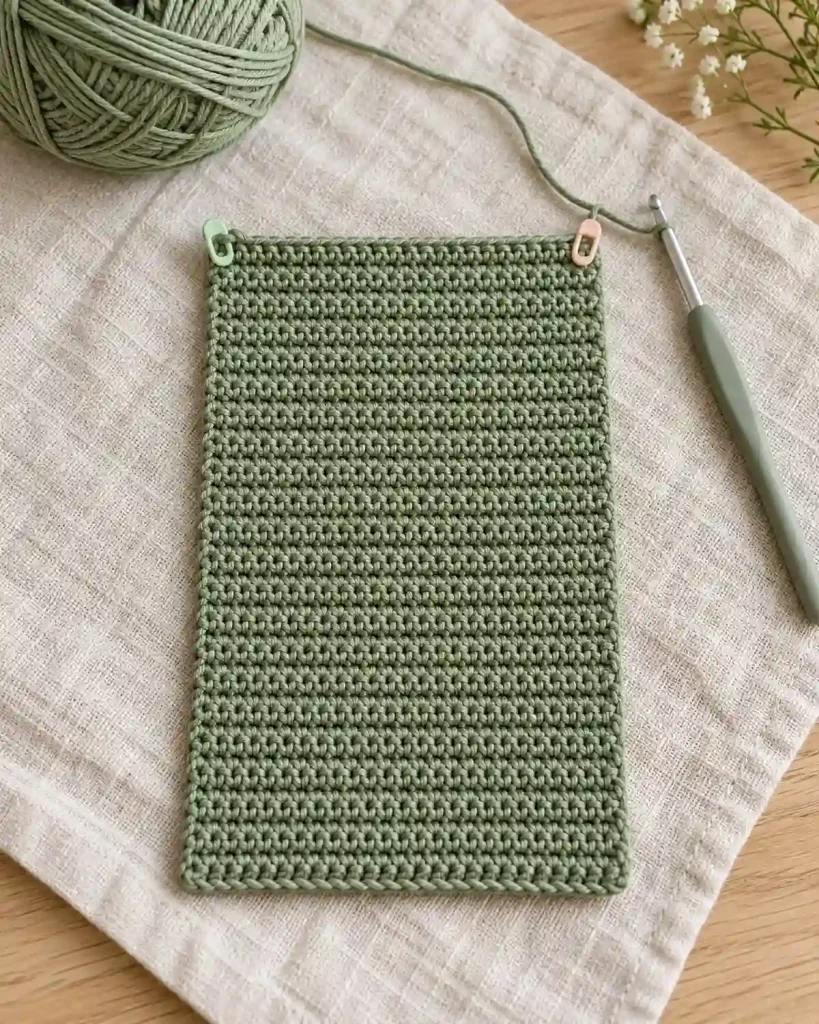
Foundation chain: Ch 23.
Row 1: Sc in the second ch from the hook. Continue working 1 sc into each remaining chain. (22 sc)
Row 2: Ch 1, turn. Work 1 sc in each stitch across. (22 sc)
Rows 3–45: Repeat Row 2, keeping 22 sc in every row.
After completing Row 45, the panel should measure approximately 10 cm wide and 17.3 cm long if your gauge matches the target.
Place a removable stitch marker at each end of Row 45. These markers identify the front panel’s upper corners.
Lay the panel against your phone to check the width. The fabric should cover the broad face of the device with enough allowance for the side edges and seams.
If the fabric is too narrow, adjust the foundation chain and restart rather than depending on stretching.
Keep your starting chain relaxed to avoid a tight opening.
Do not fasten off. Continue directly into the back panel.
Step 2: Extend the Strip to Form the Back Panel
The second stage of the iPhone 18 Pro Max Crochet Case Pattern creates the back panel without joining another piece of fabric.
Continue using Color A.
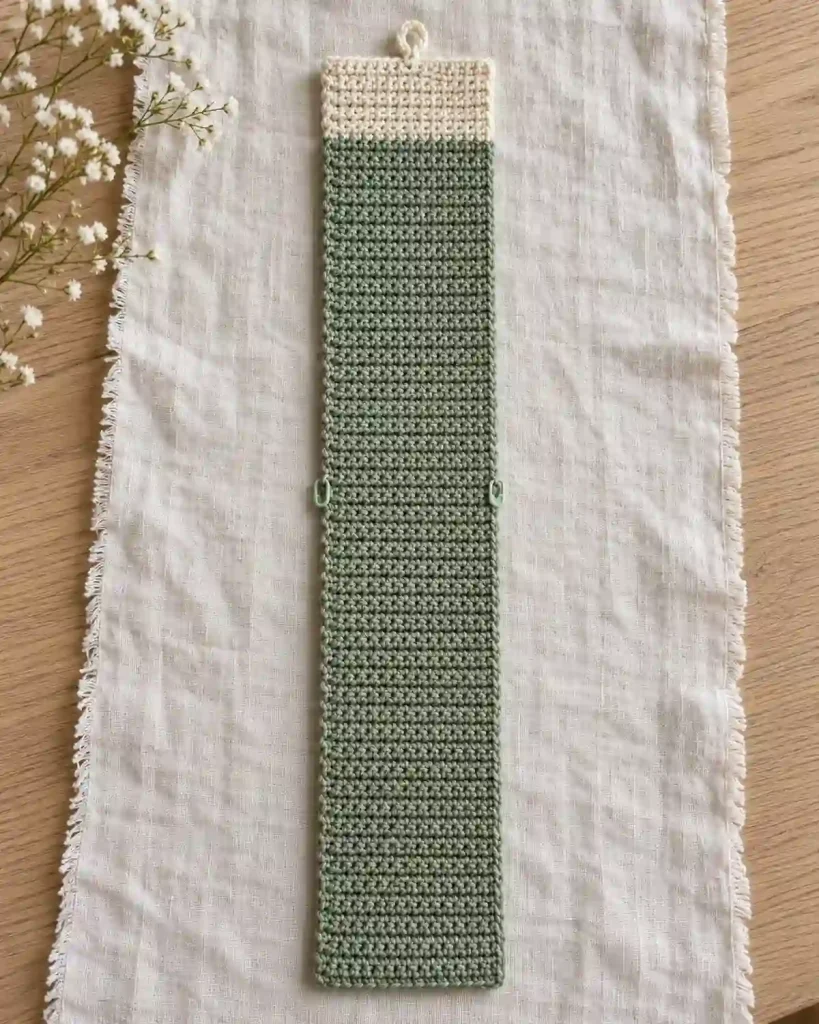
Rows 46–90: Ch 1, turn. Work 1 sc in each stitch across. (22 sc per row)
Maintain even tension and check the stitch count regularly.
After completing Row 90, the full body section should measure approximately 34.6 cm (13.6 inches) long.
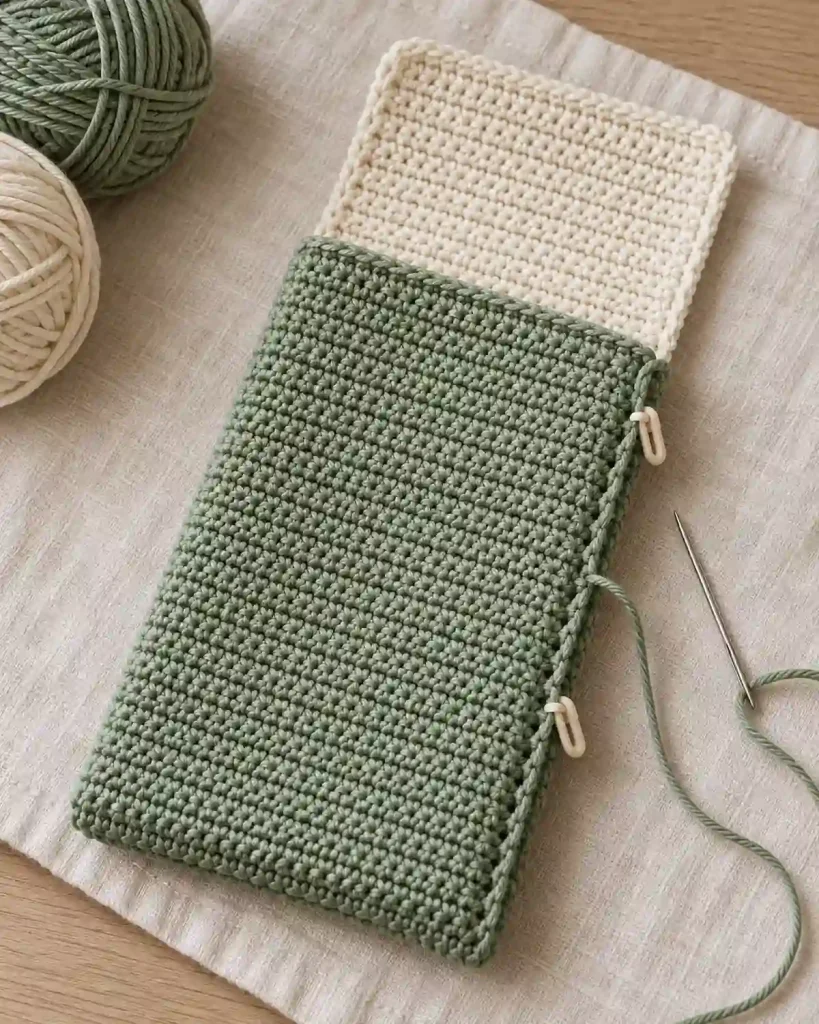
Fold the strip between Rows 45 and 46. Bring the foundation edge upward until it aligns with the upper edge of Row 90.
You should now have two matching panels, each containing 45 rows.
Temporarily secure the sides with removable stitch markers or loose basting stitches. Slide your phone into the folded fabric.
The device should enter and leave comfortably without forcing the stitches apart.
Check the height as well. The phone should sit below the opening, with enough space for the fabric to curve around the bottom.
If additional height is needed, add the same number of rows to both panels.
For example, increasing each panel to 47 rows gives 94 body rows total, with the fold between Rows 47 and 48.
If you change the body length, begin the flap after the new final body row.
Step 3: Crochet the Contrasting Flap and Button Loop
The final crochet stage adds a decorative closure to the iPhone 18 Pro Max Crochet Case Pattern.
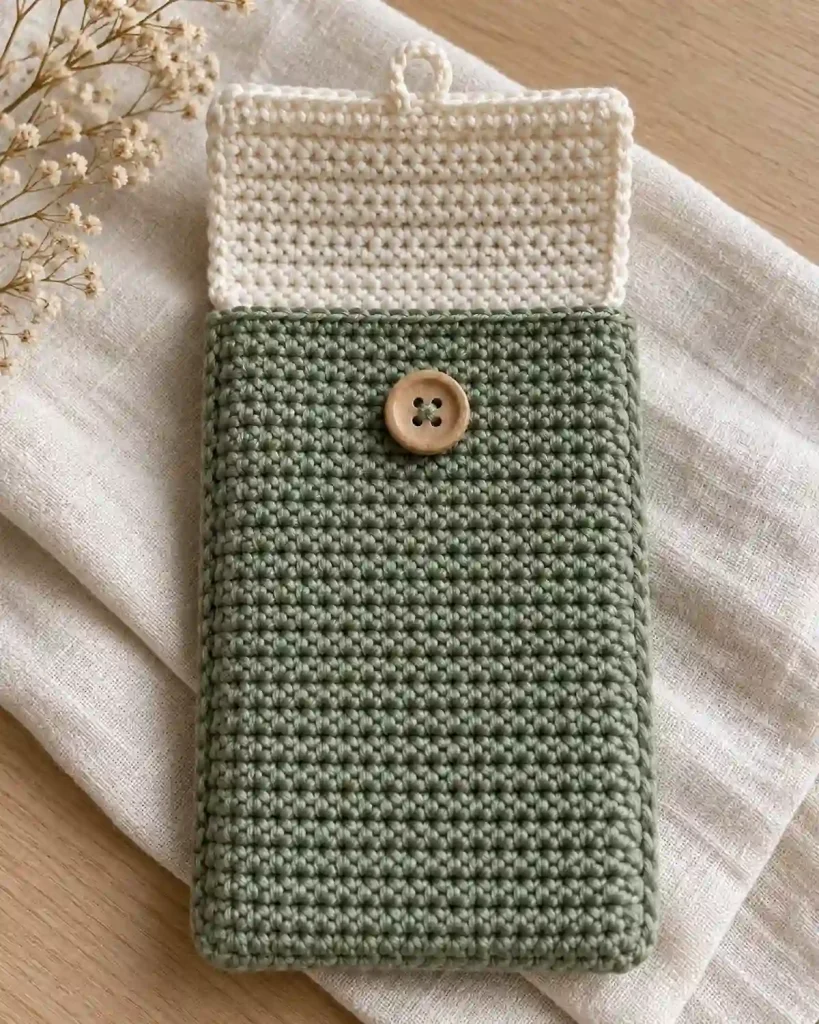
For the standard 90-row body, change to Color B during the final pull-through of the last stitch in Row 90.
Rows 91–100: Ch 1, turn. Work 1 sc in every stitch across. (22 sc per row)
These ten rows form the contrasting flap.
Row 101:
- Ch 1 and turn.
- Sc in the first 9 stitches.
- Ch 8 to create the button loop.
- Skip the next 4 stitches.
- Sc in the remaining 9 stitches.
Row 101 count: 18 sc and one ch-8 button loop.
The 22 stitches from the previous row are accounted for by nine worked stitches, four skipped stitches, and nine more worked stitches.
Before fastening off, check the loop against your chosen button. It should pass over the button without excessive stretching.
Adjust the number of chains if necessary, keeping the four skipped stitches centered.
Fasten off, leaving approximately 15 cm (6 inches) of yarn for weaving in.
The flap should extend approximately 4.2 cm beyond the back panel, excluding the button loop.
iPhone 18 Pro Max Crochet Case Pattern: Assembly
Assembling the iPhone 18 Pro Max Crochet Case Pattern requires sewing two side seams and attaching one button.
Lay the finished strip flat with the preferred outer surface facing inward.
Fold the front panel upward against the back panel. Align the foundation edge with the top of Row 90, leaving the contrasting flap extending above the opening.
Thread your yarn needle with Color A.
Sew the first side seam from the bottom fold toward the opening, catching the outer edge loops of corresponding rows.
Match front Row 1 with back Row 90, front Row 2 with back Row 89, and continue toward the fold.
Each side contains 45 paired row edges.
Repeat along the opposite side, keeping the seams neat and flexible.
Turn the sleeve right side out and insert your phone to check the fit.
Fold the flap over the opening and mark where the button loop reaches the front panel.
Remove the phone before sewing on the button. Secure the button firmly to the front panel.
iPhone 18 Pro Max Crochet Case Pattern: Finishing and Care
Finishing your iPhone 18 Pro Max Crochet Case Pattern carefully will improve its appearance and durability.
Weave each loose yarn end through several stitches on the inside of the sleeve, changing direction to help secure it.
Keep the interior smooth so that knots and bulky yarn ends do not press against the phone.
If the sleeve needs shaping, remove the phone and follow the yarn manufacturer’s care instructions. Gentle damp blocking may be suitable for some cotton yarns, but not every fiber should be treated the same way.
Lay the sleeve flat to dry without stretching it around the device.
Once dry, check both side seams, the button attachment, and the closure loop.
This crocheted sleeve provides a soft fabric barrier inside a bag but does not offer tested impact or drop protection.
Always remove your phone before washing the sleeve or charging the device.
FAQs and Troubleshooting for iPhone 18 Pro Max Crochet Case Pattern
1. Why do my rows have 21 or 23 stitches instead of 22?
The most common mistake is missing the final stitch or accidentally crocheting into the turning chain. Remember that the ch 1 does not count as a stitch.
Place a stitch marker in the first and last actual single crochet stitches if you have trouble identifying the row edges.
Count every row until you become comfortable with the pattern. If the count changes, unravel to the last correct row and continue.
Only the final button-loop row intentionally contains 18 sc instead of 22.
2. Why is my crochet phone sleeve too narrow?
Your stitch gauge may be tighter than the target, or the side seams may be taking up too much space.
Measure your gauge swatch and compare it with the target of 22 sc across 10 cm.
If your gauge is correct but the sleeve still fits tightly, increase the number of foundation stitches and maintain that new stitch count throughout the body.
Do not force the phone into a sleeve that is too small.
3. Can I use acrylic yarn instead of cotton?
Yes, smooth acrylic yarn can be used, although it may stretch differently from cotton.
Choose a yarn that produces a stable fabric with clear stitch definition.
Make a gauge swatch before starting because even yarns labeled with the same weight can produce different measurements.
Avoid very fluffy yarn that may shed fibers inside the sleeve.
4. How can I adjust the pattern for a thicker protective case?
Measure your phone with its protective case attached.
The finished sleeve needs enough width for the phone’s face, thickness, seam allowance, and a little extra room for sliding.
At the stated gauge, adding one stitch increases the flat panel width by approximately 0.45 cm.
If you change the stitch count, also adjust the flap’s final row so the four skipped stitches remain centered between equal numbers of single crochet stitches.
5. How should I wash and maintain my crochet phone case?
Follow the washing instructions printed on your yarn label.
Some cotton and acrylic yarns tolerate gentle washing, while other fibers require more careful handling.
Remove the phone before cleaning the sleeve.
If the button loop becomes stretched after washing, allow it to dry completely before checking the fit.
If it remains loose, remake the loop using fewer chains or replace the button with a slightly larger one.
Never put your phone inside a damp sleeve.
Final Thoughts
This iPhone 18 Pro Max Crochet Case Pattern offers a simple way to make a useful handmade accessory while practicing even single crochet stitches and neat seams. The continuous body construction keeps the project approachable, and the contrasting flap adds a decorative finish without complicated techniques. Because the pattern has not been physically tested, treat the calculated measurements as a starting point and check the fit throughout the process. A comfortable opening, smooth interior, and securely attached button are more important than following the stitch counts without adjustment. Record any changes you make so you can recreate your preferred sleeve size later.
For more creative crochet projects, explore our Crochet Christmas Garland Pattern to make festive handmade home decorations, or try our Easy Crochet Christmas Bauble Pattern for beautiful Christmas ornaments. These free patterns are wonderful ways to expand your crochet skills and create handmade gifts.