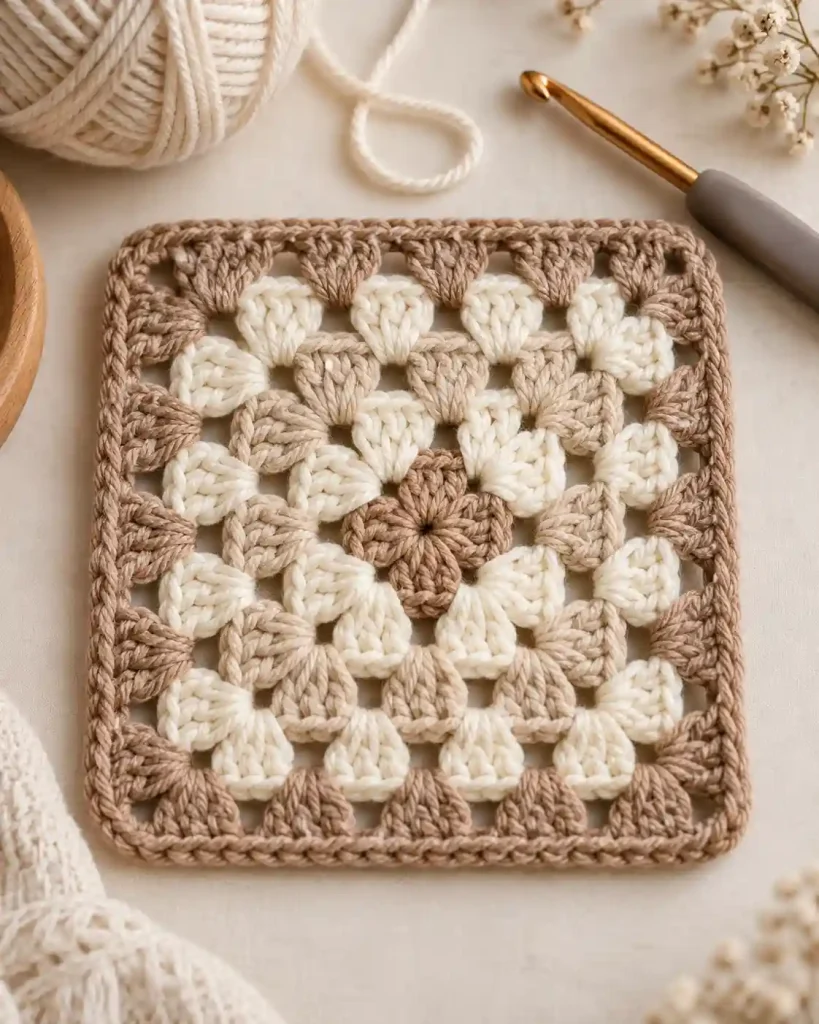
Easy Crochet Granny Square Pattern is a beginner-friendly project for learning one of the most useful motifs in crochet. This classic square is worked from the center outward using double crochet clusters, chain spaces, and simple joined rounds. You will learn how to create the center, form four defined corners, expand the square evenly, and finish the edges neatly while keeping the stitch placement consistent throughout the project.
Easy Crochet Granny Square Pattern at a Glance
This Easy Crochet Granny Square Pattern creates one classic granny square worked entirely in joined rounds. The repeating construction makes it a useful project for practicing double crochet, chain spaces, corners, and working into spaces rather than individual stitches.
- Skill level: Beginner
- Terminology: US crochet terms
- Yarn: Worsted weight yarn, category 4
- Hook: 5 mm crochet hook
- Construction: Center-out joined rounds
- Main stitch: Double crochet
- Finished size: Approximately 5–5.5 in / 12.5–14 cm square
- Total rounds: 5
- Estimated time: Approximately 25–40 minutes
- Gauge: Not critical for a single decorative square
The finished dimensions, yarn quantity, and making time are approximate because no tested source pattern was supplied. Your yarn, hook, and tension can change the final measurement.
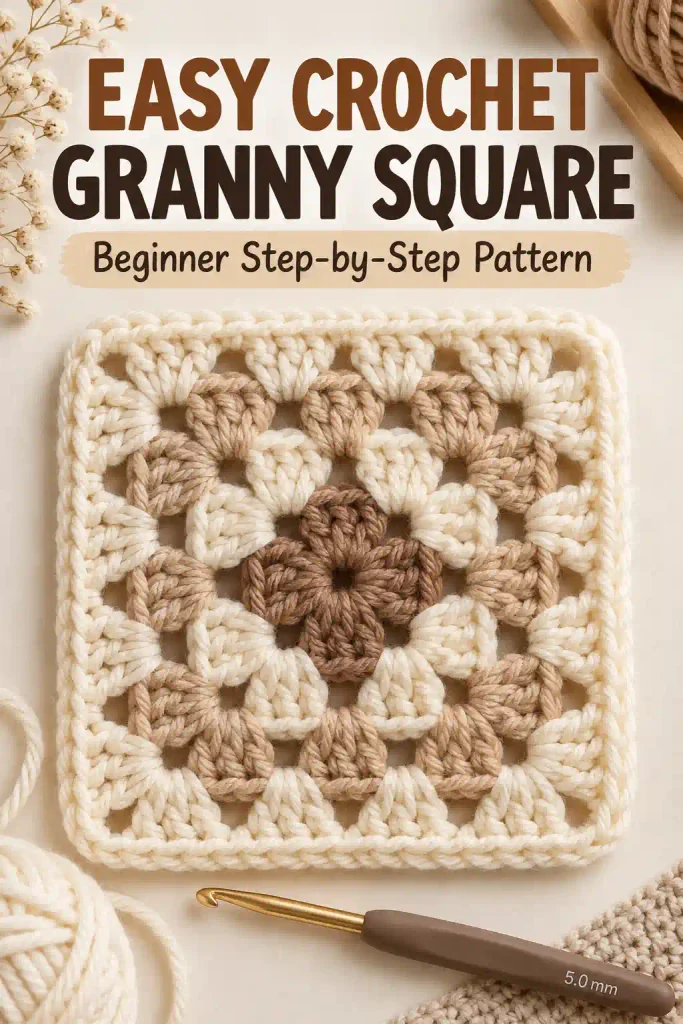
Easy Crochet Granny Square Pattern: Materials and Yarn Quantities
This Easy Crochet Granny Square Pattern requires only a small amount of yarn and a few basic crochet tools. Worsted weight yarn provides enough structure for beginners to see the stitches and chain spaces clearly.
You will need:
- Worsted weight yarn, category 4: approximately 25–35 yd / 23–32 m
- Approximate yarn weight: 12–18 g total
- 5 mm crochet hook
- Yarn needle
- Scissors
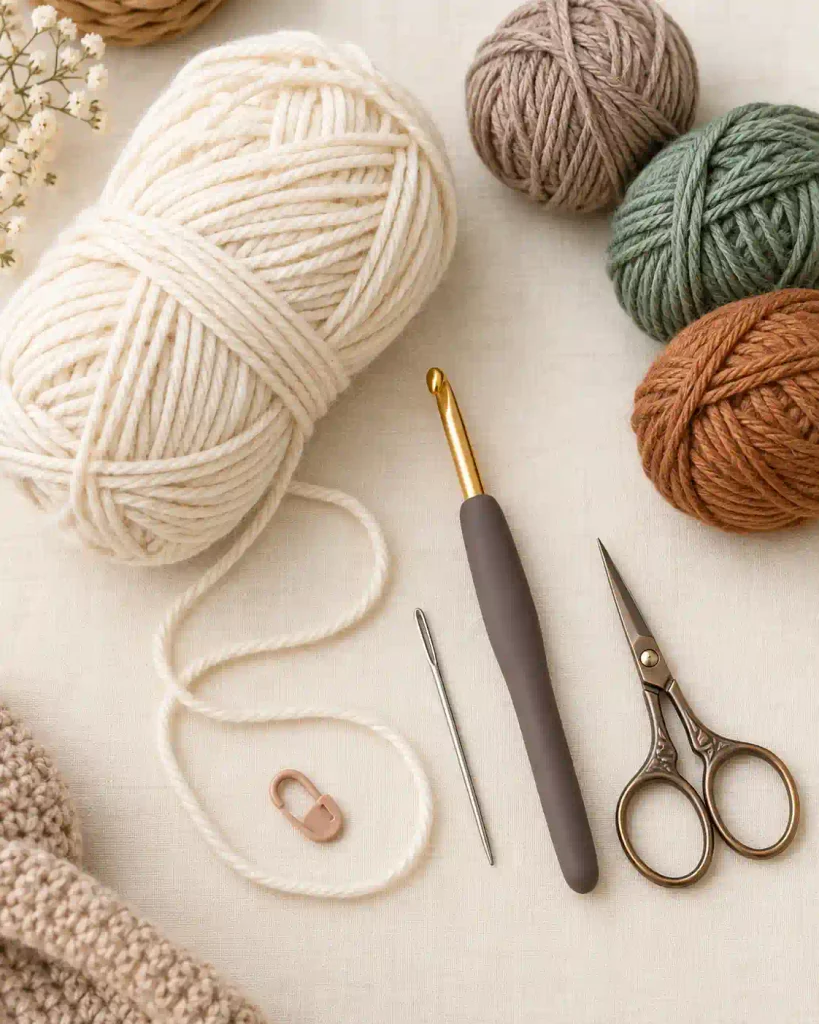
You can make the entire square in one color or change colors between rounds. If using several colors, divide the approximate total yardage between them rather than treating the estimate as the quantity required for each color.
Acrylic or cotton yarn can both work well. Cotton usually creates a firmer square with clear stitch definition, while acrylic may produce a softer fabric.
You can also substitute another yarn weight. Use a hook suitable for that yarn and expect the finished square to become smaller or larger.
Easy Crochet Granny Square Pattern: Abbreviations and Special Stitches
The Easy Crochet Granny Square Pattern uses standard US crochet terminology.
- ch – chain
- st(s) – stitch(es)
- sl st – slip stitch
- dc – double crochet
- sp – space
- ch-sp – chain space
- MR – magic ring
- [ ] – repeat the instructions inside the brackets
A 3-dc cluster in this pattern means working 3 separate double crochet stitches into the same chain space. It is not a joined cluster stitch.
A corner is formed with 3 dc, ch 2, 3 dc in the same corner space.
The beginning ch 3 counts as the first dc of each round. Each round is joined with a slip stitch to the top of that beginning ch 3.
Easy Crochet Granny Square Pattern Gauge, Size and Notes
The finished Easy Crochet Granny Square Pattern should measure approximately 5–5.5 in / 12.5–14 cm square after five rounds when made with worsted weight yarn and a 5 mm hook.
Gauge is not critical for a single granny square. However, consistent gauge becomes important when making several squares that will eventually be joined.
As an approximate reference, a completed five-round square should fall within the size range above. Measure straight across the square from one outer edge to the opposite outer edge.
The pattern is worked in joined rounds, not rows. Do not turn the work between rounds.
The beginning ch 3 counts as one double crochet. Corner ch-2 spaces separate the four sides and must remain clearly visible.
When counting the pattern, it is usually easier to count 3-dc groups and corner spaces rather than every individual double crochet.
Easy Crochet Granny Square Pattern: Method Overview
The Easy Crochet Granny Square Pattern begins with four groups of double crochet worked around a magic ring. Chain-2 spaces between these groups establish the four corners of the square.
Round 2 expands each corner by working 3 dc, ch 2, 3 dc into every corner space. This creates two 3-dc groups along each side.
From Round 3 onward, the same construction continues. Work one 3-dc group into every side chain space and a complete corner combination into every ch-2 corner space.
Each new round therefore adds one additional 3-dc group to every side.
The progression is:
Center → four corners → expanding sides → final round → finishing
After Round 5, each side contains five 3-dc groups when the two groups belonging to its adjacent corners are included. The square is then fastened off and blocked if needed.
How to Crochet the Granny Square Center
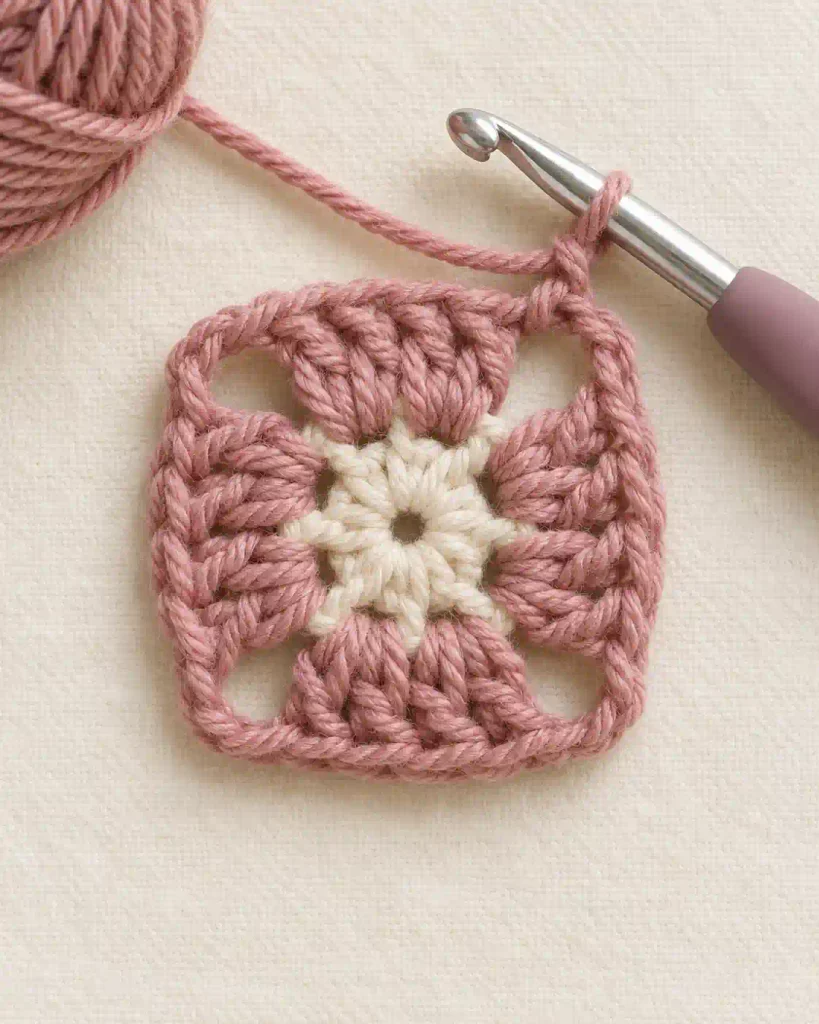
Begin the Easy Crochet Granny Square Pattern with your chosen yarn and 5 mm crochet hook.
Make a MR.
Round 1: Ch 3. The ch 3 counts as the first dc. Work 2 dc into the ring, ch 2.
Repeat [3 dc into the ring, ch 2] three more times.
Pull the starting yarn tail carefully to close the center of the magic ring.
Join with a sl st to the top of the beginning ch 3.
At the end of Round 1, you should have:
- 4 groups of 3 dc
- 4 ch-2 corner spaces
- 12 dc total, counting the beginning ch 3
Lay the work flat and identify the four ch-2 spaces. These spaces establish the corners and are essential for the remaining rounds.
If you are changing colors, fasten off and join the next color in any ch-2 corner space. Otherwise, slip stitch across to the nearest corner space before beginning Round 2.
How to Form and Expand the Granny Square Corners
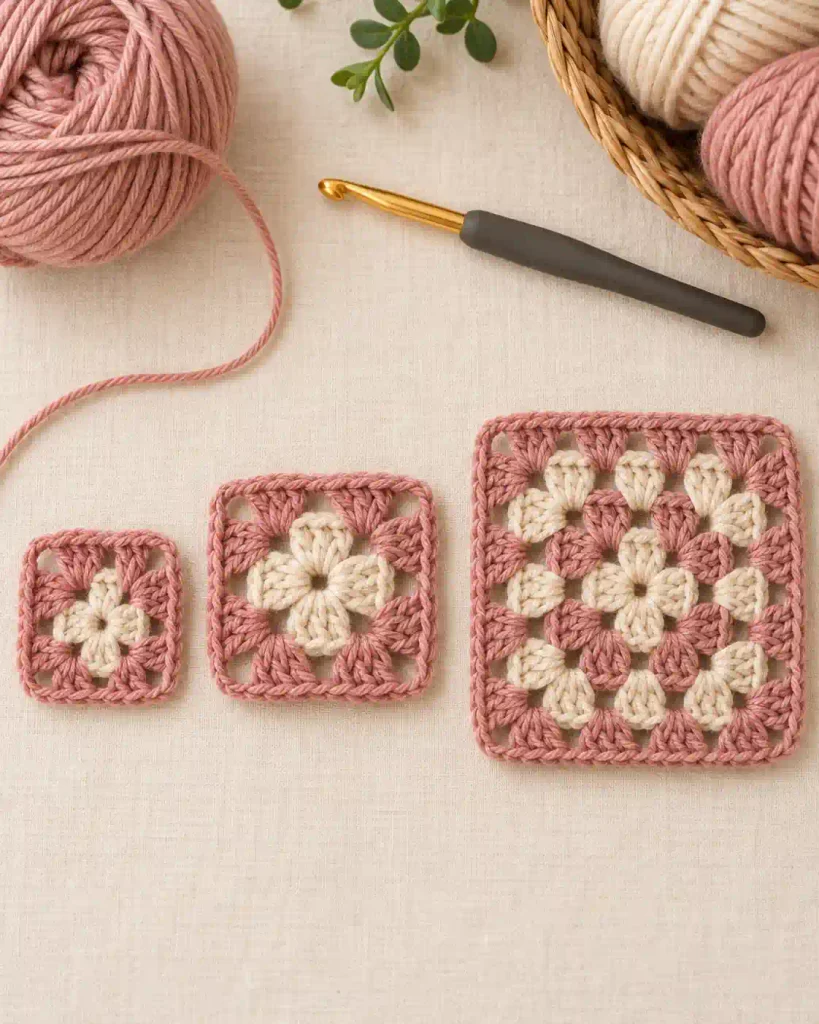
Round 2 begins the recognizable square shape by expanding each of the four corners.
Join your yarn in any ch-2 corner space if necessary.
Round 2: Ch 3, then work 2 dc, ch 2, 3 dc in the same corner space.
Ch 1.
In the next ch-2 corner space, work 3 dc, ch 2, 3 dc, ch 1.
Repeat the same sequence in each remaining corner.
Join with a sl st to the top of the beginning ch 3.
You should now have 8 groups of 3 dc, with two groups forming each side.
For Round 3, move to the nearest ch-2 corner space.
Ch 3 and work 2 dc, ch 2, 3 dc in that corner. Ch 1.
Work 3 dc in the next ch-1 side space, ch 1.
In the next corner, work 3 dc, ch 2, 3 dc, ch 1.
Continue around, placing one 3-dc group in every side space and the full corner combination in every corner.
Join to the beginning ch 3.
Round 3 ends with 12 groups of 3 dc, or three groups along each side when the corner groups are included.
How to Complete Rounds 4 and 5
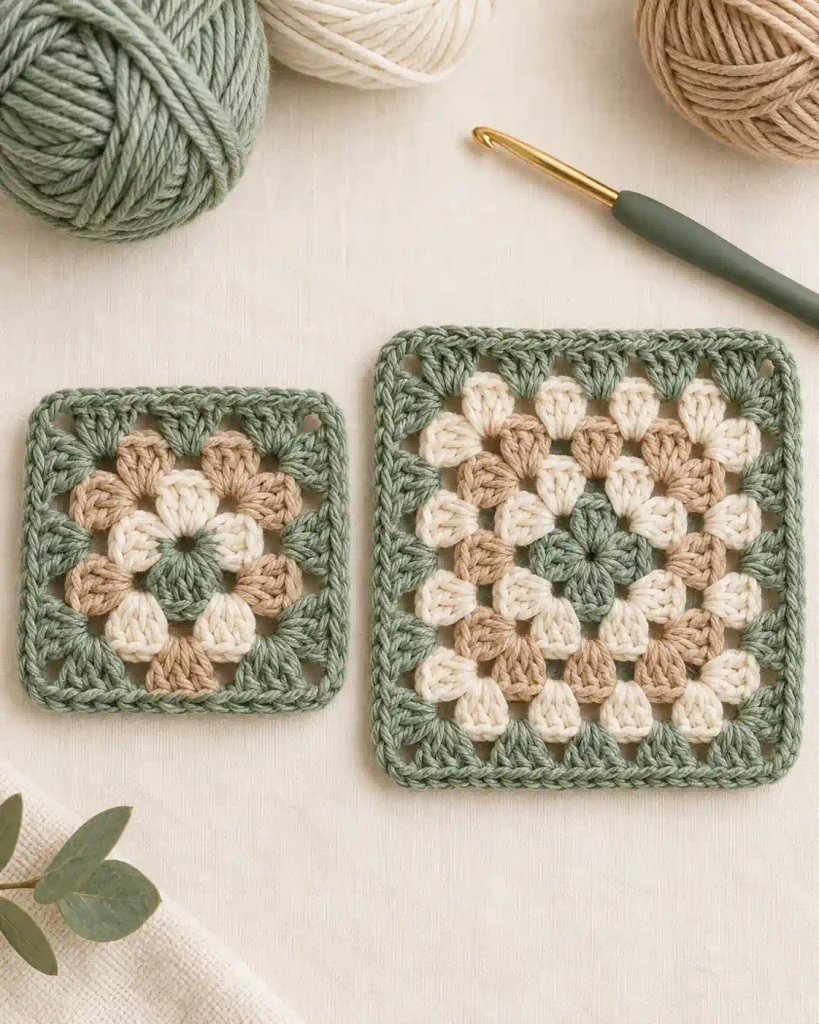
Continue the established Easy Crochet Granny Square Pattern without changing the corner structure.
For Round 4, move to a corner space. Ch 3 and work 2 dc, ch 2, 3 dc into the same corner.
Ch 1. Work 3 dc into each ch-1 side space, placing ch 1 between groups.
At every corner, work:
3 dc, ch 2, 3 dc
Continue around and join to the beginning ch 3.
Round 4 contains 16 groups of 3 dc, with four groups along each side when the corner groups are included.
Work Round 5 in exactly the same manner. Each side now has three internal ch-1 spaces between its corner groups, so place one 3-dc group into each space.
Continue using ch 1 between neighboring groups and 3 dc, ch 2, 3 dc in every corner.
Join to the beginning ch 3.
Round 5 contains 20 groups of 3 dc, giving five groups along each side when the corner groups are included.
Fasten off after checking all four sides.
Easy Crochet Granny Square Pattern: Assembly
The Easy Crochet Granny Square Pattern is made as one continuous piece, so no separate components need to be assembled.
Instead, use this stage to inspect the construction before weaving in the yarn ends.
Place the square on a flat surface. Confirm that you have four clear corners and that each corner contains a ch-2 space. Check that Round 5 has the same number of 3-dc groups on all four sides.
If you changed colors between rounds, gently check every join to make sure the new yarn was secured correctly. Do not pull the yarn tails so tightly that the surrounding stitches become distorted.
Check the center as well. The magic ring should be closed securely without pulling the first round into a puckered shape.
If you plan to make multiple granny squares for a larger project, finish each square to the same number of rounds before joining them later.
Easy Crochet Granny Square Pattern: Finishing and Care
To finish the Easy Crochet Granny Square Pattern, thread each yarn tail onto a yarn needle. Weave the tails securely through several stitches on the reverse side, changing direction before trimming the excess.
Gently arrange the square so the four sides and corners are even. Blocking can help improve the shape, particularly when several squares need to match.
Measure the square before and during blocking rather than stretching it excessively. Aim for straight sides and approximately 90-degree corners.
Choose a blocking method appropriate for the yarn fiber you used. Different fibers respond differently to moisture, steam, and heat.
Always follow the care instructions on the yarn label.
Before using or joining the square, check the center, color changes, corner spaces, final join, and woven ends for security.
FAQs and Troubleshooting for Easy Crochet Granny Square Pattern
1. Why does one side of my granny square have more groups?
A missed or extra 3-dc group is usually responsible. In Round 5, each side should contain five groups when the groups forming both corners are included. Check that you worked one group in every side ch-1 space and the full 3 dc, ch 2, 3 dc combination in every corner.
2. Why is my granny square curling or becoming wavy?
First check your stitch placement. Missing groups can pull the square inward, while accidental extra groups may create ruffling. If the construction is correct, tension may be the cause. Tight crocheters can try a slightly larger hook, while very loose stitches may benefit from a smaller hook.
3. Can I use a different yarn?
Yes. Cotton, acrylic, and suitable blends can all be used. Changing the yarn weight will change the dimensions and texture of the finished square. Select a hook appropriate for your replacement yarn and make a sample square before starting a project that requires multiple matching motifs.
4. How can I make the granny square larger?
Continue repeating the established round structure. Work 3 dc, ch 2, 3 dc in every corner and one 3-dc group in every ch-1 space along the sides, with ch 1 between groups. Each additional round adds one more 3-dc group to each side.
5. How should I wash a finished granny square?
Follow the care instructions for the specific yarn used. Fiber types can have very different washing, drying, and heat requirements. If several squares will be joined into one item, using the same yarn throughout generally makes care easier and helps the motifs behave consistently after washing.
Final Thoughts
Easy Crochet Granny Square Pattern is a useful introduction to center-out crochet and the repeating structure of a classic granny square. Once you understand how the four corners are formed, every additional round follows the same basic rhythm of corner groups, side groups, and chain spaces. Keep the four sides balanced, check that each corner remains clearly defined, and count your 3-dc groups before moving to the next round. After mastering this five-round version, you can continue adding rounds or make multiple matching squares for larger crochet projects.
Try this Easy Crochet Coaster Pattern for another simple beginner project, or make this Medium Crochet Pumpkin Pattern to practice ribbed crochet, stuffing, and shaping for a seasonal decoration.