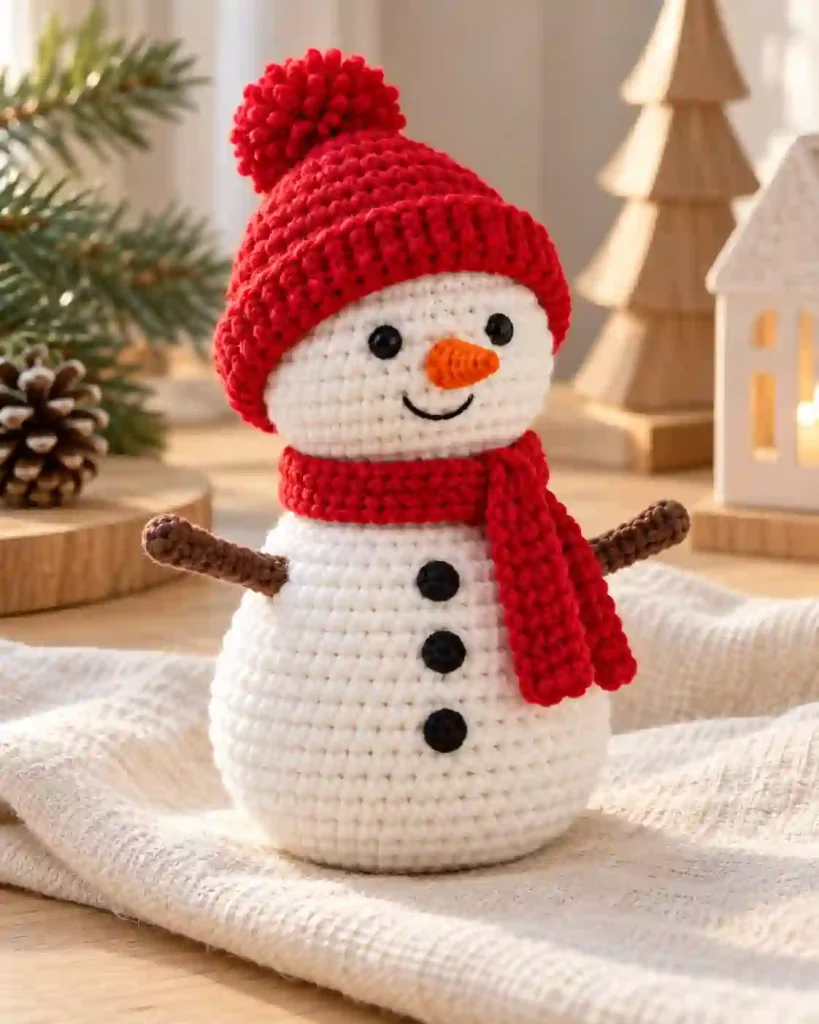
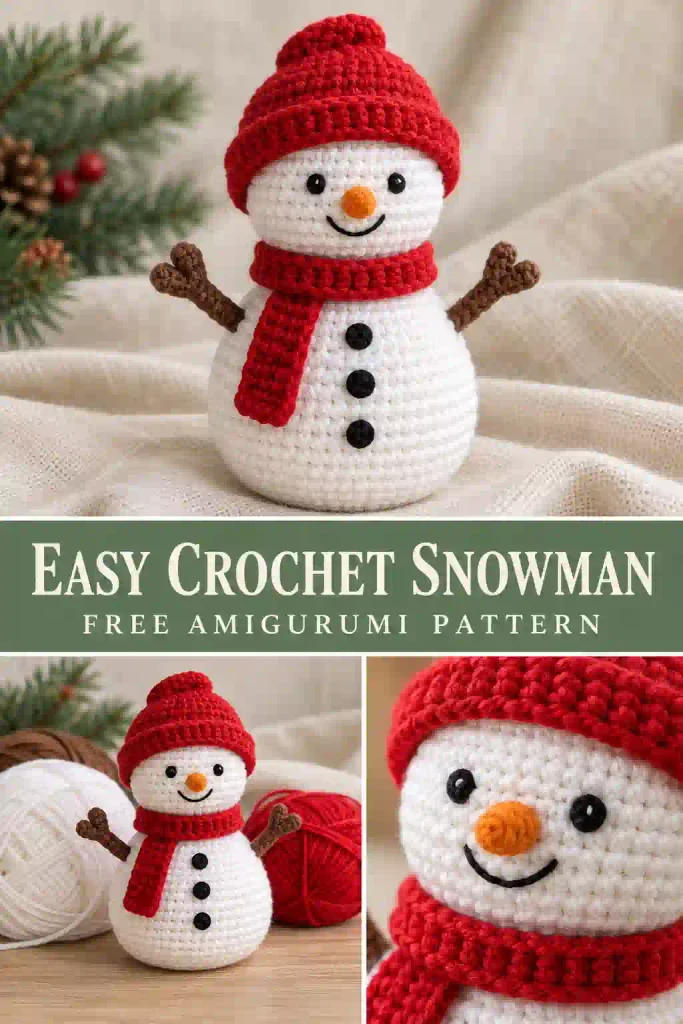
This Easy Crochet Snowman Pattern is a cozy winter project featuring a round white head, a plump body, a tiny carrot nose, and a cheerful red hat and scarf. Made with basic amigurumi stitches, this little snowman is a lovely addition to handmade Christmas decorations.
In this free tutorial, you’ll learn how to crochet the head, body, arms, nose, and winter accessories, then assemble everything into a charming snowman with embroidered facial details.
Easy Crochet Snowman Pattern at a Glance
This crochet snowman is made from separately crocheted pieces that are stuffed, shaped, and sewn together. The head and body use continuous rounds of single crochet, while the accessories add color and personality.
The snowman has a rounded head, a wider body that narrows toward the neck, two slim brown arms, an orange carrot nose, a red winter hat, and a matching scarf. Its eyes, smile, and buttons are embroidered with black yarn.
Pattern details:
- Skill level: Confident beginner
- Crochet terminology: US terms
- Yarn weight: Worsted weight, category 4
- Hook size: 3.5 mm
- Construction: Continuous rounds, separate components, and sewing
- Estimated making time: 3–5 hours
- Approximate finished height: 6–7 inches (15–18 cm), including the hat
- Approximate body width: 3–3.5 inches (7.5–9 cm)
- Gauge: Not critical, but tight stitches are recommended
The measurements and making time are estimates because this original pattern has not been physically tested.
The Easy Crochet Snowman Pattern is intended as a decorative amigurumi project rather than a toy designed for babies or toddlers.
Easy Crochet Snowman Pattern: Materials and Yarn Quantities
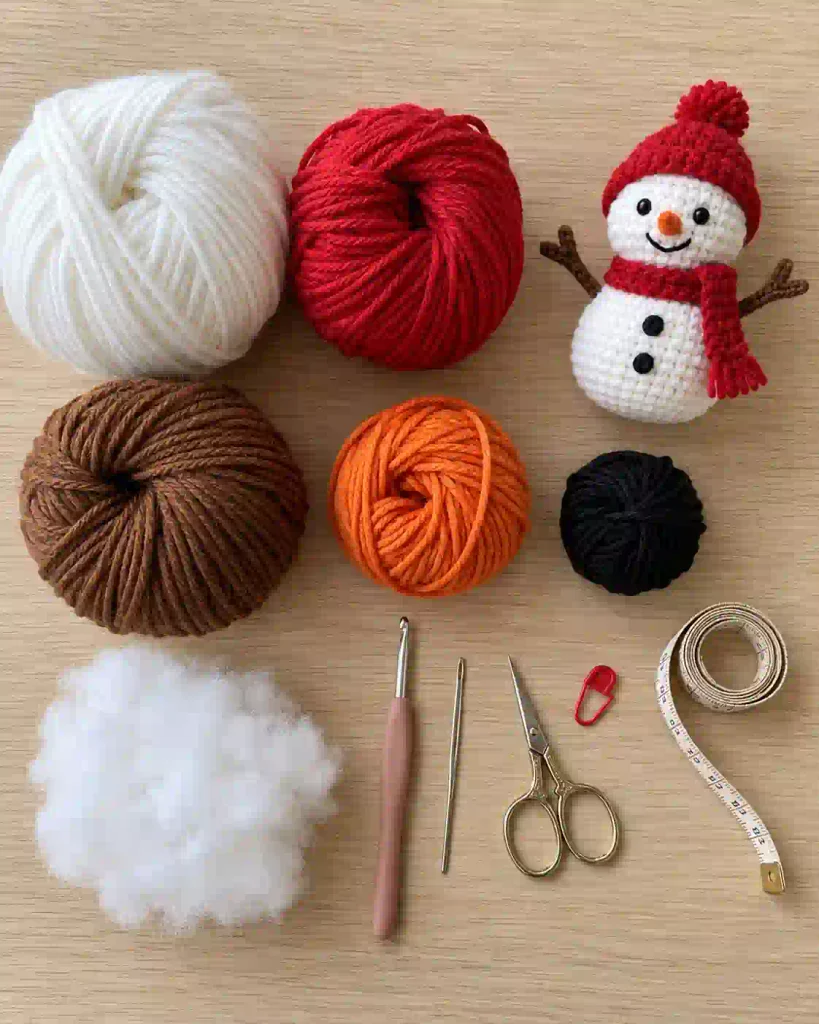
Choose smooth worsted weight yarn in five colors.
Yarn requirements:
- White: Approximately 55–75 yards (50–69 meters) for the head and body
- Red: Approximately 25–35 yards (23–32 meters) for the hat and scarf
- Brown: Approximately 8–12 yards (7–11 meters) for the arms
- Orange: Approximately 2–4 yards (2–4 meters) for the carrot nose
- Black: A small amount for embroidered eyes, smile, and buttons
Additional supplies:
- 3.5 mm crochet hook
- Polyester fiberfill stuffing
- Blunt yarn needle
- Scissors
- Stitch marker
- Measuring tape
- Optional sewing pins for positioning pieces
These quantities are approximate and may change depending on your yarn, tension, and finished size.
Acrylic yarn is a practical choice for decorative amigurumi because it is widely available and generally easy to work with. Cotton yarn is another option if you prefer firmer stitch definition.
For this Easy Crochet Snowman Pattern, use yarns of similar thickness for all crocheted components.
If you’re unsure about yarn substitutions, consult the Craft Yarn Council’s Standard Yarn Weight System.
For the Easy Crochet Snowman Pattern, choosing a consistent yarn weight helps the head, body, and accessories fit together more neatly.
Easy Crochet Snowman Pattern: Abbreviations and Special Stitches
This tutorial uses US crochet terminology.
| Abbreviation | Meaning |
|---|---|
| MR | Magic ring |
| ch | Chain |
| sc | Single crochet |
| inc | Increase: 2 sc in one stitch |
| dec | Invisible single crochet decrease |
| sl st | Slip stitch |
| st / sts | Stitch / stitches |
| rnd | Round |
| BLO | Back loop only |
Invisible decrease: Insert the hook through the front loops of the next two stitches. Yarn over and pull through both front loops, then yarn over and pull through the remaining two loops.
Repeat notation: Instructions followed by ×6 are repeated six times.
All amigurumi pieces are worked in continuous spiral rounds unless otherwise stated. Do not join rounds with a slip stitch.
The scarf is worked in turned rows. Its turning chain does not count as a stitch.
For more help, visit the Craft Yarn Council’s Crochet Abbreviations Guide.
Easy Crochet Snowman Pattern Gauge, Size and Notes
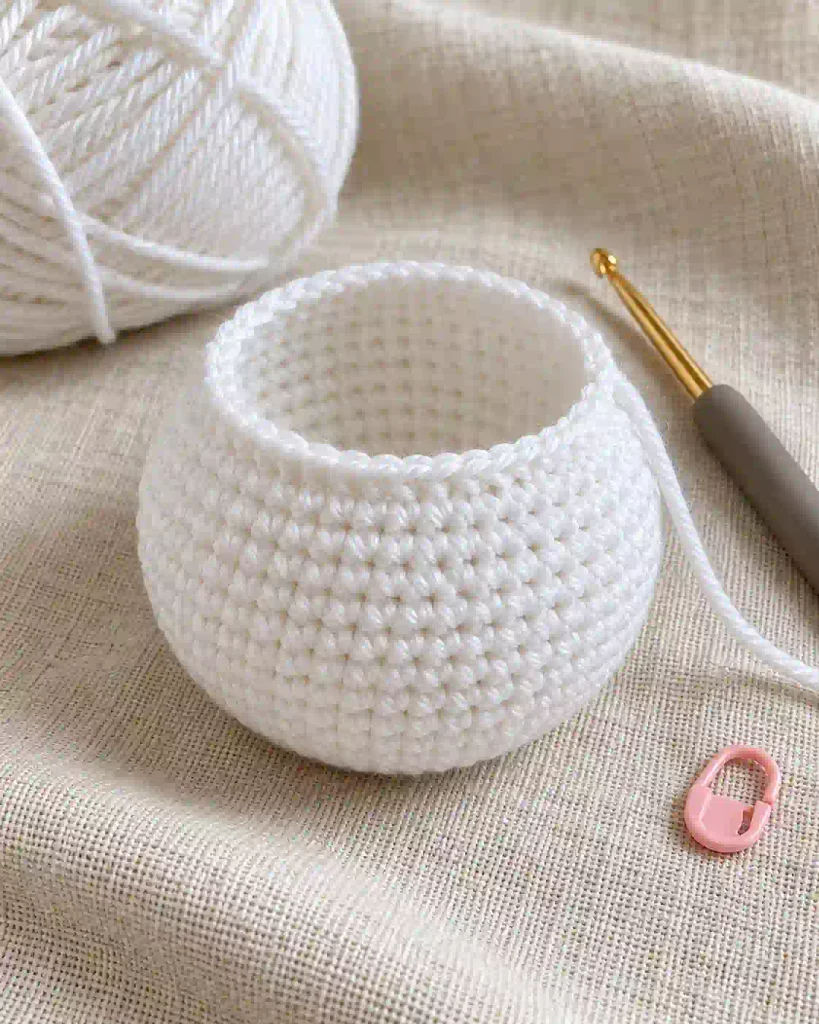
The finished snowman is expected to measure approximately 6–7 inches (15–18 cm) tall, including the hat, and 3–3.5 inches (7.5–9 cm) across the widest part of the body.
These measurements are approximate.
Gauge is less important than creating firm stitches that keep the stuffing inside.
For a general starting point, aim for approximately 5–6 single crochet stitches per inch (2.5 cm). This is a suggested reference rather than a tested gauge.
If you want to measure your tension, crochet a small single crochet swatch and count the stitches across one inch.
If your fabric is too loose, try a smaller hook.
The head, body, arms, nose, and hat are worked in continuous rounds. The scarf is made in turned rows.
Use a stitch marker to identify the beginning of every round.
Count stitches after increases and decreases to maintain the intended shapes.
Easy Crochet Snowman Pattern: Method Overview
This Easy Crochet Snowman Pattern begins with the two main white pieces.
First, crochet the head, increasing from a small magic ring to a rounded shape before decreasing and closing the opening.
Next, crochet the body. Its wider lower section gradually narrows toward the neck, creating a familiar snowman silhouette.
After the main pieces are complete, make two brown arms and a small orange carrot nose.
The red hat is crocheted in rounds, while the scarf is worked in simple rows.
Once all the pieces are finished, stuff the head and body, sew them together, and attach the smaller components.
Embroider the eyes, smile, and buttons using black yarn.
Finally, position the hat and wrap the scarf around the neck.
Working in this order allows you to adjust the placement of each feature before sewing it permanently.
Step-by-Step Easy Crochet Snowman Tutorial
Step 1: Crochet the Snowman Head
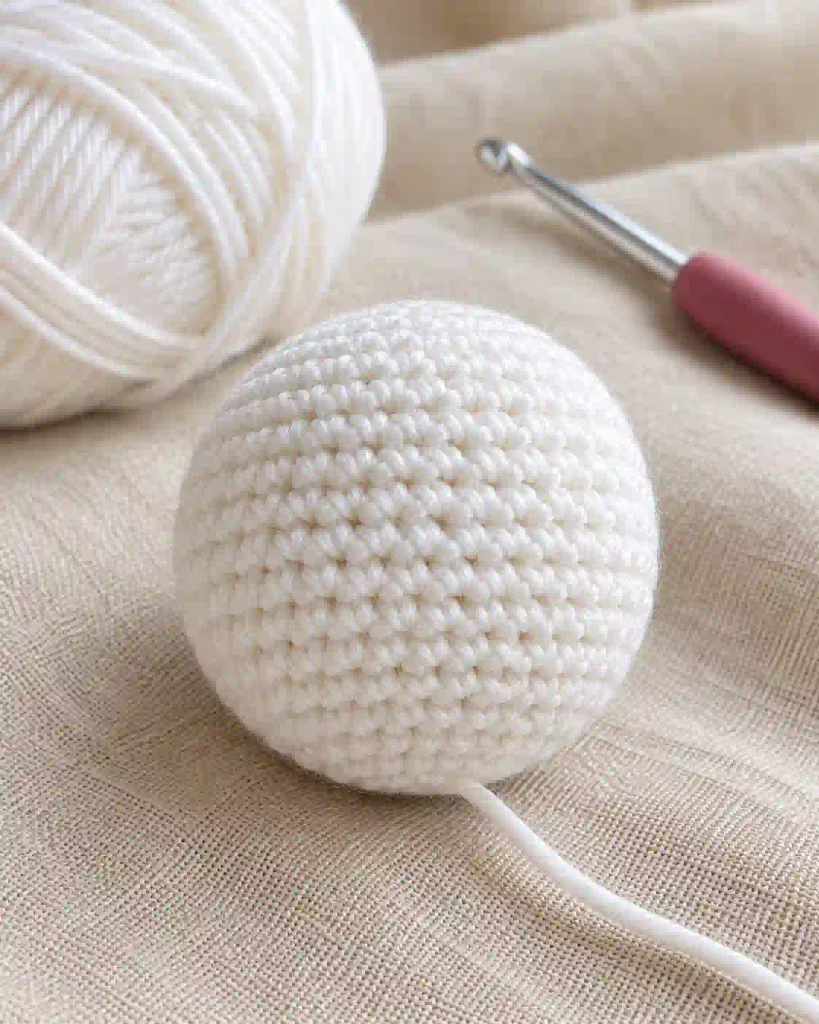
Using white yarn, make a magic ring.
Round 1: 6 sc in MR. (6)
Round 2: Inc in each stitch. (12)
Round 3: (1 sc, inc) ×6. (18)
Round 4: (2 sc, inc) ×6. (24)
Round 5: (3 sc, inc) ×6. (30)
Round 6: (4 sc, inc) ×6. (36)
Rounds 7–12: Sc in each stitch around. (36)
Round 13: (4 sc, dec) ×6. (30)
Round 14: (3 sc, dec) ×6. (24)
Round 15: (2 sc, dec) ×6. (18)
Stuff the head firmly, distributing the fiberfill evenly.
Round 16: (1 sc, dec) ×6. (12)
Round 17: Dec ×6. (6)
Fasten off, leaving a long sewing tail.
Thread the tail through the front loops of the remaining six stitches and pull gently to close the opening.
The head should be rounded and firm without visible stuffing between stitches.
Keep the sewing tail for attaching the head to the body later.
Avoid overstuffing, which can distort the shape and stretch the crochet fabric.
Step 2: Crochet the Snowman Body
Using white yarn, make a magic ring.
Round 1: 6 sc in MR. (6)
Round 2: Inc ×6. (12)
Round 3: (1 sc, inc) ×6. (18)
Round 4: (2 sc, inc) ×6. (24)
Round 5: (3 sc, inc) ×6. (30)
Round 6: (4 sc, inc) ×6. (36)
Round 7: (5 sc, inc) ×6. (42)
Rounds 8–13: Sc around. (42)
Round 14: (5 sc, dec) ×6. (36)
Round 15: Sc around. (36)
Round 16: (4 sc, dec) ×6. (30)
Round 17: Sc around. (30)
Round 18: (3 sc, dec) ×6. (24)
Round 19: Sc around. (24)
Round 20: (2 sc, dec) ×6. (18)
Fasten off, leaving a long sewing tail.
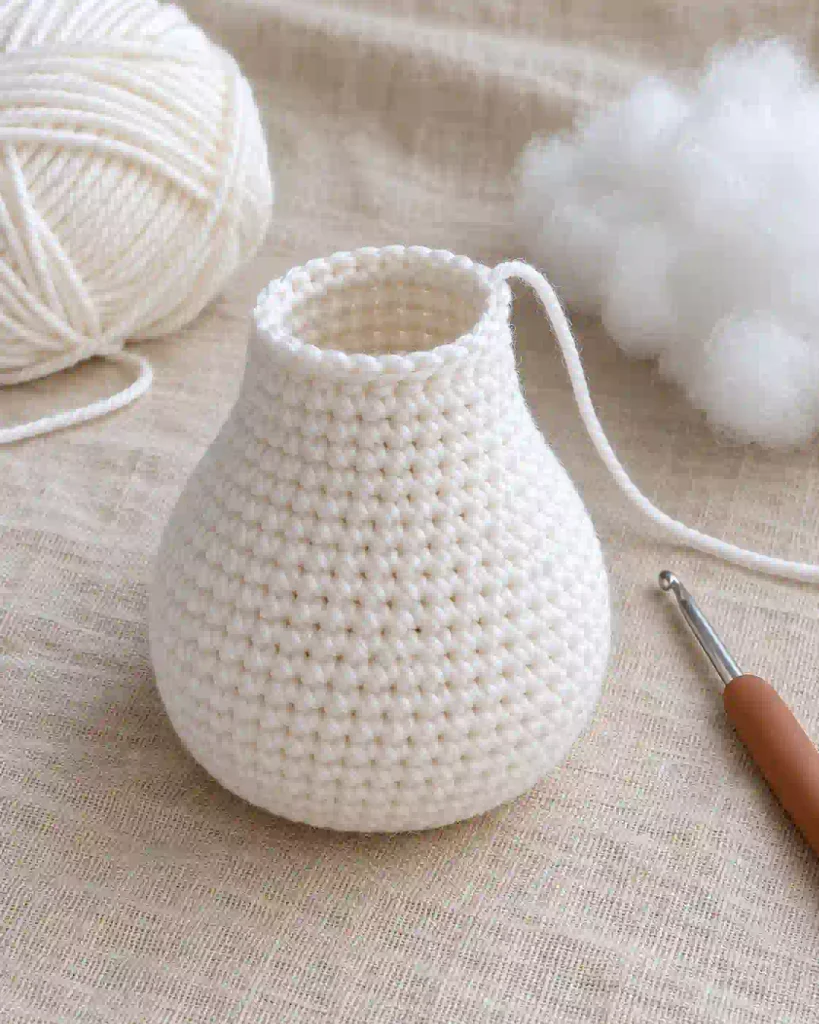
Stuff the body firmly, paying particular attention to the rounded base.
The lower section should be wider than the upper section.
Leave the final 18-stitch opening unclosed.
This opening will be positioned beneath the head during assembly.
Before attaching the head, place the stuffed body on a flat surface.
If it leans noticeably, redistribute the stuffing to create a more balanced shape.
Step 3: Crochet the Carrot Nose and Brown Arms
Carrot nose
Using orange yarn, make a magic ring.
Round 1: 4 sc in MR. (4)
Round 2: Sc around. (4)
Round 3: (1 sc, inc) ×2. (6)
Round 4: Sc around. (6)
Round 5: (2 sc, inc) ×2. (8)
Fasten off, leaving a long sewing tail.
The narrow starting end forms the carrot tip. The final eight-stitch opening forms the base that attaches to the face.
Light stuffing is optional.
Brown arms — make two
Using brown yarn, make a magic ring.
Round 1: 5 sc in MR. (5)
Rounds 2–9: Sc around. (5)
Fasten off, leaving a sewing tail.
Do not stuff the arms.
Flatten each arm slightly.
The finished arms should be narrow and flexible enough to angle upward when attached.
These crocheted arms require no internal wire, making them simpler to construct than pipe-cleaner branches.
Easy Crochet Snowman Pattern: Hat and Scarf
Crochet the Red Winter Hat
Using red yarn, make a magic ring.
Round 1: 6 sc in MR. (6)
Round 2: Inc ×6. (12)
Round 3: (1 sc, inc) ×6. (18)
Round 4: (2 sc, inc) ×6. (24)
Round 5: (3 sc, inc) ×6. (30)
Round 6: (4 sc, inc) ×6. (36)
Rounds 7–10: Sc around. (36)
Round 11: Working in BLO, sc around. (36)
Round 12: Sc around. (36)
Fasten off and weave in the end.
The hat has a rounded crown and a simple lower band.
Try it on the head before sewing it in place.
Crochet the Matching Scarf
Using red yarn, ch 46.
Row 1: Sc in the second chain from the hook and in each remaining chain. Ch 1, turn. (45)
Row 2: Sc across. Ch 1, turn. (45)
Row 3: Sc across. (45)
Fasten off and weave in the ends.
The scarf should wrap around the neck once, leaving two short ends.
Adjust its length if your yarn or tension produces a different fit.
Easy Crochet Snowman Pattern: Assembly
Place the head over the open top of the stuffed body.
Use the long white sewing tail to attach the body’s 18-stitch opening to the underside of the head.
Sew evenly around the neck opening, adding a little more stuffing before closing the seam if needed.
Position the carrot nose near the center of the face and sew its wider base securely against the head.
Using black yarn, embroider two small eyes above the nose and a gentle curved smile below it.
Attach the brown arms to opposite sides of the upper body, angling them slightly upward.
Embroider three small black buttons down the front of the body.
Place the red hat over the top of the head. Secure it with discreet stitches if desired.
Wrap the scarf around the neck and tie it loosely.
Check that the head, arms, and nose are securely attached before displaying the finished snowman.
Easy Crochet Snowman Pattern: Finishing and Care
Weave in all remaining yarn tails with a blunt yarn needle.
For secure finishing, pass the tails through several stitches inside the amigurumi before trimming.
Gently reshape the head and body with your hands to distribute the stuffing evenly.
Blocking is usually unnecessary for stuffed crochet figures.
If the scarf needs shaping, follow the yarn manufacturer’s care instructions before using water or steam.
Some acrylic yarns tolerate gentle washing, while cotton and other fibers may require different care.
Avoid excessive heat, especially when working with synthetic yarn.
For decorative amigurumi, light surface cleaning may be sufficient.
Before storing your Easy Crochet Snowman Pattern project, inspect the seams and embroidered features.
Keep the snowman in a clean, dry place where the hat and scarf will not become crushed.
FAQs and Troubleshooting for Easy Crochet Snowman Pattern
1. Why does my snowman head look uneven?
Uneven shaping often happens when increases or decreases are missed.
Use a stitch marker at the beginning of each round.
The head reaches 36 stitches in Round 6 and stays at that count through Round 12.
If the stitch count changes unexpectedly, review the previous round before continuing.
Maintaining consistent tension will also help create a smoother shape.
2. Why can I see stuffing through the stitches?
Visible stuffing usually indicates that the crochet fabric is too loose.
Try a smaller hook while keeping the same yarn weight.
A 3.5 mm hook is a useful starting point for worsted weight amigurumi, but individual tension varies.
Avoid adding too much fiberfill, as overstuffing can stretch the stitches and create gaps.
3. Can I use cotton yarn for this snowman?
Yes. Cotton yarn can create a firm snowman with clearly defined stitches.
Choose a similar yarn weight and adjust your hook size if needed.
Cotton is often less stretchy than acrylic, so take care when stuffing and sewing.
The finished size and yarn quantities may differ from the estimates.
4. How can I make a larger crochet snowman?
Use thicker yarn with a suitable larger crochet hook.
Follow the same stitch counts and construction steps.
The finished snowman will generally be larger, although the exact dimensions depend on yarn thickness and tension.
You will also need more yarn and stuffing.
For a smaller version, use thinner yarn and a correspondingly smaller hook.
5. Is this crochet snowman safe for young children?
This design is intended as a decoration rather than a toy for babies or toddlers.
Although the eyes and buttons are embroidered, the snowman still contains stuffing and separately attached components.
Check all seams carefully.
Do not assume that a handmade item is suitable for young children simply because it contains no plastic safety eyes.
Additional construction and safety considerations would be necessary for child-directed use.
Final Thoughts
This Easy Crochet Snowman Pattern is a cheerful way to practice amigurumi while making a handmade winter decoration. Its rounded shape, carrot nose, embroidered face, and cozy accessories give it plenty of seasonal charm.
For more holiday crochet inspiration, explore our Crochet Christmas Tree Ornament Pattern. You can also try the Crochet Heart Coaster Pattern for a handmade gift or the Mini Crochet Turtle Pattern for another amigurumi project.
If you enjoy comparing different construction methods, visit the Crochet Snowman Pattern by Crochet 365 Knit Too for another snowman design and tutorial.