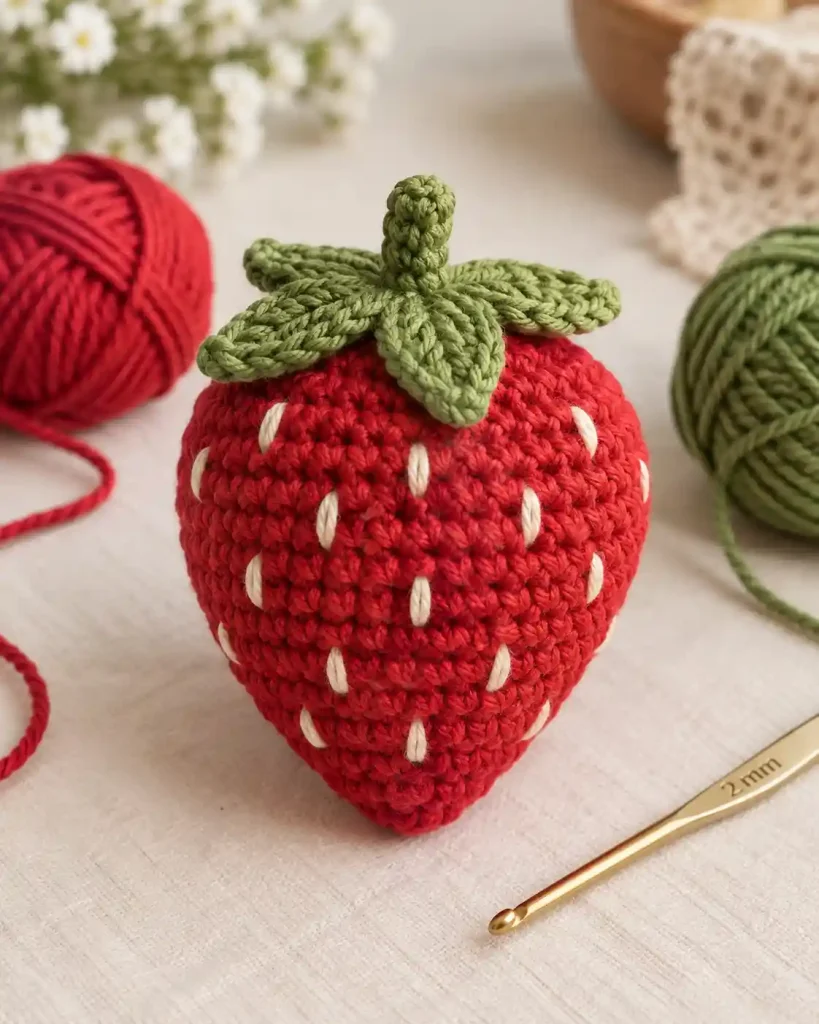
Crochet Strawberry Pattern is a small amigurumi-style project for making a soft, three-dimensional strawberry with a green leafy top. Using sport weight cotton yarn and basic US crochet stitches, you will build the fruit in continuous rounds, shape its tapered base, add stuffing, and crochet a separate five-point leafy cap. The finished strawberry can be used as a small decoration or adapted into a phone, bag, or keychain charm.
Crochet Strawberry Pattern at a Glance
This Crochet Strawberry Pattern is worked primarily in continuous spiral rounds using sport weight cotton yarn and a 2 mm crochet hook. The strawberry consists of two crochet pieces: a stuffed red fruit and a separate green leafy cap with five points.
The project uses single crochet, increases, decreases, chains, slip stitches, and half double crochet. It is suitable for an adventurous beginner who already understands the magic ring and basic amigurumi construction.
- Skill level: Adventurous beginner
- Yarn: Sport weight cotton
- Hook: 2 mm
- Construction: Stuffed fruit + separate leafy cap
- Finished height: Approximately 2.25–2.75 in / 5.5–7 cm
- Finished width: Approximately 1.75–2.25 in / 4.5–5.5 cm
- Estimated time: Approximately 45–75 minutes
- Gauge: Not critical
Measurements and making time are approximate because this version has not been independently tested.
Crochet Strawberry Pattern: Materials and Yarn Quantities
The Crochet Strawberry Pattern requires only small amounts of red and green yarn. Cotton is a practical choice because its stitch definition helps the fruit maintain a clean shape.
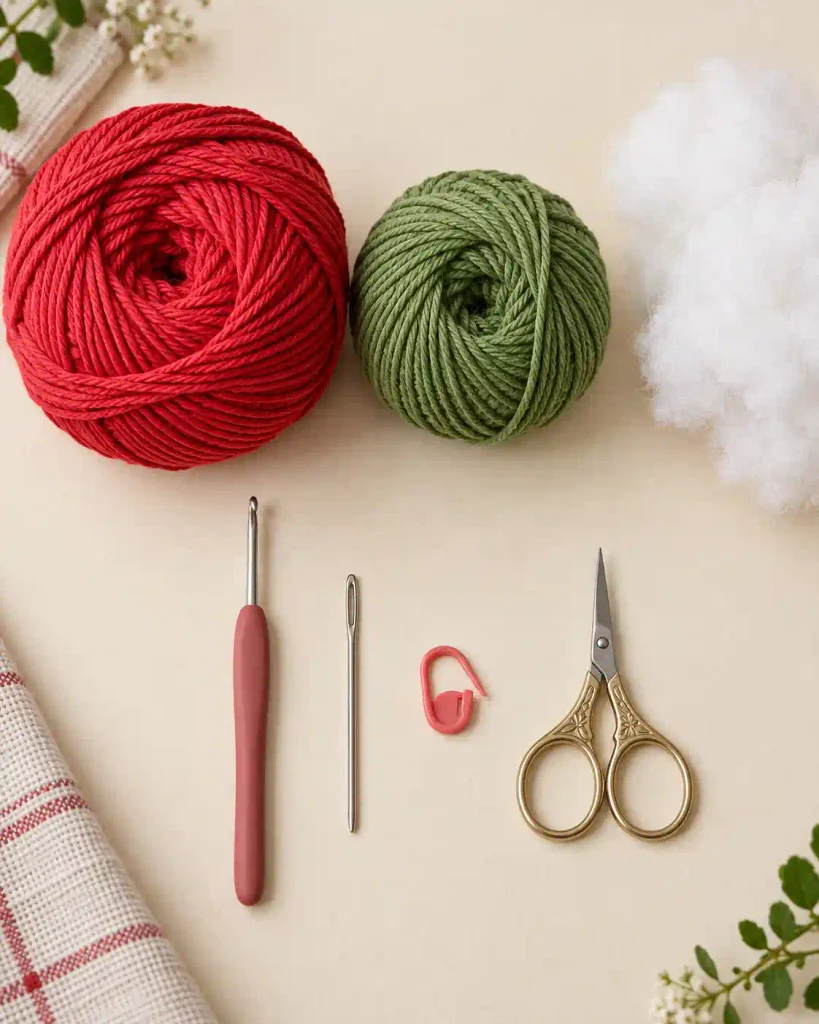
You will need:
- Red sport weight cotton yarn: approximately 15–20 yd / 14–18 m, about 6–9 g
- Green sport weight cotton yarn: approximately 4–7 yd / 4–6.5 m, about 2–4 g
- 2 mm crochet hook
- Polyester fiberfill
- Yarn needle
- Stitch marker
- Small scissors
For an optional phone charm version, you will also need:
- Phone charm strap
- Small jump ring
- Eye pin
- Beads or decorative charms
- Flat-nose pliers
- Round-nose pliers
The yarn quantities are approximate because individual tension affects yarn usage. A smooth sport weight cotton or cotton-blend yarn is the simplest substitution. If you change yarn thickness, the finished strawberry will also change in size, so select a hook that produces a dense amigurumi fabric.
Crochet Strawberry Pattern: Abbreviations and Special Stitches
This Crochet Strawberry Pattern uses standard US crochet terminology.
- R – round
- ch – chain
- st(s) – stitch(es)
- sl st – slip stitch
- sc – single crochet
- hdc – half double crochet
- inc – increase; work 2 sc in the same stitch
- dec – decrease; single crochet 2 stitches together
- MR – magic ring
- [ ] – repeat the instructions inside the brackets
- ( ) – stitch count at the end of the round
For a smoother surface, an invisible single crochet decrease can be substituted for a standard decrease.
The red fruit is worked continuously in a spiral. Do not join rounds with a slip stitch. Place a stitch marker in the first stitch and move it upward after every completed round.
Crochet Strawberry Pattern Gauge, Size and Notes
Gauge is less critical for this Crochet Strawberry Pattern because the strawberry is a decorative stuffed piece rather than a fitted item. Your main goal is a firm fabric without spaces large enough for the fiberfill to show.
With sport weight cotton and a 2 mm hook, expect a finished fruit approximately 2.25–2.75 inches / 5.5–7 cm tall and 1.75–2.25 inches / 4.5–5.5 cm wide. These measurements are approximate.
A traditional gauge swatch is unnecessary. Instead, check the fabric after the first several rounds. If visible gaps appear between stitches, use a slightly smaller hook or tighten your tension.
The fruit is worked in continuous rounds without joining. Always count the stitches after an increase or decrease round. Accurate counts are especially important for maintaining an even strawberry shape.
Crochet Strawberry Pattern: Method Overview
The Crochet Strawberry Pattern begins with the red fruit. Start with six single crochet stitches in a magic ring and increase gradually until the widest part reaches 24 stitches. Two even rounds provide enough depth for a rounded upper body.
The second stage uses controlled decreases to transform that rounded body into a tapered strawberry shape. Fiberfill is added before the final opening becomes too narrow, and the remaining six stitches are drawn closed.
The green leafy cap is crocheted separately. A five-stitch center provides one base stitch for each of five pointed leaves. Each point is created with a short chain and graduated stitches.
Finally, center the leafy cap over the wider end of the strawberry and sew it securely in place. The completed strawberry can remain a simple decoration or be fitted with suitable hardware for use as a charm.
How to Crochet the Strawberry Body
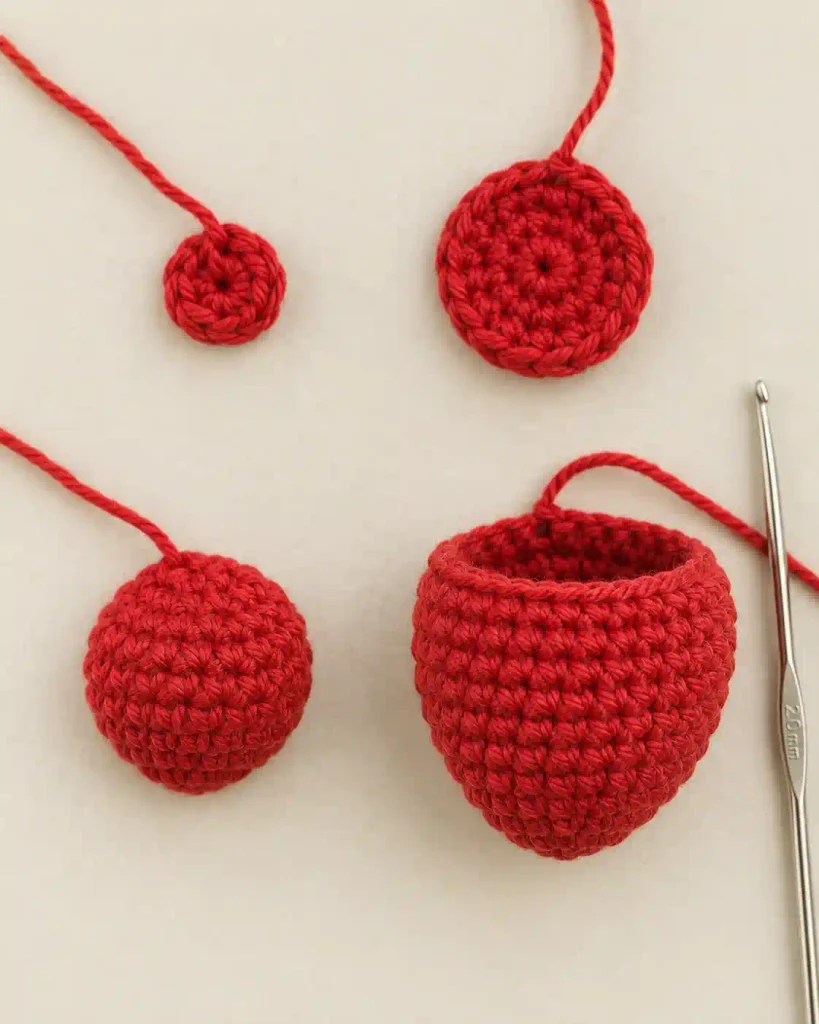
crochet-strawberry-body
For this Crochet Strawberry Pattern, begin with red sport weight cotton yarn and a 2 mm crochet hook.
Make a magic ring.
R1: Work 6 sc into MR. (6)
Pull the ring closed and place a stitch marker in the first stitch.
R2: Inc in each st around. (12)
R3: [1 sc in next st, inc in next st] 6 times. (18)
R4: 1 sc in each st around. (18)
The first four rounds establish the upper portion of the strawberry.
R5: [1 sc in each of next 2 sts, inc in next st] 6 times. (24)
R6: 1 sc in each st around. (24)
R7: 1 sc in each st around. (24)
Do not fasten off.
After Round 7, the piece should resemble a small rounded cup. The 24-stitch rounds create the widest portion of the fruit.
Check that your fabric is dense and that the stitches remain even. If the crochet feels extremely stiff, relax your tension slightly. If large spaces appear between stitches, a smaller hook may produce a cleaner stuffed finish.
How to Shape and Stuff the Strawberry
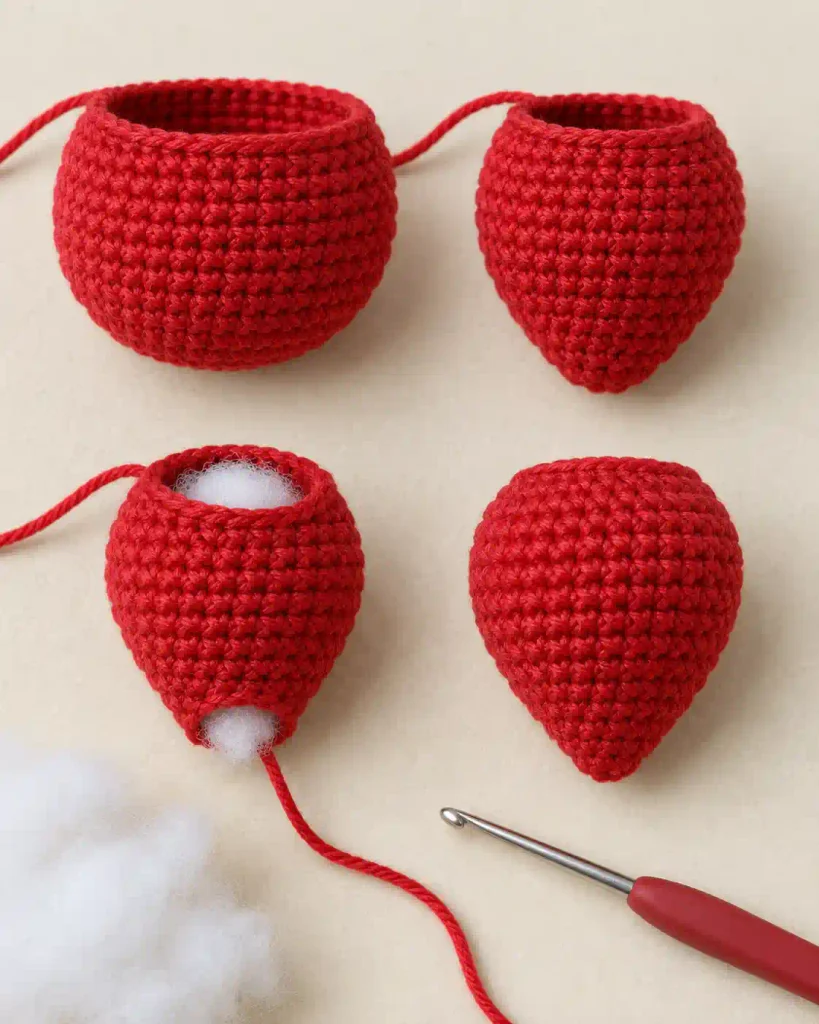
The next stage of the Crochet Strawberry Pattern creates the tapered lower portion. Continue with the red yarn without joining or turning.
R8: [1 sc in each of next 2 sts, dec] 6 times. (18)
Count carefully before continuing. You should have exactly 18 stitches.
R9: 1 sc in each st around. (18)
This even round provides a little extra length before the stronger decreases begin.
R10: [1 sc in next st, dec] 6 times. (12)
Pause here and begin stuffing.
Add small amounts of polyester fiberfill at a time. Push the stuffing toward the upper sides first, then fill the center. The strawberry should feel firm enough to maintain its shape but should not be stuffed so tightly that the crochet stitches stretch apart.
R11: Dec 6 times. (6)
Fasten off, leaving a 6–8 in / 15–20 cm yarn tail.
Thread the tail through a yarn needle and pass it through the front loops of the remaining six stitches. Pull gently to close the opening.
For a slightly more defined strawberry point, insert the needle through the closed bottom and bring it out farther up the fruit. Pull very lightly before securing the yarn. Do not pull so tightly that the strawberry becomes distorted.
How to Crochet the Five-Point Leafy Top
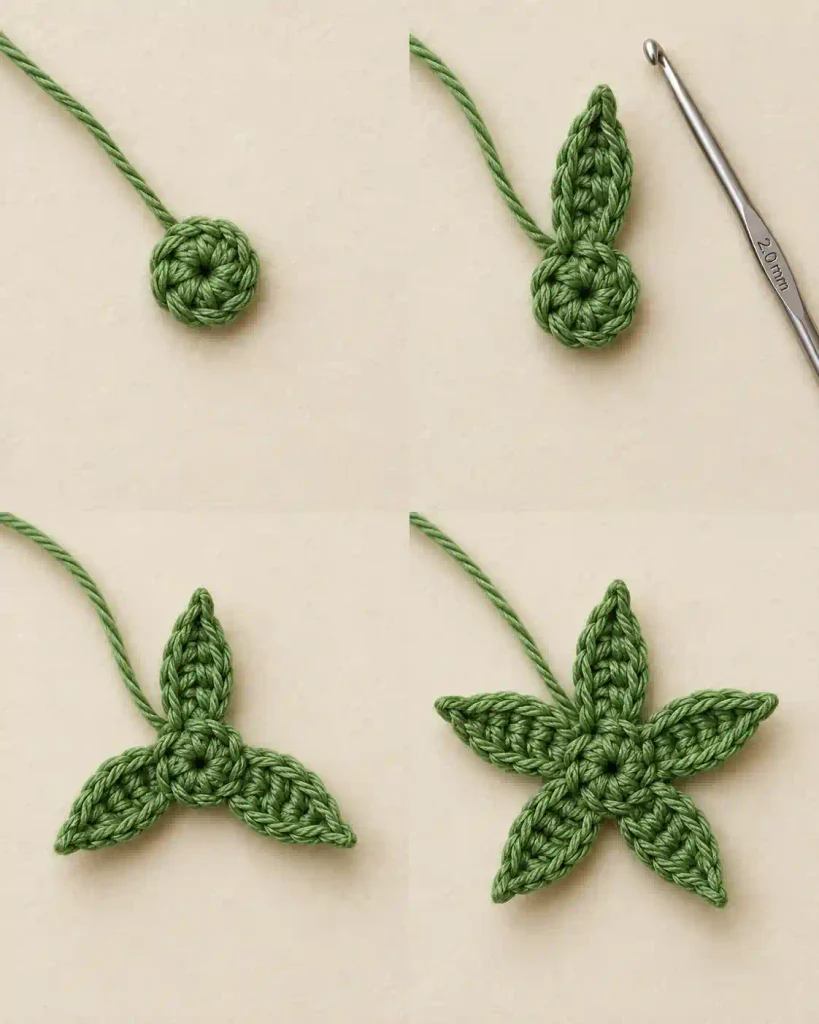
The green cap gives the Crochet Strawberry Pattern its recognizable strawberry appearance. Use green sport weight cotton and the 2 mm hook.
Make a magic ring.
R1: Work 5 sc into MR. (5)
Pull the ring closed. Each of these five stitches will support one green point.
For the first point, ch 4.
Starting in the second chain from the hook:
- Sl st in next ch
- Sc in next ch
- Hdc in next ch
- Sl st into the same base stitch where the chain began
Sl st into the next stitch of Round 1.
Repeat the same sequence from that stitch.
Continue until you have made five points total, one from each stitch of the center.
After completing the fifth point, sl st near the beginning to finish neatly.
Fasten off, leaving approximately 8 in / 20 cm of green yarn for sewing.
Spread the five points gently with your fingers. They should radiate around the small central circle and remain flexible enough to lie naturally over the top of the strawberry.
Crochet Strawberry Pattern: Assembly
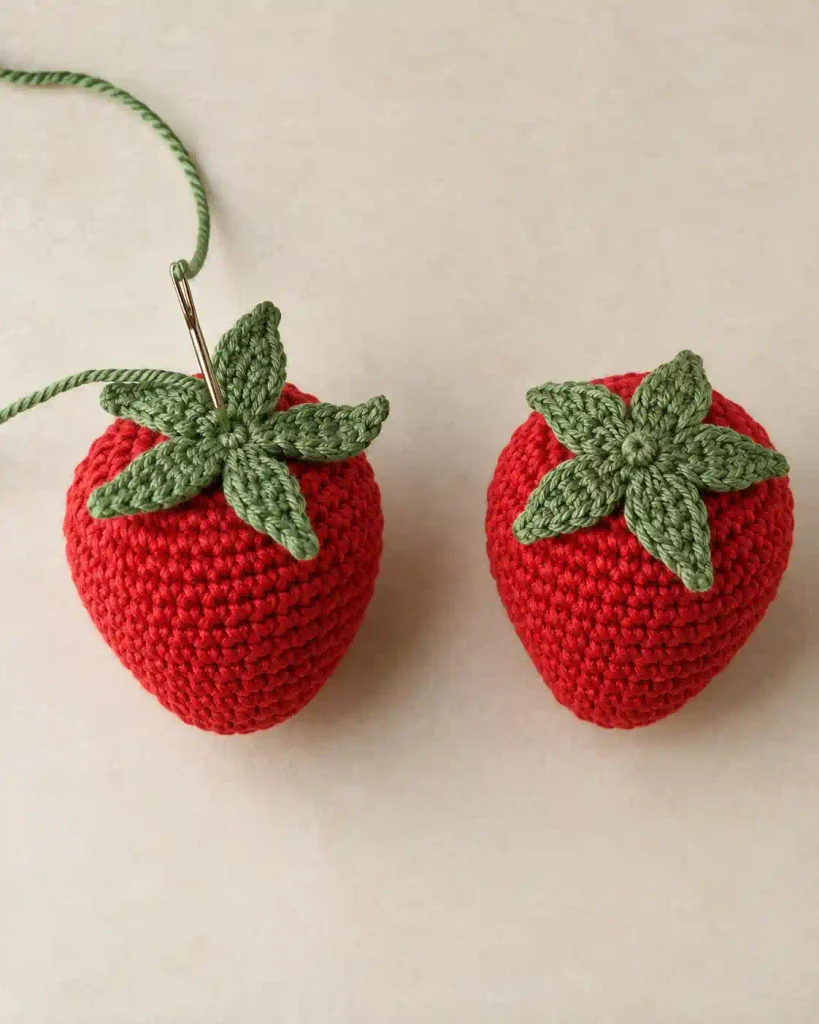
To assemble the Crochet Strawberry Pattern, place the green leafy cap directly over the wider upper end of the stuffed red fruit. Arrange all five points evenly before beginning to sew.
Thread the long green yarn tail onto a yarn needle. Sew around the central green circle, passing through both the leafy cap and the upper stitches of the strawberry.
Keep the stitches small and secure. Avoid sewing the complete length of each green point to the fruit. Leaving most of each point free creates a more dimensional finish.
Knot securely where necessary and hide the remaining yarn tail inside the strawberry.
For a hanging charm, attach a secure loop through the center of the green cap. If you are making a phone charm, a small jump ring and eye pin can connect the strawberry to beads, decorative charms, and a phone strap.
Close all metal loops completely with appropriate pliers and check the attachment before using the charm.
Crochet Strawberry Pattern: Finishing and Care
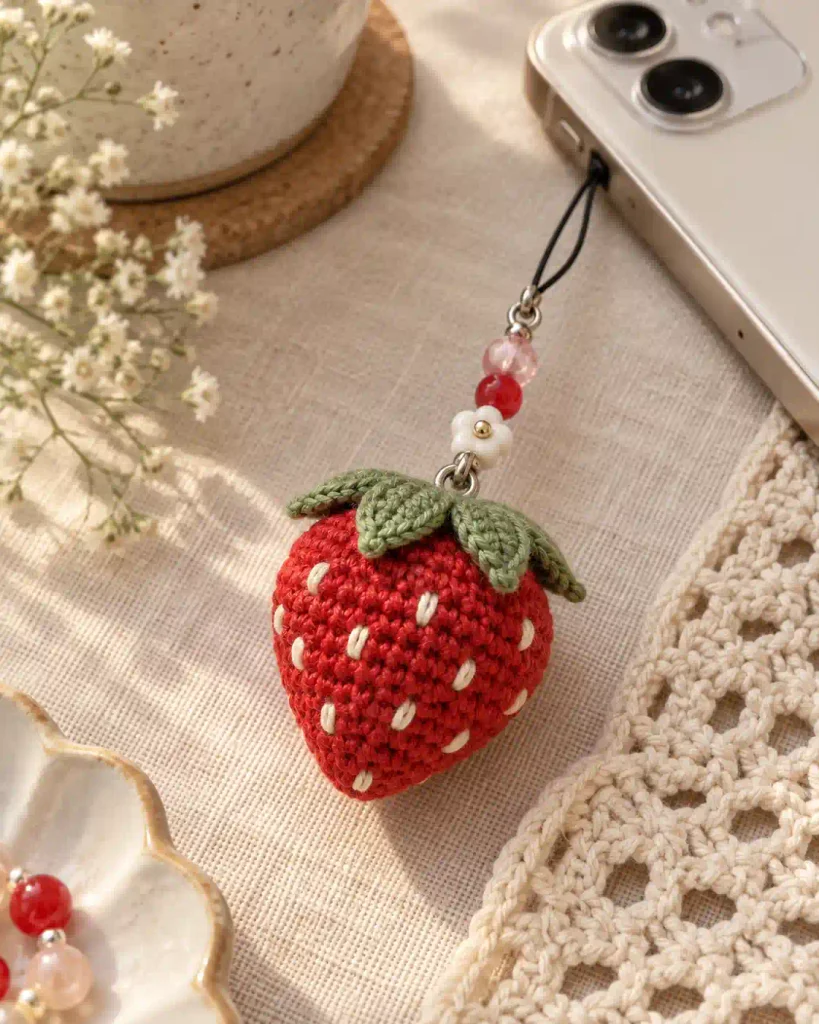
Finish the Crochet Strawberry Pattern by inspecting the fruit from every side. The upper section should look rounded while the bottom gradually narrows into a soft point.
Gently redistribute the fiberfill with your fingers if one side appears flatter. Weave any remaining yarn tails securely into the crochet before trimming the excess.
The stuffed fruit usually does not require blocking. If the green points curl, gently shape them with your fingers. Light blocking should only be used when appropriate for the yarn fiber and according to the yarn manufacturer’s instructions.
Follow the care directions on your yarn label rather than assuming the finished strawberry is machine washable.
If you added metal findings, beads, or a detachable phone strap, remove detachable components before cleaning when possible. Regularly check the leafy cap, hanging point, jump rings, and other attachments for looseness.
FAQs and Troubleshooting for Crochet Strawberry Pattern
1. Why is my stitch count wrong after the increase rounds?
The Crochet Strawberry Pattern should have 6 stitches after R1, 12 after R2, 18 after R3, and 24 after R5. A common mistake is skipping a stitch or accidentally crocheting into the first stitch twice. Keep a marker in the first stitch and count each completed increase round before moving on.
2. Why does my strawberry look round instead of tapered?
Check the decreases in R8, R10, and R11. The stitch count must reduce from 24 to 18, then 12, then 6. Overstuffing the lower portion can also make the Crochet Strawberry Pattern look round. Keep more fullness around the upper and middle body and less stuffing near the final point.
3. Can I substitute another yarn for sport weight cotton?
Yes. For this Crochet Strawberry Pattern, a smooth sport weight cotton or cotton blend is the easiest substitute because it provides clear stitches and a firm fabric. Other fibers can work, but softness, stretch, and finished shape may differ.
4. How can I make the crochet strawberry bigger or smaller?
Changing yarn and hook size together is easier than redesigning the stitch counts. Use thicker yarn with a suitable hook for a larger strawberry or finer yarn with a smaller hook for a miniature version. Maintain a dense fabric so stuffing remains hidden.
5. How should I wash a crochet strawberry?
Check the care instructions for the exact yarn you used. Do not assume every cotton or blended yarn has identical washing requirements. Remove detachable hardware when possible, clean according to the yarn label, reshape the Crochet Strawberry Pattern gently afterward, and allow it to dry as recommended.
Final Thoughts
This Crochet Strawberry Pattern combines several useful amigurumi techniques in one small project, including continuous rounds, controlled increases and decreases, stuffing, closing, and sewing separate pieces together. The 24-stitch body creates the rounded fruit, while the gradual decreases form the tapered bottom and the five-point green cap completes the strawberry shape. Once you are comfortable with the construction, try different shades of red, pink, or green without changing the stitch counts. The finished strawberry works well as a small handmade decoration and can also be adapted into a phone charm, bag charm, or keychain.
For another small handmade accessory, try this Crochet Flower Keychain Pattern. If you enjoyed working with stuffing and shaping, continue with this Medium Crochet Pumpkin Pattern for a larger seasonal project.