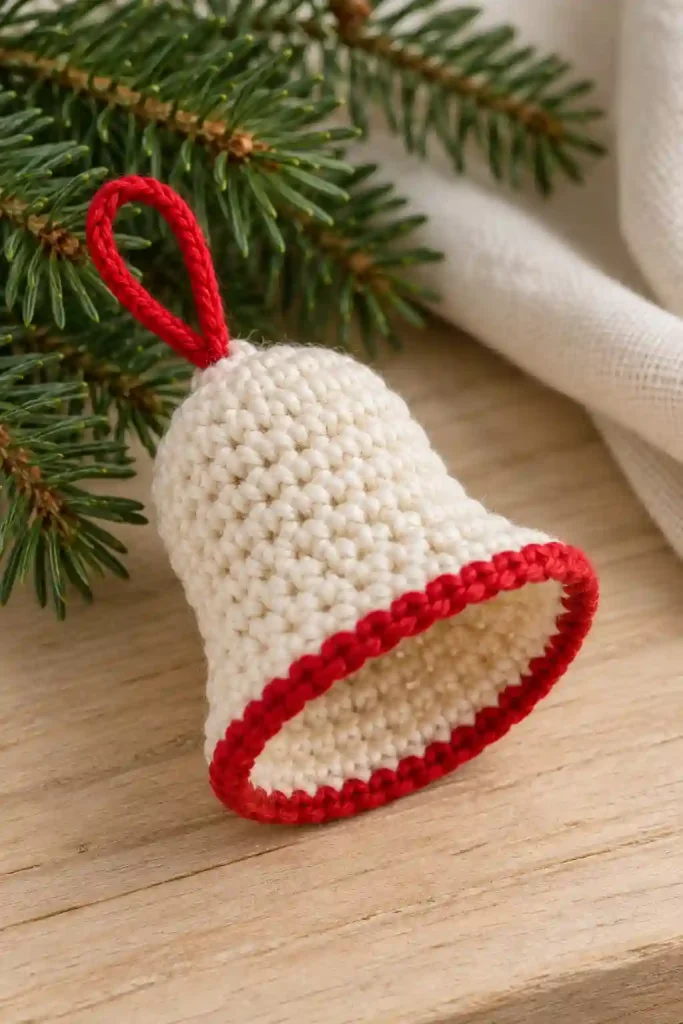
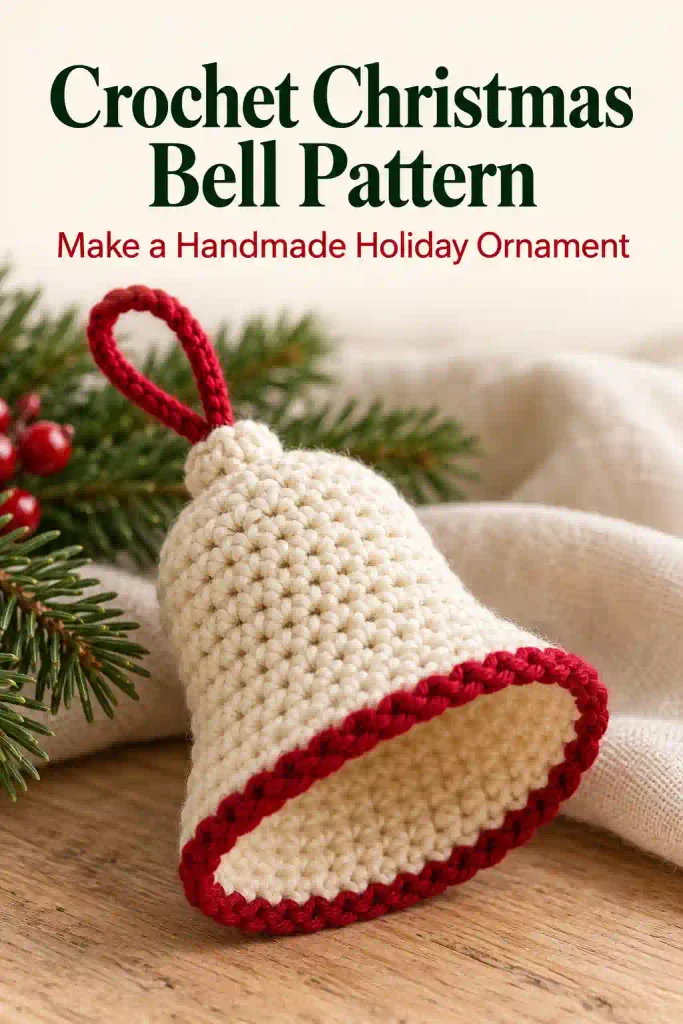
Crochet Christmas Bell Pattern projects bring a soft, handmade detail to a Christmas tree, gift package, or mantel display. This guide presents a small hollow bell with an ivory body, a gently flared red rim, and a matching hanging loop. You will learn how to shape the crown, build the walls, widen the opening, and finish the ornament. The independently drafted pattern below is untested; measurements and yarn allowances are estimates.
Crochet Christmas Bell Pattern at a Glance
This Crochet Christmas Bell Pattern is suitable for confident beginners familiar with single crochet, increases, and working in a spiral. The bell shell is made in one piece from the closed crown down to the open lower edge. A separate yarn loop provides the hanger; an optional metal jingle bell can hang inside.
Use category 4 yarn and a 4 mm hook as a starting combination. Aim for firm but comfortable stitches that help the hollow shell hold its shape. The estimated finished size is approximately 2½–3 inches tall and wide, excluding the hanger, but this has not been verified by making a sample.
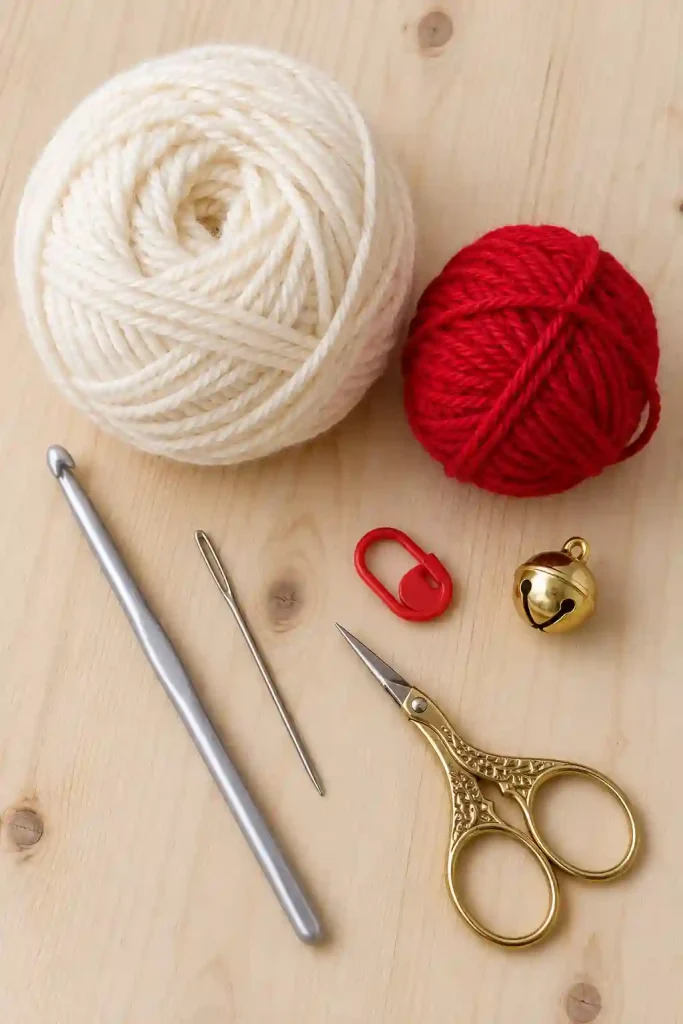
Crochet Christmas Bell Pattern: Materials and yarn quantities
Gather these supplies before beginning the Crochet Christmas Bell Pattern:
- Ivory yarn: Category 4, medium-weight yarn for the bell shell.
- Red yarn: A similar thickness for the lower edge and hanger.
- Crochet hook: 4 mm, or the size needed for a firm fabric.
- Tapestry needle: For hiding tails and attaching the loop.
- Scissors.
- Removable stitch marker: To mark the beginning of each round.
- Optional small metal jingle bell: For a gentle sound inside the ornament.
As an untested planning allowance, reserve approximately 25–40 yards of ivory yarn and 5–10 yards of red. These are generous preparation estimates rather than measured consumption. Yarn weights in grams are omitted because different yarns have different yardage-to-weight ratios.
A smooth yarn makes the stitches easier to identify. Avoid combining a very thin edging yarn with a bulky body yarn unless you want a deliberately different finish. Cotton may create a firmer shell, while acrylic can feel softer; make a trial piece to judge the fabric. Stuffing is not needed because the bottom remains open.
Crochet Christmas Bell Pattern: Abbreviations and special stitches
This Crochet Christmas Bell Pattern uses US terminology:
- ch: Chain.
- sc: Single crochet.
- sl st: Slip stitch.
- st/sts: Stitch/stitches.
- inc: Work 2 sc into the same stitch.
A magic ring is an adjustable loop used to close the top of the bell. Work the first round into the loop, then tighten and secure it.
Instructions in parentheses followed by a repeat number describe a sequence to repeat. A count in square brackets gives the total stitches after the round.
Work into both top loops unless instructed otherwise. Rounds 1–11 form a continuous spiral: do not join or chain between them. The contrasting edging is joined separately. Its starting ch-1 does not count as a stitch.
Crochet Christmas Bell Pattern Gauge, Size and Notes
Exact gauge is not essential for this Crochet Christmas Bell Pattern. The useful test is whether the fabric feels firm enough to keep an open bell shape without stuffing. If the stitches have large gaps or the shell collapses easily, try a smaller hook with the same yarn.
The approximate 2½–3-inch size is an untested estimate. Measure the completed shell from its crown to its lowest edge, excluding the loop. Measure the opening across its widest point without stretching it.
There are 12 numbered rounds in this version. The shell increases to 24 stitches, stays at that count through the walls, then widens to 32 stitches for the rim. Move the marker after each round.
The decorative red round is worked after fastening off the ivory yarn. This deliberate restart gives the color change a clear finishing point and avoids carrying unused yarn through the hollow interior.
Crochet Christmas Bell Pattern: Method overview
Begin the Crochet Christmas Bell Pattern at the crown with a small closed circle. Two increase rounds add width, and the following rounds develop the sides. Because the stitch count stays unchanged, the fabric should gradually form a cup rather than continue spreading flat.
After completing the walls, distribute eight increases around the next round. This creates a modest flare at the open end. A plain round stabilizes that wider edge, and a contrasting red round finishes it.
Next, secure the magic-ring tail and all color-change ends. Add a red hanging loop through the crown using several yarn strands as support. If desired, attach a small metal jingle bell inside.
Finally, gently shape the ornament and check its balance while hanging. Any optional metal bell should remain within the shell rather than pulling the bottom out of shape. Keep the inside hollow throughout the construction.
Crochet Christmas Bell Pattern: Step-by-Step Tutorial
Shape the Closed Crown
Use ivory yarn and leave a starting tail long enough to secure thoroughly.
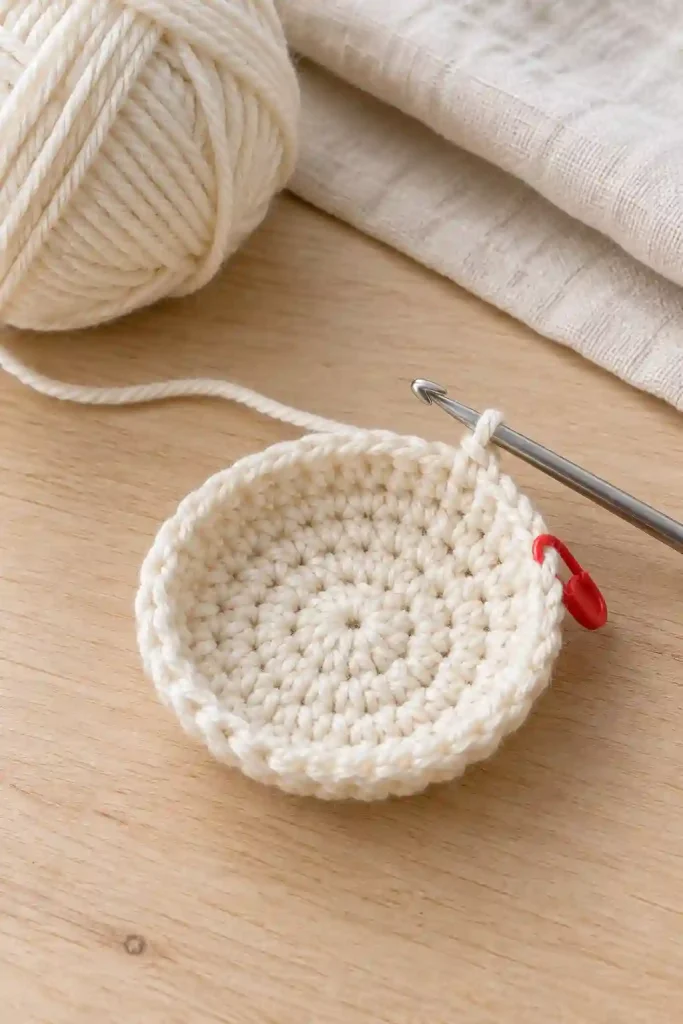
- Round 1: Make a magic ring. Work 8 sc into it. Tighten the ring. [8]
- Round 2: Inc in each stitch around. [16]
- Round 3: (Sc in the next stitch, inc in the next stitch) eight times. [24]
Place a removable marker in the first stitch of each new round. The marker belongs in an actual single crochet, not in the adjustable loop or a loose strand.
Count all 24 stitches before proceeding. Each repeat in Round 3 uses two stitches from the previous round and produces three new stitches. Eight repeats therefore consume the 16 available stitches and produce 24.
The crown may look shallow at this stage; the walls will establish its depth. Do not add extra increases simply because it has not yet formed a full bell. Leave the center tail accessible inside the work so you can secure it before adding the hanger.
Build the Hollow Bell Walls
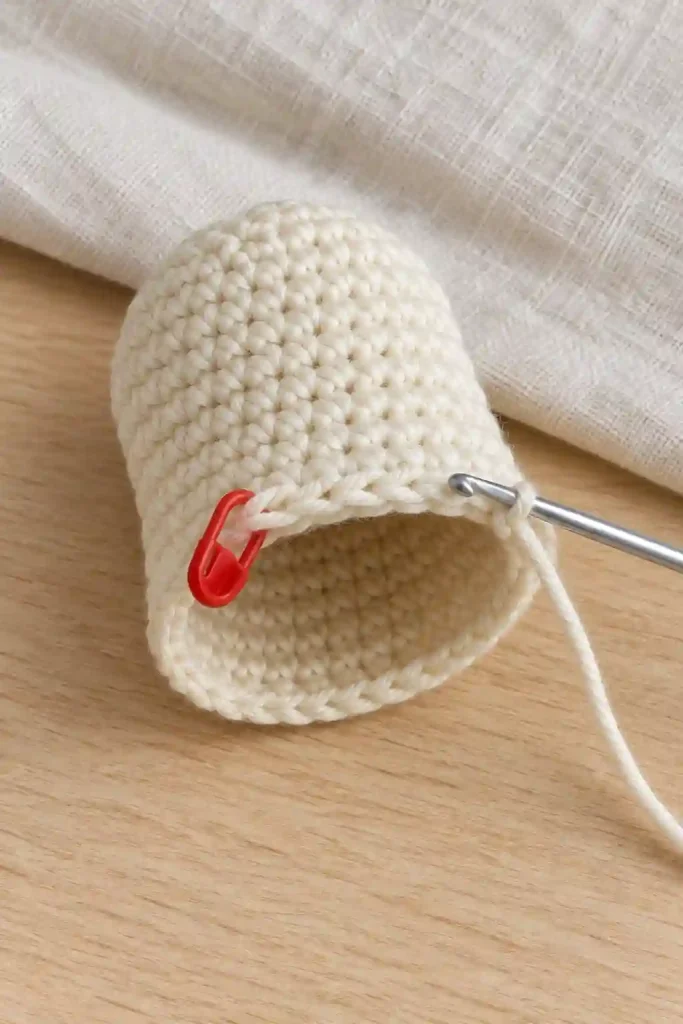
Continue with ivory yarn without joining or turning.
- Round 4: Sc in every stitch around. [24]
- Round 5: Sc in every stitch around. [24]
- Round 6: Sc in every stitch around. [24]
- Round 7: Sc in every stitch around. [24]
- Round 8: Sc in every stitch around. [24]
- Round 9: Sc in every stitch around. [24]
These six rounds build the sides without adding width. Let the fabric curve naturally; do not force it flat on the table. Gently turn the emerging cup so the preferred side faces outward, keeping the working loop secure.
Check the count periodically. An accidental increase near the marker can widen the shell, while skipping a stitch can pull one side inward.
At the end of Round 9, pause and look at the overall shape. This is an untested draft, so assess the proportions before continuing. If experimenting with extra height, add complete 24-stitch rounds here and record the change. Such additions will affect the finished size and yarn consumption.
Flare the Opening and Add the Red Edge
The next increase round widens the bottom evenly.
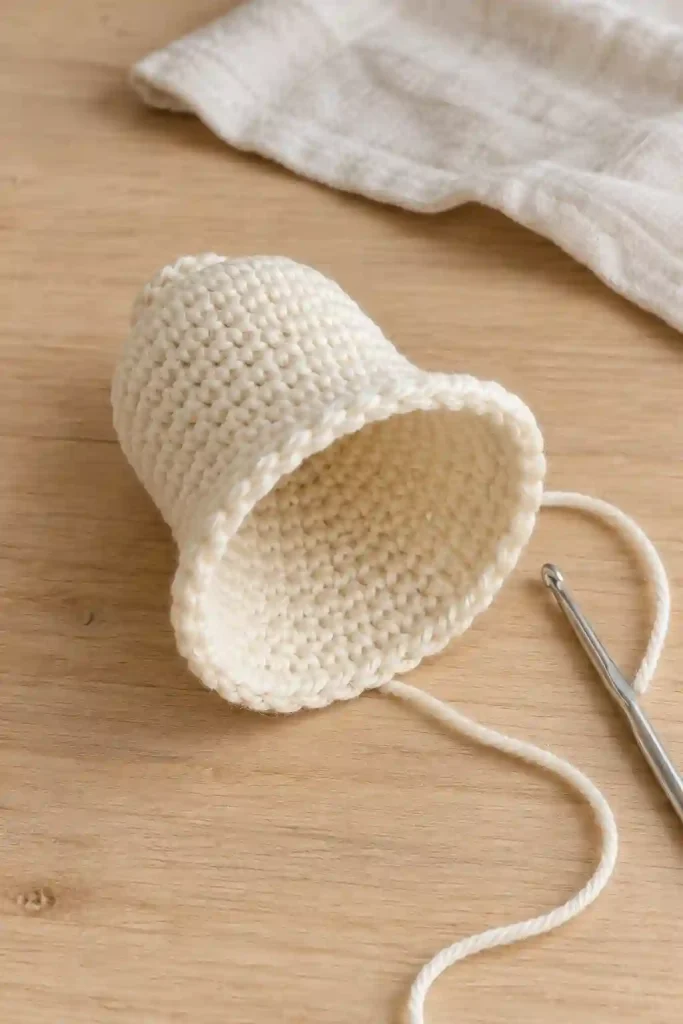
- Round 10: (Sc in each of the next 2 stitches, inc in the next stitch) eight times. [32]
- Round 11: Sc in every stitch around. [32]
Round 10 consumes three stitches and produces four per repeat. Eight repeats use all 24 stitches and produce 32. Count before adding the red edge.
Fasten off the ivory yarn. A discreet finishing stitch can soften the visible step where the spiral ends.
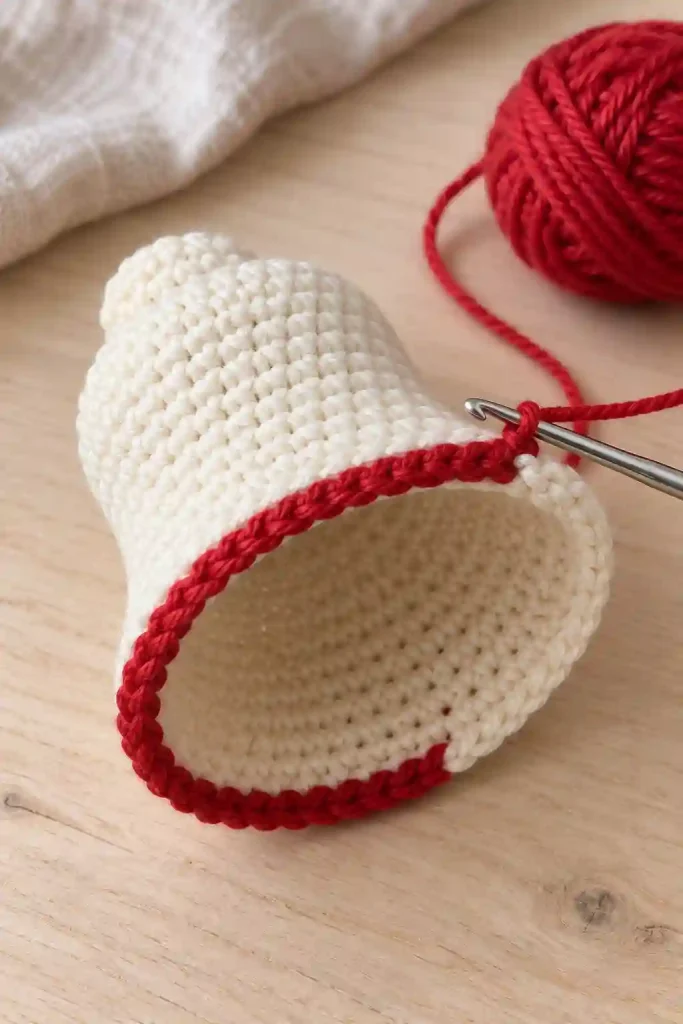
- Round 12: Join red yarn at the back of the bell opening. Ch 1, then sc in the same stitch and every remaining stitch around. [32]
- Join with a sl st to the first red sc and fasten off.
Do not count the starting chain or closing slip stitch in the edging total. Keep the red stitches relaxed enough to follow the flare. If the opening draws inward, redo the edging with looser tension rather than adding unplanned stitches.
Crochet Christmas Bell Pattern: Assembly
The Crochet Christmas Bell Pattern needs no side seam or separate base. Assembly consists of adding the hanger and, optionally, the small metal bell.
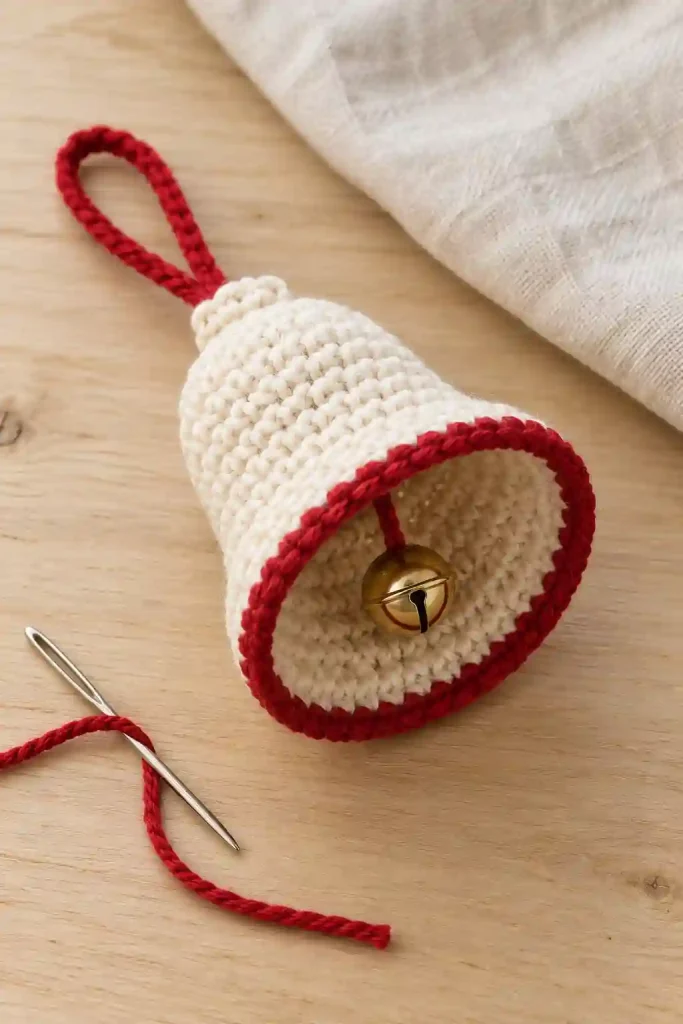
For a simple hanger, cut approximately 12 inches of red yarn. Thread it through several firm stitches near the crown, bring the ends together, and tie a secure knot to form a loop. Adjust the hanging length before hiding the ends. Avoid relying on the magic-ring center alone to support the ornament.
To add sound, use a separate yarn length to suspend a small jingle bell inside the shell. Pass the yarn through its attachment loop and secure it to several crown stitches. Choose a position that keeps the metal bell inside the opening without excessive tension.
Check all knots and attachments before displaying the ornament. Small metal components and long loops should remain out of reach of young children and pets. Omit the metal bell when it is unsuitable for the display location.
Crochet Christmas Bell Pattern: Finishing and care
Weave each tail through several stitches on the inside, changing direction to help keep it secure. Trim only after checking that the tail cannot pull free easily. Inspect the crown for any opening left by the magic ring.
Gently shape the bell with your fingers, keeping the lower edge circular. If blocking is needed, follow the yarn manufacturer’s instructions and test the method on a small sample first. Avoid direct heat on acrylic yarn.
For this Crochet Christmas Bell Pattern, choose care methods that suit both the fiber and any attached hardware. Spot cleaning is a practical first option; remove a detachable metal bell before wet cleaning. Dry the shell fully before storage.
Store the ornament where its rim will not be crushed. Recheck the hanger before bringing it out for another season.
For another design, see Oombawka Design Crochet’s Simple Christmas Bells. That source specifies a 4 mm hook, medium-weight yarn, and a finished size of 2½ inches tall and wide. Its instructions differ from this independently drafted version.
FAQs and Troubleshooting for Crochet Christmas Bell Pattern
1. Why do I have 31 or 33 stitches after the flare?
Round 10 contains eight increases. Check that each repeat has two ordinary sc followed by one increase. A missed increase gives 31 stitches; an extra one gives 33. Return to the beginning of that round and recount the 24 stitches underneath before reworking it.
2. Why does my bell look floppy or unusually wide?
First confirm the wall rounds each contain 24 stitches. If they do, the yarn and hook may be producing fabric that is too loose to support itself. Try a smaller hook on a new sample. Do not expect stuffing to solve the problem; this design has an open bottom.
3. Can I use a different yarn weight?
Yes, as an experiment. Finer yarn with a suitable hook generally gives a smaller bell, while thicker yarn generally gives a larger one. The stated dimensions and yarn allowances will no longer apply. Keep the stitch counts consistent and evaluate how well the new fabric holds its shape.
4. How can I make the bell taller?
Add complete 24-stitch rounds between the wall section and the flare. Record how many you add, especially when making a matching pair. Height adjustments change the proportions; they do not automatically increase the opening width. Work a sample before committing to a whole set.
5. Can I wash or stiffen the ornament?
Follow the yarn label and account for metal attachments. Test any stiffener on a sample because it can change the color, feel, and cleaning requirements. Stiffening is optional, not a required step in this draft. Avoid storing the bell until all moisture has evaporated.
Final Thoughts
This Crochet Christmas Bell Pattern creates a thoughtful finishing detail for a wrapped present or a handmade Christmas display. Pay attention to the stitch counts at the crown and flare, then let the yarn and your tension guide the final shaping. Since this independently drafted version has not been tested, make one sample before planning a matching collection. Keep the linked designer’s pattern available if you prefer to follow that separate design. For a companion decoration with a different construction, explore the crochet gingerbread man pattern and combine the two projects in your holiday display.